

The Complete Guide to Professional Headshot Preparation: Expert Tips for 2025
A great headshot starts before you step into the studio. This comprehensive guide covers everything from the night-before prep to industry-specific styling, what colors work best, and insider tips that make the difference between a good photo and a powerful professional tool that opens doors.
TL;DR - Quick Preparation Checklist
Essential prep (do this first):
Book 3-4 months ahead for important deadlines
Get a haircut 3-7 days before your session (not day-of)
Practice your expression in a mirror for a week beforehand
Get 7-8 hours of sleep the night before
Day of session:
Wash face, skip heavy lotions (causes shine under lights)
Shave within 4 hours if you shave daily
Wear solid colors, avoid patterns and logos
Bring multiple outfit options
Industry-specific attire:
Legal/Finance: Suit and tie (traditional business)
Tech/Creative: Nice shirt + jacket (tie optional)
Medical: Clean, conservative styling for trust-building
Colors that work: Blues (trust), grays (sophistication), earth tones (approachability), or match your eye color
A great headshot starts before you even step into the studio. What most people don't realize is that proper preparation makes the difference between a good photo and a powerful professional tool that opens doors. Here's everything you need to know to look and feel your absolute best.
Studies show 75% of business-to-business buyers use social media to evaluate vendors, and 65% of recruiters say a professional headshot significantly influences hiring decisions. Your headshot often serves as the first impression long before any in-person meeting.
The Night Before & Day-Of Preparation
The Night Before
Get 7-8 hours of sleep to look truly rested and avoid puffy eyes
Remove all makeup completely and moisturize thoroughly
Hydrate well - your skin will thank you tomorrow
Lay out your outfits and check for wrinkles, pet hair, or missing buttons
Day of Your Session
Wash your face to remove oils and reduce shine
Skip heavy lotions - they create unwanted shine under studio lights
If you shave daily, do it within 4 hours of your session
Keep beards neatly trimmed
Trim ear, nose, and eyebrow hairs if needed
Pro tip: Don't worry about acne, razor cuts or skin imperfections - we handle these perfectly in post-production.
Hair & Makeup Strategy
Get a haircut 3-7 days before your session - not the day of. This gives you time to adjust if needed.
For Women:
Hair: Keep it classic and avoid dramatic changes right before your session
Makeup: Timeless, natural, and polished works best. Studio lighting shows everything, so use matte powder to reduce shine
Consider professional makeup for important sessions - it photographs better under studio lights
Avoid experimenting with new products right before your shoot
For Men:
Facial hair: If you shave daily, do it within 4 hours of your session for the smoothest look
Beards: Keep them neatly trimmed; consider a professional barber trim the day before
Eyebrows, nose, and ear hair: Trim if needed - studio lighting reveals everything
Consider a professional shave for high-stakes sessions (medical school applications, C-suite roles, etc.)
For Everyone:
Avoid hair dyeing right before your session unless you do it regularly
Gray hairs are easily addressed in post-production - don't worry about them
For complex styling: Book morning sessions so your hair looks its best throughout the shoot
What to Wear: Industry-Specific Guide
The Universal Rule
Your face should be the focus, not your outfit. The goal is for people to recognize you when they meet you in person - dress like the best version of yourself, not a character you're playing.
Industry-Specific Guidelines
Legal & Finance: Traditional business attire remains the standard. Think suit and tie for men, structured blazer and blouse for women.
Tech & Creative Industries: More casual and personality-oriented looks work well. A nice dress shirt with a well-fitted jacket (no tie needed) projects modern professionalism.
Medical & Healthcare: Convey competence, compassion, and professionalism. Clean, conservative styling builds trust with patients.
The Truth About Ties: You really only need one if your industry still requires them - think attorneys, bankers, and traditional corporate roles. For everyone else, a nice dress shirt with a well-fitted jacket looks polished and professional without being stuffy.
Research-Backed Color Psychology
Blues convey trust and stability - work for everyone
Grays project sophistication and balance
Earth tones communicate approachability and reliability
Match outfit colors to your eye color when possible
What Works Best
For Women:
Structured pieces work best - jackets create flattering lines and frame your face
Avoid loose, hanging fabric around sleeves and torso
Great options: Suit jacket with blouse, cardigan with dress, tailored dress alone
Simple and sophisticated: A quality blouse with a well-fitted jacket - keep it simple and let the jacket shine
Necklines: V-necks and scoop necks are universally flattering; avoid high necklines that can look bulky
Sleeves: Long sleeves or 3/4 sleeves look more polished than sleeveless (which can look too casual)
Jewelry: Keep it simple - classic earrings, subtle necklace, professional watch
Makeup: Natural and polished is best; consider professional makeup if it's an important session
For Men:
The modern approach: Well-fitted dress shirt with sport coat or blazer (tie optional for most industries)
Clean alternative: A simple, quality t-shirt with a well-fitted jacket - surprisingly sharp and modern
Suit jacket vs. sport coat: Suit jackets look more formal; sport coats are more approachable
Shirt fit is crucial - ensure proper collar size, sleeve length, and no pulling across the chest
Tie guidance: Only necessary for traditional industries (law, banking, finance)
Colors that work: Navy, charcoal, classic blue shirts, subtle patterns okay if they're small
Grooming: Fresh shave or well-trimmed beard; consider a professional shave for important sessions
Critical Fit Check for Everyone:
Jacket fit is everything - not too tight (pulls across chest/back) and not too baggy
Cuff length matters - sleeves shouldn't be too long
Shoulder fit - the jacket should sit properly at your shoulder line
When in doubt, get it tailored - a $20 alteration can make a $100 jacket look like $500
For Everyone:
Solid colors always - avoid busy patterns and logos
Well-fitted clothing that makes you feel confident
Bring multiple options - we'll help you choose the most flattering
Bringing Your Personal Brand: It's perfectly fine to incorporate personality into your professional look. What we wear often serves as a personal brand signature - something that distinguishes you and makes you memorable. This could be:
A signature color that you're known for wearing
A distinctive accessory like a classic watch, unique eyeglasses, or meaningful jewelry
A style element that reflects your personality while staying professional
Industry-appropriate flair - a creative professional might wear a bold blazer, while a consultant might have a signature pocket square
The key is balance: professional first, with thoughtful touches that reflect who you are. Your headshot should feel authentically you while opening the right doors.
2025 Trends: What's In and What's Out
What's Trending
Authenticity over heavy retouching - minimal editing is preferred
Natural lighting over harsh studio lighting - creates a warmer, more approachable feel
Personalized backgrounds that reflect your profession or personality
Genuine expressions over rigid, overly posed looks
Diversity and inclusive representation across all industries
What's Out
Heavily edited "plastic" looks - audiences value authenticity
Bright, harsh lighting that creates unflattering shadows
One-size-fits-all approaches - your headshot should reflect your unique professional brand
Research-Backed Mistakes to Avoid
#1 reason for reshoots: wrong clothing choices. Test your outfits 2-3 days before your session.
Technical mistakes that hurt your image:
Forced smiles look unprofessional - aim for genuine expressions
Poor lighting creates unflattering shadows
Wide-angle lenses distort facial features
Poor posture appears unconfident
Strategic mistakes:
Rushing the process - great headshots require thoughtful preparation
Choosing based on price alone - while 68% of startups use AI headshots for cost savings, they were only indistinguishable from professional photos 62% of the time in blind tests
Not considering your audience - your headshot should speak to your ideal clients or employers
What to Bring to Your Session
Multiple outfit options - we'll help you choose the most flattering
Any jewelry or accessories you regularly wear professionally
Hair products and makeup for touch-ups
Reference images if you have a specific style in mind
An open mind and readiness to enjoy the process
The Bigger Picture: Why This Investment Matters
Your headshot isn't just a photo - it's a strategic tool for your professional success. Research consistently shows that professional headshots increase perceived credibility, improve engagement rates, and can be the deciding factor in competitive situations.
Questions?
Every session is different, and we're here to help you look your absolute best. If you have specific questions about preparing for your industry, timeline, or style goals, just ask. We've worked with everyone from neurosurgeons to tech entrepreneurs and know what works.
The most important thing? Come ready to enjoy the experience. When you feel relaxed and confident, it shows in every shot - and that authentic confidence is exactly what makes a headshot truly powerful.

GPT-5 Review for Creatives: Visual AI & Vibe Coding
GPT-5’s new visual intelligence and ‘vibe coding’ tools promise better photography analysis, creative strategy, and AI-assisted design for professionals.
OpenAI just dropped GPT-5 with bold claims about visual intelligence—but does it live up to the hype for photographers, marketers, and designers?
Another day, another "revolutionary" AI release. OpenAI officially launched GPT-5 on August 7, 2025, promising significant improvements in visual processing and creative capabilities. But we've heard these promises before, haven't we?
As someone who's watched countless AI launches promise the moon and deliver a flashlight, I approached GPT-5 with healthy skepticism. The real question isn't whether it's technically impressive—it's whether it actually solves the problems creative professionals face every day. After 24 hours of testing, the answer is... complicated.
The Visual Intelligence Claims
OpenAI claims GPT-5 excels across a range of multimodal benchmarks, spanning visual, video-based, spatial, and scientific reasoning. On paper, this stronger multimodal performance should mean ChatGPT can reason more accurately over images and other non-text inputs—whether that's interpreting a chart, summarizing a photo of a presentation, or answering questions about a diagram.
But here's the million-dollar question: do these benchmark improvements actually translate into practical benefits for working creatives? The technical specs sound impressive, but benchmarks and real-world application are often very different things. Let’s try a couple prompts…
Prompt 1: Create a detailed product photography scene with exactly 12 distinct objects: a vintage camera, leather portfolio, brass compass, fountain pen, pocket watch, coffee mug with steam, scattered film negatives, rolled blueprints, antique globe, reading glasses, leather-bound journal, and a single red rose. Arrange them on a weathered oak desk with dramatic window lighting. Each object should cast realistic shadows and have proper depth of field. Style: commercial photography, warm color grading, film grain texture.

ChatGPT-5 generates a reasonably photorealistic image
Prompt 2: Generate a cross-section architectural diagram of a modern photography studio. Include: natural light from north-facing windows, tungsten and LED lighting setups, backdrop systems, camera positions, reflector placement, and equipment storage. Use technical blueprint style with measurements, annotations, and a vintage blueprint aesthetic. Add subtle wear and aging effects to the paper texture.
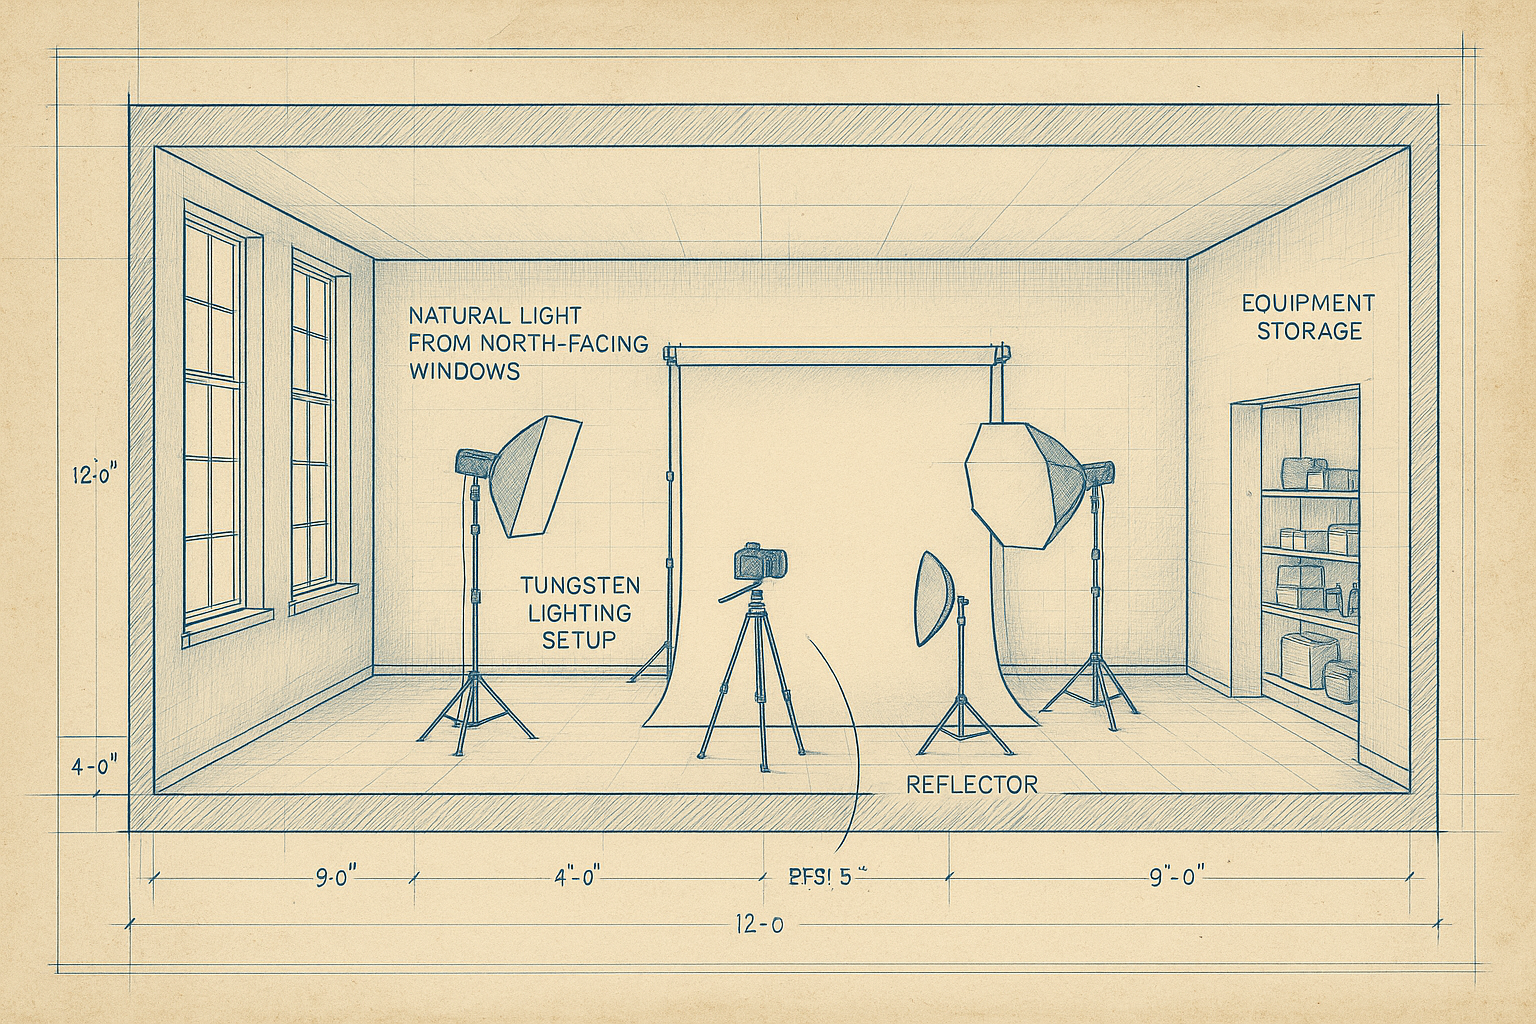
ChatGPT-5 creates an architectural diagram with mostly accurate lettering
For Photographers: Revolutionary or Incremental?
OpenAI suggests GPT-5 could help analyze entire portfolios and identify strong compositions, optimal cropping, and technical issues. The promise is compelling: imagine an AI that can sift through 500 wedding photos and surface the best shots, or help sequence images for maximum emotional impact.
But does it actually deliver? The model's ability to span visual, video-based, spatial, and scientific reasoning sounds impressive in theory. The real test is whether it can understand the subtle storytelling elements that separate good photography from great photography, something that requires both technical knowledge and emotional intelligence.
Early reports suggest it can analyze composition and suggest contexts for different platforms (Instagram vs. print vs. client galleries), but the jury's still out on whether these suggestions actually improve creative outcomes or just add another layer of digital noise to cut through. Please share your results with us, we’d be curious to hear your experience.
For Marketers: Better Taste or Better Marketing?
According to OpenAI, GPT-5 exhibits "better taste" than other AI models on creative tasks—a subjective claim that's inherently difficult to verify. The company suggests this translates into improved visual strategy capabilities, from analyzing brand consistency to predicting which visual elements might perform better with target demographics.
The question is whether "better taste" actually means anything concrete for working marketers, or if it's just a marketing buzzword. Can GPT-5 really understand the subtle psychology behind color choices and brand positioning? Or is it simply better at pattern matching from its training data?
If the claims hold up, GPT-5 could potentially help analyze visual consistency across campaigns and suggest complementary palettes aligned with brand psychology. But the proof will be in real campaign performance, not in demo videos. We created a simple test using their highly touted vibe coding improvements.
Welcome to the "Vibe Coding" Era
Here's where things get really interesting. OpenAI's post-training lead, Yann Dubois, said the model opens up "a whole new world of vibe coding," or the ability for noncoders to create fully deployable websites and apps just by describing what they want to build and letting an AI agent do the work.
I tried the following prompt:
Build a web application that analyzes uploaded brand images and suggests complementary color palettes. Include:
- Drag-and-drop image upload area
- Real-time color extraction showing dominant colors with hex codes
- Suggested palette variations (monochromatic, complementary, triadic)
- Color accessibility checker (contrast ratios)
- Export functionality for Adobe Creative Suite formats
- Visual preview showing how colors work together
- Modern interface with smooth animations
- Include color psychology descriptions for each palette
- Make it look professional enough for client presentations
First it returned an error: “RunError: Build failed with 1 error:”
internal:user-component.js:27:9: ERROR: No matching export in "external:https://cdn.jsdelivr.net/npm/file-saver/+esm" for import "saveAs"
But you can click on the errors and have ChatGPT-5 fix the bug.
After running the “fixed” code, a second error popped up, then ChatGPT-5 again fixed it. Here’s a screenshot, and it was fully functional, aside from a few cosmetic quirks:

ChatGPT-5 Vibe Coding App
So it doesn’t always get the vibe coding right the first time. That’s been my experience with all vibe coding platforms though - they often claim to have built a fully functioning program but they are in fact rife with errors that take quite a bit of time to fix. Having said that, ChatGPT-5 seems to fix its own errors handily and create a usable prototype that can then be refined with other tools like Claude Code or Cursor’s Agent.
Real-World Creative Applications
Let me share some specific scenarios where GPT-5 is already changing the game:
Campaign Concepting: Upload your client's existing materials, describe your target audience and campaign goals, and GPT-5 will generate multiple creative directions with specific visual treatments, color psychology rationales, and even media placement strategies.
Brand Identity Development: Early testers also noted its design choices, with a much better understanding of things like spacing, typography, and white space. GPT-5 can analyze your client's industry, target market, and brand values to suggest logo concepts, typography pairings, and comprehensive visual systems that feel authentically crafted, not AI-generated.
Content Strategy: For commercial illustrators, GPT-5 can analyze market trends, identify visual gaps in specific niches, and suggest illustration styles and subjects that have commercial potential. It's like having a market research team and art director rolled into one.
The Technical Magic Behind the Creativity
GPT-4 included limited vision capabilities, but GPT-5 offers true multimodality, supporting text, image, audio, and video inputs within one unified model. This allows ChatGPT-5 to handle complex tasks like reading a graph, analyzing audio tone, or writing captions for video, all in one workflow.
This unified approach means you're not juggling multiple AI tools anymore. One conversation can flow seamlessly from analyzing your brand's visual equity to generating social media concepts to creating the actual assets, all while maintaining creative coherence and strategic alignment.
GPT-5 also introduces a 1 million token context window, dwarfing GPT-4's limit of 128,000 tokens. This means GPT-5 can track context across long documents, dense codebases, or entire user sessions without losing coherence.
For creative professionals, this translates to AI that remembers your entire creative brief, references previous concepts throughout the project, and maintains design consistency across all deliverables without constant re-briefing.
The Reliability Revolution
According to OpenAI, GPT-5 was 45% less likely to contain a factual error than GPT-4o in tests in which it had web search enabled and used anonymized prompts; when "thinking", GPT-5 was 80% less likely to contain an error than OpenAI o3.
This dramatic improvement in accuracy addresses one of the biggest pain points creative professionals have had with AI tools: unreliable outputs that require extensive human oversight. GPT-5's enhanced reliability means you can trust its creative suggestions and technical implementations enough to build them into your actual client workflows.
The Competitive Edge
GPT-5 is now available to all free users of ChatGPT as their default model. This democratization means your smaller competitors now have access to the same creative intelligence that was previously available only to agencies with massive AI budgets.
The competitive advantage won't come from having access to better AI, it'll come from knowing how to leverage it strategically within your creative process. The photographers, marketers, and illustrators who figure out how to integrate GPT-5 into their workflows seamlessly will be the ones who thrive in this new landscape.
So, Is This Actually a Game-Changer?
Here's the honest answer: it's too early to tell definitively.
GPT-5 represents a significant technical advancement, that much is clear. The enhanced reliability (45% fewer factual errors than GPT-4o) and improved multimodal capabilities are genuine improvements. The "vibe coding" functionality could democratize web development for creatives who previously hit technical walls.
But whether these improvements translate into better creative outcomes depends heavily on implementation. Having access to better AI tools doesn't automatically make someone a better creative professional, it just changes the skill requirements.
The real competitive advantage won't come from having access to GPT-5 (since it's available to everyone). It'll come from understanding how to integrate these capabilities strategically into existing creative workflows without losing the human insight that drives truly innovative work.
The Bottom Line
GPT-5 might be a significant step forward for AI-assisted creativity, but it's not magic. It's a powerful tool that requires thoughtful application and realistic expectations.
For photographers, marketers, and illustrators willing to experiment and iterate, GPT-5 offers genuine opportunities to streamline technical tasks and explore new creative directions. For those expecting it to replace creative judgment and strategic thinking, disappointment awaits.
The question isn't whether GPT-5 will change your creative work, it's whether you'll approach it as a sophisticated instrument that amplifies your expertise, or as a shortcut that bypasses the hard work of developing creative judgment.
Have you tested GPT-5's visual capabilities? What's working, and what isn't? The creative community needs honest assessments, not just hype. Share your real-world experiences below.

Why Medical Device Companies Need Photographers Who Actually Understand FDA Requirements
Why FDA-Compliant Photography Matters for Medical Device Submissions
Medical device companies preparing 510(k) submissions face a critical but often overlooked compliance risk: improperly documented photography. With new FDA guidance around AI-generated content, standard commercial photography can lead to Additional Information Requests, delays, or even submission rejections. To stay compliant, your device images must come with full audit trails, AI tool documentation, and integration into your quality management system under 21 CFR 820. We provide professional imaging services specifically tailored for FDA submissions, ensuring your photography supports, rather than hinders, regulatory approval.
The Hidden Complexity in What Should Be Simple Documentation
Most medical device executives assume photography for FDA submissions is straightforward: hire a commercial photographer, get professional-looking images, include them in your 510(k) package. What they don't realize is that FDA's documentation requirements, especially with new AI guidance, have created a maze of compliance considerations that most photographers have never encountered.
The result? Companies unknowingly introduce compliance risks into their submissions, face unnecessary delays during FDA review, and miss opportunities to strengthen their substantial equivalence arguments through proper visual documentation.
If you're preparing a 510(k) submission, here's what you need to know about photography's evolving role in FDA compliance, and why choosing the right photographer matters more than you think.
Understanding Photography's Real Role in FDA Submissions
Let's be clear about what we're dealing with. Photography doesn't make or break FDA approvals, that comes down to safety data, clinical testing, and fundamental device design. But photographic documentation plays several critical supporting roles that can significantly impact your submission timeline and review process.
Where Photography Actually Matters in 510(k) Reviews:
Technical Documentation Requirements:
Device specification photography showing physical characteristics and features
Comparative analysis images supporting substantial equivalence claims with predicate devices
Labeling compliance ensuring promotional imagery doesn't suggest off-label uses
Quality system documentation becoming part of your Device Master Record under 21 CFR 820
The Real Risk: While photography issues rarely cause outright rejections, improperly documented images can trigger Additional Information Requests during FDA review, extending your timeline from the target 90 days to 140-200+ days that most submissions actually experience.
The New AI Documentation Challenge No One's Talking About
FDA's January 2025 draft guidance on AI-enabled devices introduced something unprecedented: explicit requirements for documenting AI tool usage in regulatory submissions. This affects photography because virtually every modern photo editing application now uses AI.
The Documentation Requirement Most Companies Miss:
Every AI tool used in your submission photography must now include:
Tool identification with specific software versions
Process documentation showing exactly what enhancements were applied
Human oversight validation confirming accuracy of AI-processed images
Risk assessment for potential bias or accuracy issues
Adobe Photoshop's "Content-Aware Fill"? That's AI. Lightroom's automatic exposure correction? AI-powered. Noise reduction algorithms? AI-based.
Most photographers use these tools without realizing they need documentation. Most companies don't even know to ask about it.
Real Client Pain Points: What Medical Device Companies Actually Face
Through conversations with regulatory affairs professionals, I've identified the core challenges companies face with photography documentation:
1. The Documentation Gap
The Problem: Regular commercial photographers deliver nice images but no FDA-compliant documentation.
What Companies Need: Complete audit trails showing how images were created, what tools were used, and verification that images accurately represent the device for regulatory purposes.
2. Comparative Analysis Challenges
The Problem: 510(k) submissions require demonstrating substantial equivalence to predicate devices, often through side-by-side visual comparisons.
What Companies Need: Controlled, consistent photography that fairly represents both devices without inadvertently creating bias toward either product.
3. AI Compliance Uncertainty
The Problem: FDA's new AI guidance is creating confusion about what photo editing tools are acceptable and how to document their use.
What Companies Need: Clear protocols for AI tool usage that maintain compliance while leveraging efficiency benefits.
4. Quality System Integration
The Problem: All photography becomes part of the Device Master Record under 21 CFR 820, requiring version control and change documentation.
What Companies Need: Photography workflows that integrate seamlessly with existing quality management systems.

What FDA Reviewers Actually Look For in Photography
Understanding the reviewer's perspective helps explain why documentation matters:
Substantial Equivalence Verification
FDA reviewers use photography to verify claims made in technical documentation. They're looking for visual confirmation that your device actually matches the specifications and predicate comparisons described in your submission.
Labeling Compliance Assessment
Promotional photography gets scrutinized for potential off-label use suggestions. Images can't imply uses beyond your cleared indications - even subtly.
Processing Transparency
With AI tools now ubiquitous, reviewers want assurance that image processing didn't misrepresent device characteristics. They need to trust that what they're seeing accurately represents your device.
The Three-Level Approach to Compliant Medical Device Photography
Based on FDA requirements and industry needs, I've developed a structured approach:
Essential Documentation Package
For all medical device photography:
Complete technical specifications photography showing device features
Controlled lighting and background for consistent representation
Full audit trail documenting all tools and processes used
Human verification confirming accuracy of final images
Integration with your quality management system
Comparative Analysis Package
For 510(k) substantial equivalence documentation:
Side-by-side predicate device comparison photography
Consistent methodology ensuring fair representation
Detailed documentation supporting equivalence claims
Version control for any image updates during submission process
AI Compliance Package
For companies using modern photo editing tools:
Complete AI tool documentation meeting FDA requirements
Risk assessment for all automated processing
Before/after documentation showing exact modifications
Quality control validation of AI-processed images
Why Most Photographers Miss These Requirements
The reality is straightforward: Commercial photographers focus on creating compelling imagery. FDA compliance requires understanding regulatory documentation standards, quality system integration, and submission requirements that aren't part of traditional photography training.
This creates a knowledge gap where companies receive professional-looking images that may not meet FDA's documentation standards for regulatory submissions.
Building Your Photography Compliance Strategy
Questions to Ask Any Photographer:
Regulatory Knowledge:
Do you understand 510(k) submission requirements?
How do you document AI tool usage for FDA compliance?
What quality system integration do you provide?
Documentation Capabilities:
Can you provide complete audit trails for all image processing?
How do you handle version control and change documentation?
What validation do you provide for image accuracy?
Experience Level:
Have you worked with medical device regulatory submissions?
Do you understand substantial equivalence photography requirements?
Can you integrate with our existing quality management system?
Red Flags to Avoid:
Photographers who don't ask about your specific FDA requirements
Anyone promising to "handle all regulatory aspects" without regulatory training
Lack of documentation systems for quality management integration
No experience with medical device industry requirements

The Strategic Value of Proper Documentation
Compliant photography documentation doesn't just avoid problems - it can actively support your submission success:
Faster Review Times: Complete documentation reduces reviewer questions and Additional Information Requests.
Stronger Equivalence Arguments: Proper comparative photography can reinforce your substantial equivalence claims.
Quality System Benefits: Integrated documentation supports your overall quality management compliance.
Future Submission Efficiency: Established documentation systems streamline subsequent 510(k)s and modifications.
Making the Right Photography Decision
The medical device industry is complex enough without adding unnecessary compliance risks through inadequate photography documentation. The difference between a photographer who understands FDA requirements and one who doesn't isn't just about image quality, it's about regulatory risk management.
Consider the real costs:
Additional Information Requests: 45+ day delays during FDA review
Documentation remediation: $10,000-50,000 in emergency consulting
Resubmission requirements: Additional FDA fees and timeline extensions
Competitive disadvantage: Market delays while competitors advance
Compare this to investing in proper documentation from the start: Complete FDA-compliant photography typically costs $3,500-4,500 for most device submissions, a fraction of the potential delay costs.
Your Next Steps
For Upcoming 510(k) Submissions:
Audit your current photography approach for FDA compliance gaps
Review AI tool usage in your existing documentation workflow
Assess documentation standards for quality system integration
Plan photography timeline allowing for proper regulatory documentation
For Strategic Planning:
Develop photography compliance standards for your organization
Integrate documentation requirements into your quality management system
Establish vendor selection criteria for regulatory photography needs
Train your team on FDA photography documentation requirements
Need FDA-Compliant Photography Documentation?
I specialize in medical device photography and strategic planning consulting that meets FDA's regulatory documentation requirements. My approach combines professional imaging with the compliance documentation that medical device companies actually need for successful submissions.
What I provide:
✅ Complete FDA documentation for all photography and image processing
✅ AI tool compliance meeting January 2025 guidance requirements
✅ Quality system integration supporting 21 CFR 820 requirements
✅ Substantial equivalence photography for 510(k) submissions
✅ Regulatory-ready documentation reducing review timeline risks
Free Consultation Available
I'm offering complimentary email consultations to help medical device companies assess their photography compliance needs and documentation requirements.
During this consultation, we'll review:
Your current photography workflow for regulatory compliance
Specific FDA documentation requirements for your device type
AI tool compliance needs for your upcoming submissions
Integration options with your existing quality management system
Ready to Ensure Your Photography Is FDA-Compliant?
Fill out the form below to request your free consultation. I’ll personally review your current workflow and help identify the exact documentation and imaging support your submission needs.
Contact Information:
Email: hello@henrydavidphotography.com
Phone: (314) 877-8877
Serving medical device manufacturers nationwide
About Henry David Photography: We provide FDA-compliant photography services and strategic planning consulting specifically for medical device companies, combining professional imaging expertise with understanding of regulatory documentation requirements. My goal is helping companies navigate FDA photography compliance while supporting successful submission outcomes.
This article provides educational information about FDA photography documentation requirements. Specific compliance requirements vary by device type and submission pathway. Consult with qualified regulatory professionals for device-specific regulatory guidance.

Automotive Light Painting Photography with a Porsche GTS: Full Behind-the-Scenes Guide
This behind-the-scenes breakdown of a Porsche GTS light painting session reveals everything you need to know about automotive light painting photography. From camera settings to lighting techniques, discover how we created cinematic, detail-rich car images using long exposure light painting, perfect for automotive photographers, Porsche enthusiasts, or anyone looking to elevate their car photography.
Learn how we shot a cinematic Porsche light painting image using rooftop location, bulb exposures, and layered light passes.
This behind-the-scenes breakdown of a Porsche GTS light painting session reveals everything you need to know about automotive light painting photography.
From camera settings to lighting techniques, discover how we created cinematic, detail-rich car images using long exposure light painting, perfect for automotive photographers, Porsche enthusiasts, or anyone looking to elevate their car photography.
I recently had the pleasure of working with Chris, the proud owner of a stunning 2018 Porsche GTS, to create a light-painted automotive portrait that blends technical precision with creative storytelling. This blog is a behind-the-scenes look at how we used light painting to turn a car into a work of art, capturing images you simply can’t get with natural light alone.
1. Choosing the Right Location: A Rooftop Advantage
For this shoot, we selected the rooftop of a parking garage. Rooftops are ideal for automotive light painting, flat, expansive, and usually free from distracting clutter. They offer room to move around freely and reposition the car to optimize reflections and composition.
We picked a dark section of the rooftop, well away from overhead lamps and other ambient light sources. The darker the environment, the better, because every bit of unwanted light reduces your control. In light painting, you decide where light falls. Starting with a blank canvas of darkness gives you full creative control to build contrast, drama, and nuance, one stroke at a time.
2. Setup and Tethering
Once we arrived on site, here’s what our setup included:
Tripod to keep the camera absolutely locked down
Tethering with TetherTools to a laptop running Adobe Lightroom Classic for real-time feedback
Lights:
Godox LC500 with modified barn doors for sweeping, broad passes
Eagtac flashlight with Harold Ross modifiers for precision detail lighting
ColorChecker Passport 2 from Calibrite for accurate color calibration
Tethering was key. It let us evaluate every light pass immediately, checking highlight clipping and exposure levels in real time. While we typically aim to ETTR (Expose to the Right) to preserve shadow detail, in light painting we’re extra careful not to blow out highlights, especially since we’re layering multiple exposures.
Safety Tip:
Secure your tethering setup! We used a non-slip pad on a portable table weighed down with sandbags. Even a light breeze can tip over your gear, so plan accordingly.Once on site, we built our setup:
3. Framing, Composition, and Camera Settings
Once the Porsche was in position, we dialed in the technical settings. These are crucial in light painting:
ISO: Lowest native ISO (usually ISO 100) to maximize image quality and reduce noise
Aperture: Between f/16 and f/22, depending on your lens’ diffraction handling. These smaller apertures give maximum depth of field - essential for full-car sharpness.
Lens Choice: We opted for a 100mm prime on full frame for some subtle compression. Zoom lenses or other primes can work too, bring options to decide on-site. For certain angles, using a circular polarizer can help reduce unwanted reflections on the car’s windows or body panels.
Shutter: Bulb mode + remote trigger (we used the Oppilas which is readily available on Amazon), be sure to use a trigger that allows for usage on the Bulb setting.
Additional Camera Settings:
Turn off Long Exposure Noise Reduction – it slows down workflow and can introduce unwanted artifacts
Disable IBIS (In-Body Image Stabilization) – during long tripod exposures, IBIS can cause micro-vibrations
Double-check focus at your working aperture, then lock it in
Don’t bump the tripod, or the car! Even slight movement can ruin layer alignment. You cannot fix misaligned light passes later in post.
Pro Tip:
Work with a teammate, preferably the owner of the car! It’s more efficient, more fun, and safer for your gear. Have your teammate be triggering the opening and closing of the shutter while you control the application of light, or vice versa.
4. Building the Image with Light, in five simple steps
Light painting is the art of layering exposures over time, with each pass selectively lighting a different part of the subject. In post-production, typically in Photoshop, we combine those layers to create a cohesive, polished, and dimensional final image. The brightness and quality of each exposure will depend on three key factors: the size of your light source, how fast you move it, and how close it is to the subject. Keep in mind that the inverse square law applies, light intensity increases dramatically the closer you are, so small distance changes can have a big impact.
1. Base-Fill Pass
We started with broad sweeps using the LC500 to create a soft, even exposure across the entire car. While the light itself isn’t huge, movement over a long exposure makes it act like a massive softbox, smooth and flattering, since it is the size in aggregate captured over time that is ultimately the light source. With light painting, the really cool thing is that you get to determine the characteristics of your light modifier!

Base Fill Layer with relatively even exposure
2. Top-Down Passes
Next, we extended the light wand overhead using a monopod extension - use something sturdy, the last thing you want is for your light to accidentally damage something so valuable as a Porsche GTS.
These top-down sweeps introduced bold contrast and shadows that give the image dramatic structure. These passes often form the foundation of your final look.
Pro Tip: Try multiple angles and elevations to give yourself options.
Look for a clean light streak that follows the contour of the car, it will likely be the “hero” pass in your final composite. Also watch the shadow cast on the ground, it forms its own visual line, so make sure it looks intentional.

A Top-Down Pass over with the Godox LC500 safely extended over the Porsche GTS yields dramatic results.
3. Detail & Accent Lighting
Now we fine-tune. Use a smaller flashlight to light:
Wheels and rims (have the driver slightly rotate them for a strong angle of the full wheel)
Interior seats, dash, and steering wheel
Badging, trim, emblems, and surface highlights
We had Chris turn on the headlights and taillights to capture those iconic glows. These add life and realism when blended into the final composite.
Ask the car owner what details matter most to them. Chris, for example, pointed out the beautiful leather stitching on the interior as well as the rear spoiler, so we made sure to capture those elements.


4. Rim Lighting / Backlighting
One of the most cinematic touches: a subtle rim light from behind. This outlines the vehicle and creates beautiful separation and pop from the background.

Rim Lighting from Behind the Porsche for a dramatic outline.
5. Capture a “Before” Image
Before wrapping the lighting, take a shot without any light painting. Let the ambient light (or sky) expose naturally. This gives you a dramatic “before” for comparison, and can serve as a base for compositing a clean background later. You can also do this step before starting the light painting as your framing up your image.

5. Post-Processing: Where the Magic Happens
Once back in the studio, we import RAWs into Lightroom and apply a calibrated color profile for the light source. Make basic exposure corrections to preserve your highlight detail and shadow depth.
Photoshop Compositing
In Photoshop, each light pass becomes a layer. Using masks, we selectively reveal only the best-lit parts from each. This additive process builds up a clean, dimensional final image.
We recommend working in 16-bit sRGB throughout for best results and smooth tonal transitions.
Sharpening & Background Work
Once the image is composited and flattened, use AI-assisted sharpening tools like Topaz or Photoshop Neural Filters. Be gentle, over-sharpening can introduce banding in smooth gradients like skies or reflections. Apply sharpening selectively to details only, using layer masks.
If needed, composite in a new background. You can often use the original, but in our case, we replaced the sky with a cloud layer for added atmosphere. Match perspective, focal length, lighting temperature, and shadow direction to blend it believably.

Final Thoughts
Light painting a car like Chris’s Porsche GTS is a perfect marriage of technical precision and creative expression. It requires planning, teamwork, patience, and a genuine love for the craft and subject.
Unlike standard car photography, this approach is slow, deliberate, and deeply satisfying. You're not just capturing an image, you're building one, piece by piece. It’s a chance to fall in love with photography all over again.
If you're a car enthusiast, creative professional, or just someone who wants their vehicle immortalized in this otherwise unachievable, cinematic style, let’s connect. I’d love to collaborate and create something truly one-of-a-kind for your prized machine.

Chris & Cassidy’s Engagement at Art Hill: A Porsche, Champagne, and a Beautiful Morning in Forest Park
Looking back at the gallery, what we created feels like a small European elopement. The clean lines of the museum steps, the symmetry of the Art Hill backdrop, and the elegance of the early morning light gave everything that timeless, old-world atmosphere.
When Chris first reached out, I could tell he had a clear vision. He mentioned wanting something natural but refined, photojournalistic in style with a bit of polish. We set up a phone call, and right away, I knew this was going to be a special session.
Planning the Experience
Chris and Cassidy were intentional about everything, from location to styling. We decided on Art Hill and the Saint Louis Art Museum (SLAM) area. Those stone steps and grand columns always bring a sense of elegance, and in the early morning light, it almost feels like being in Europe.
We aimed for a weekday morning to avoid crowds and take advantage of the soft, golden light. Cassidy worked with Ashley Faith, a professional makeup artist based here in St. Louis that morning to get ready, and they arrived looking incredible. Stylish but relaxed, ready to enjoy the morning together.
They even brought accessories, like sunglasses and a cooler bag packed with champagne and glasses!

When the bubbly hits and everything starts to feel like a movie. Art Hill, Forest Park, St. Louis MO
The Morning of the Shoot
Working with them felt effortless. The Porsche was already in place when we started, gleaming in the soft morning light like it belonged there. Right away, it set the tone. We eased into the session with some quiet moments around the museum and the hill, letting Chris and Cassidy walk, talk, and simply be themselves. The car wasn’t just a prop, it was part of the story, adding a classic, personally meaningful touch to the entire feel of the shoot.

Effortlessly stylish in the driver’s seat… timeless car, timeless love.
When the champagne came out, the energy shifted in the best way. They popped the bottle, poured glasses, toasted each other, and started to laugh more freely. It wasn’t staged. It felt like a real celebration, and I was lucky to be there to capture it all unfolding naturally.

Champagne popped, laughter followed. This is what celebration looks like.
The Results and the Feeling Behind Them
The gallery tells the story better than I ever could. There’s elegance, romance, style, but also real connection.


Looking back at the gallery, what we created feels like a small European elopement. The clean lines of the museum steps, the symmetry of the Art Hill backdrop, and the elegance of the early morning light gave everything that timeless, old-world atmosphere.
The photos feel like they could have been taken in Paris or Rome, that mix of romance and sophistication, but with a relaxed, modern energy. There’s a story in every frame. Some are quiet and candid, others feel straight out of a fashion magazine. That blend is exactly what we were going for, a photojournalistic approach with an editorial edge.
Chris and Cassidy brought such strong presence to the session, but they also let themselves be in the moment. That’s a big part of why these images work, they weren’t performing for the camera. They were enjoying the experience together, and the photos reflect that.
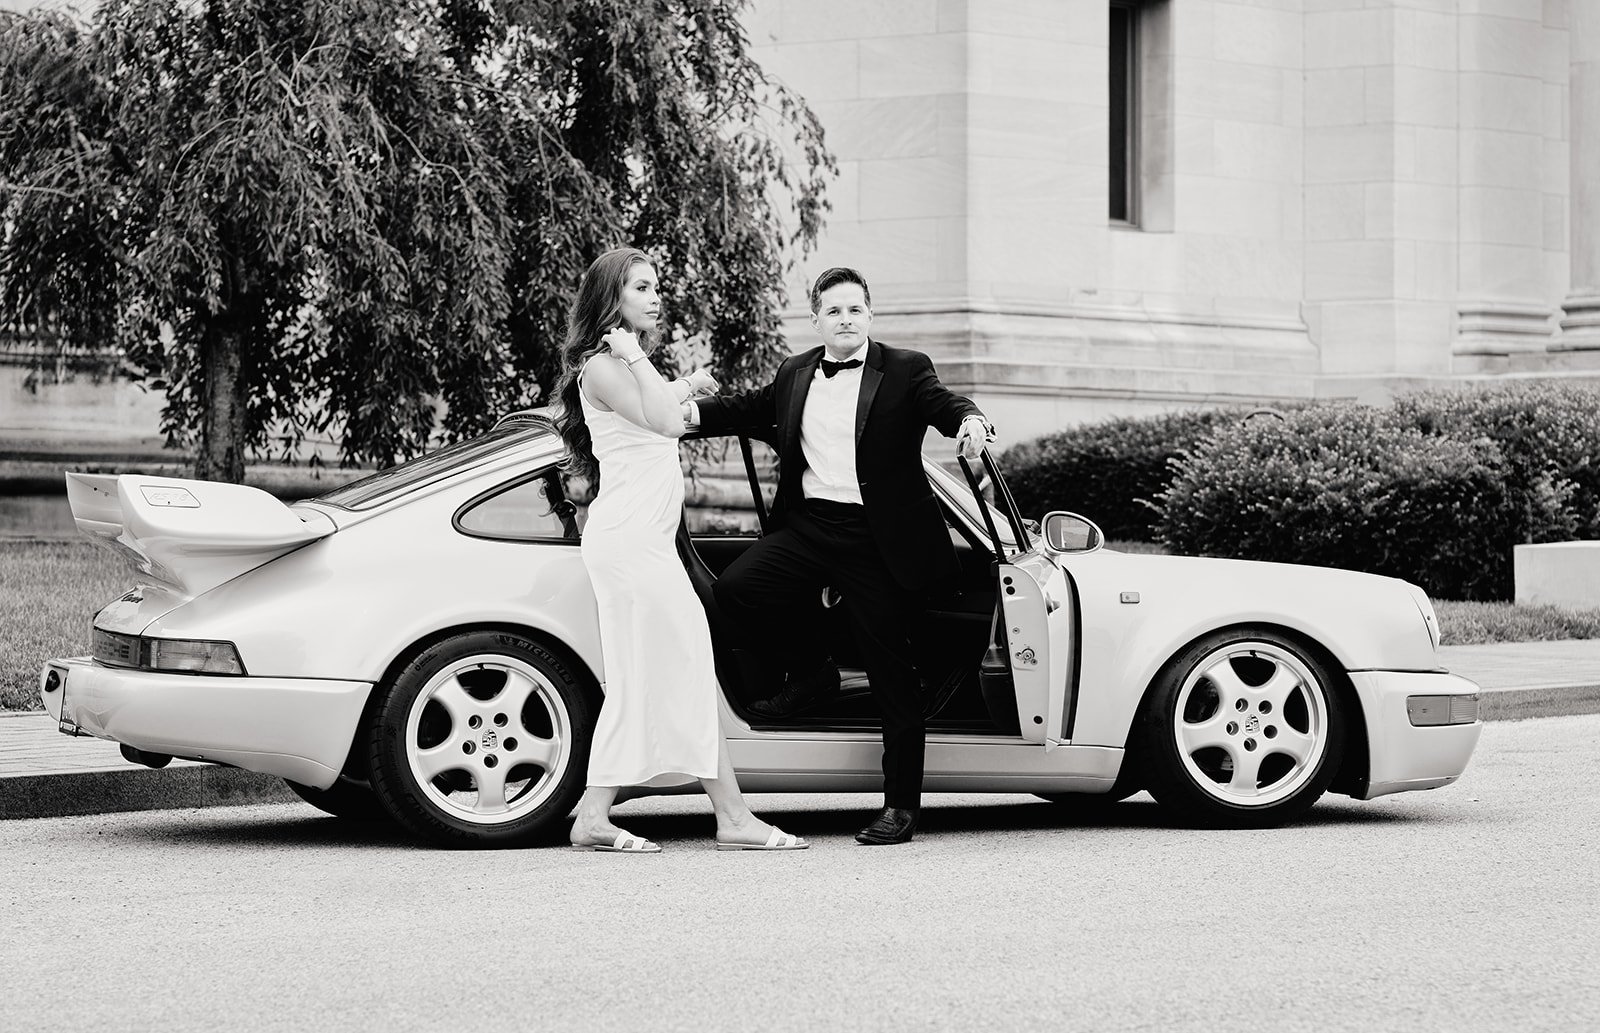
The Black & White Edits Hit Differently
There’s a section of the gallery that’s entirely black and white, and honestly, they feel like a story all on their own. Removing the color shifts the focus to light, form, and expression. The lines of the car, the architecture, it all becomes more cinematic and timeless in black and white.
These edits give the session a classic, almost documentary feel that looks like it was pulled from a 1960s wedding album in Italy.


More Than Just Photos
I’m truly grateful Chris and Cassidy trusted me to help shape this moment for them. They brought intention and enthusiasm, but also flexibility and ease, and that combination made the whole process such a joy.
This session was a reminder that great engagement photos aren’t about perfection. They’re about preparation and vision, yes, but also about showing up as yourselves and letting real moments unfold. Whether you bring a classic car or just the person you love, what matters is that it reflects you.
Chris and Cassidy, thank you again. It was a joy and a privilege to be part of this morning with you.

The way she leans into him says everything.
Thinking about your own engagement session?
Let’s talk about your ideas and build something that feels true to you. Reach out here and we’ll start planning.

The Marketing Director’s Guide to ROI-Driven Branding Photography & Videography
Unlock Measurable ROI with Strategic Branding Photography & Videography. Discover how professional visuals drive business growth, boost engagement, and elevate your brand. This executive-level guide shows marketing directors and business leaders how authentic photography and video content can improve conversions, build trust, attract top talent, and deliver lasting ROI.
A Strategic Value Proposition Framework for Marketing Directors and Business Leaders
In today's competitive, content-saturated landscape, visual media isn't a luxury, it's a strategic business asset. Whether you're a marketing director looking to drive campaign results or a business executive focused on growth and efficiency, professional branding photography and videography offer measurable ROI, clear differentiation, and a compelling way to tell your brand story.
This guide provides a comprehensive value proposition analysis tailored for decision-makers. It will help you articulate the real business benefits of visual branding content and address common objections with data-backed reasoning.
Aligning Visual Media with Core Business Objectives
1. Business Growth & ROI
Professional photography and videography directly impact your bottom line by enhancing engagement, conversions, and customer trust.
Increased Engagement: LinkedIn profiles with professional photos receive 14x more views and 36x more messages.
Higher Conversion Rates: Real team photos on a website outperform stock imagery by 35%.
Explainer Video ROI: Videos can boost conversion rates by up to 144% and site engagement by 88%.
Story-Driven Sales: 55% of people are more likely to buy after connecting with a brand story. 15% buy immediately.
Video Testimonials: 77% of viewers say testimonials positively influence their purchase decision.
2. Talent Acquisition & Retention
Visual branding also enhances your employer brand, helping you attract and retain top talent.
Recruitment ROI: Strong employer branding reduces hiring costs by 50% and increases retention by 28%.
Culture Clarity: Workplace photography signals alignment between internal culture and external branding.
Employee Advocacy: When employees feel seen and valued through professional visuals, they become brand ambassadors.
3. Trust & Credibility
Trust is earned in milliseconds—and visuals make the first impression.
Instant Credibility: First impressions are formed in just 1/10th of a second. Professional headshots make them count.
Authenticity Over Stock: Consumers are 87% more likely to trust and engage with brands that use authentic visuals.
Consistent Branding: Custom photography ensures visual consistency across all platforms, reinforcing brand trust.
4. Competitive Differentiation
Standing out in your industry requires more than a good product.
Unique Identity: Custom photography visually expresses your brand personality.
Behind-the-Scenes Appeal: 54% of consumers want to see behind-the-scenes content, it humanizes your company.
Visual Storytelling: Branded photography communicates more than a thousand words ever could.
Value Propositions Tailored by Role
For CEOs & Business Owners
ROI-Centric Messaging: Present visuals as revenue-generating assets, not marketing expenses.
Competitive Advantage: Highlight the value of standing out visually in a saturated market.
Brand Equity: Show how consistent imagery builds long-term brand value.
For Marketing Directors
Content Versatility: Professional images and videos fuel digital, print, social, and campaign assets.
Improved Metrics: Higher engagement, better SEO rankings, stronger campaign performance.
Streamlined Production: Capture months of content in a single, well-planned session.
For HR & Recruitment Leaders
Employer Branding: Visual culture pieces attract mission-aligned talent.
Employee Pride: High-quality portraits make team members feel valued.
Recruitment Efficiency: Authentic visuals help candidates self-select, improving hiring outcomes.
For Finance & Operations Leaders
Cost Efficiency: High ROI compared to ongoing stock photo licenses or ad hoc visual needs.
Tax Benefits: Professional photography/videography often qualify as business deductions.
Multi-Use Investment: A single shoot can benefit HR, marketing, sales, and ops for years.
Addressing Common Objections
"It's Too Expensive"
Reframe as a strategic investment with clear, measurable returns.
Emphasize opportunity costs of low-quality or DIY visuals.
Highlight long-term usage and tax-deductible classification.
"We Can Use Stock Photos"
Stock photos lack authenticity and are often used by competitors.
87% of consumers prefer authentic content to staged or stock imagery.
Stock images can't reflect your real team, space, or values.
"Our Employees Can Take Their Own Photos"
In-house photos often suffer from inconsistent quality and lighting.
Professionals bring storytelling skills, visual branding expertise, and technical mastery.
Self-taken photos may undercut brand credibility.
"It’s Just for Vanity"
Data shows real business outcomes: more views, messages, conversions, hires, and loyalty.
Visuals are strategic tools, not superficial accessories.
Real-World Applications & Case Examples
Professional Headshots
Use Case: LinkedIn, About pages, proposals, conference bios.
Impact: Builds trust, makes memorable impressions, supports professional authority.
ROI: A single photo can be used across dozens of platforms for years.
Video Profiles of Key Personnel
Use Case: Executive bios, recruiting, sales emails, investor decks.
Impact: Builds trust and authority while differentiating your team.
Workspace & Culture Photography
Use Case: Website, Glassdoor, careers page, onboarding kits.
Impact: Shows transparency, humanizes your team, reflects values.
ROI Framework
How to Quantify the Return
Use this simple formula to estimate the return on your visual media investment: ROI = (Revenue - Cost) / Cost × 100
Example Calculation
Investment: $2,500 ($2,000 production + $500 distribution)
Direct Campaign Revenue: $6,000
ROI = ($6,000 - $2,500) / $2,500 × 100 = 140%
Long-Term ROI
Asset Longevity: Use across channels for 1–3 years
Multi-Purpose Usage: Divide cost across marketing, HR, and PR
Opportunity Cost: Compare against DIY, stock, or low-quality alternatives
Conclusion: Transforming the Conversation
Professional branding photography and videography are no longer optional—they're essential. For marketing leaders, this is your opportunity to elevate brand identity, drive growth, and influence executive decisions with compelling, ROI-backed arguments. For executives, it's time to view visual content not as a line item, but as a lever for measurable business performance.
Don't just take pictures, make an investment in your brand's future.

Elevating Precision Skin Care Dermatology’s Branding with Stunning Imagery
To ensure we captured their best look, I used beauty lighting techniques that emphasize smooth, glowing skin, perfect for their brand’s aesthetic. Every detail, from the lighting setup to the subtle yet effective retouching, was carefully crafted to highlight their expertise in skin health and beauty treatments.
Precision Skin Care Dermatology is entering an exciting new chapter with the launch of their practice in St. Louis, and I had the privilege of helping them bring their vision to life through photography. With a focus on beauty-oriented medical treatments, they wanted imagery that exuded luxury, professionalism, and healthy, radiant skin.

Showcasing the team: Dr. Prasanthi Kandula and Dr. Elizabeth Rancour
A Collaborative Vision
From our initial conversations, it was clear that the team at Precision Skin Care Dermatology had a strong vision: they wanted bright, polished images that would resonate with their sophisticated clientele. Given my background in beauty and fashion photography, I knew the key to achieving this look lay in expert lighting, high-end retouching, and natural, confident expressions.
To ensure we captured their best look, I used beauty lighting techniques that emphasize smooth, glowing skin, perfect for their brand’s aesthetic. Every detail, from the lighting setup to the subtle yet effective retouching, was carefully crafted to highlight their expertise in skin health and beauty treatments.

Beauty inspired headshot of Dr. Elizabeth Rancour
Bringing in a Natural, Elegant Touch
To further enhance the shoot, I connected with makeup artist Alexis Bonacker, whose talent for creating natural yet refined looks was the perfect complement to our vision. Her approach enhanced each subject’s features while maintaining an effortless, approachable elegance—exactly what Precision Skin Care Dermatology wanted to convey.

Beauty lighting techniques provide a bright radiant look
A Dynamic and Engaging Session
Dr. Kandula and Dr. Elizabeth arrived with an elegant selection of outfits that perfectly aligned with the brand’s high-end aesthetic. They took direction marvelously, embracing each pose with confidence and grace. More than just a photoshoot, the session was filled with energy, collaboration, and laughter. It was clear they were having a great time, which translated into images that feel both polished and authentic.

Editorial inspired team photo of Dr. Rancour and Dr. Elizabeth
A Thrilled Client
The response from the team was incredibly rewarding:
“These photos are incredible. You are so talented and we loved working with you. Thank you for all the guidance and vision. We really enjoyed the session as well and are looking forward to working with you again in the future.”
Hearing that they not only loved the results but also enjoyed the experience reinforces why I love what I do—creating images that empower professionals and elevate brands.

Looking Ahead
Precision Skin Care Dermatology’s rebrand is a testament to the power of strong, intentional imagery. We are already looking forward to our next session, which may include videography to feature interviews with these talented medical practitioners as they discuss the amazing services they offer to their clients. I’m excited to see how they integrate these photos into their marketing and can’t wait to collaborate again in the future.
If you’re looking to refine your brand’s visual presence with high-end, professional photography, let’s connect and create something remarkable together.

The Ultimate Guide to DIY Headshots: Gear, Tools, Tips, and Techniques
One of the most common questions I get is, “What gear do you use for professional headshots?” While I could simply list my equipment, I think it’s more valuable to explain why I chose each piece. Photography gear is like any set of tools - having the right tools for the job makes a big difference, but your technique, creativity, and preparation are just as critical, if not more so.
Professional headshot photography can be expensive, and not everyone has the budget for it. Luckily, with the right gear and a bit of know-how, you can create quality headshots on your own. Whether you're a small business owner, an aspiring photographer, or simply in need of a great headshot, this guide will help you achieve professional-looking results.
One of the most common questions I get is, “What gear do you use for professional headshots?” While I could simply list my equipment, I think it’s more valuable to explain why I chose each piece. Photography gear is like any set of tools - having the right tools for the job makes a big difference, but your technique, creativity, and preparation are just as critical, if not more so.
Drawing from years of experience in professional headshot photography, I’ll share some of my insights on essential tools, techniques, and best practices to help you get started.
Here’s what we’ll cover:
Key Equipment for DIY Headshot Photography: Cameras, lenses, and accessories for creating flattering portraits.
Lighting Essentials: The ideal lighting setups to highlight your best features.
Backdrop Tips: Choosing the right background for clean and professional results.
Editing Basics: Simple post-processing tips to polish your photos.
By the end of this guide, you'll have the knowledge and confidence to capture headshots that look polished and professional—perfect for LinkedIn, resumes, websites, or social media. Whether you're setting up your first headshot session or looking to refine your skills, this guide is your step-by-step roadmap to success.
So, let’s dive in and take a look at the key equipment necessary for DIY headshot photography, the best camera and lens choices for flattering portraits, ideal lighting setups, backdrop options, and editing tips.
1. Choosing the Right Lens for Flattering Headshots

The lens is the first key consideration (not the camera!) when it comes to capturing the human face in a flattering way. Avoid using wide-angle lenses, as they can distort proportions and result in an unflattering image. The shortest focal length I can recommend for portraits is 50mm. While 85mm is often considered THE classic focal length for portraits, I personally love the look of even longer telephoto lenses such as 105mm, 135mm, or even 200mm. These lenses are commonly used in beauty portraits because they offer a flattering representation of facial proportions.
How is that achieved?
Short telephoto lenses, typically in the 85mm to 135mm range on a full-frame camera, are flattering for headshots and portraits because they reduce distortion and create a natural, proportional representation of the face. Unlike wide-angle lenses that exaggerate features closer to the camera, such as the nose, short telephoto lenses minimize this effect. The compression effect, caused by the narrower field of view, makes objects at different distances appear closer together, subtly bringing facial features into better balance and enhancing symmetry for a more pleasing aesthetic.
Here are some of my favorite lenses across different portrait focal lengths (note that APS-C lenses will have a different effective full-frame focal length):
PRO TIP: In my experience, 135mm lenses are fantastic for individuals with more angular or thinner facial features, while those with fuller faces often benefit from the 50mm-58mm range for a more flattering result.
2. Camera: Selecting the Right Tool for the Job

While the latest high-resolution camera may seem like the answer to everything, professional headshots are typically delivered at dimensions well under 3000px on the long side. So, a super-high-res camera really isn’t necessary for stunning results. Any DSLR or mirrorless that produces an image 20 megapixels and up will be plenty.
What’s much more important is your ability to control the image’s exposure, focus, and lighting, and again, the lens choice. While I recommend that you select the camera based on the lens that produces your desired look, here are some additional considerations, especially since there are many lens manufacturers that create the same lens for different camera systems:
Key Camera Features:
Autofocus: If autofocus is important to you, Sony, Canon, and Panasonic are excellent choices. I personally love Sony for its fast, reliable autofocus, and this seems to be the consensus among professional headshot photographers who value the convenience of autofocus.
In-Body Image Stabilization (IBIS): For sharper images in lower light, Panasonic leads the market in IBIS, which helps you avoid camera shake and maintain image clarity. If you have a low powered key light, this is very useful. If you’re using a tripod with a remote trigger, this won’t matter nearly as much, but if you have a friend or family member taking your photos handheld, IBIS can prove very useful.
Color Science: For the best skin tones and flattering color, I recommend Fujifilm or Canon. Fujifilm’s color science is particularly well-suited for headshots, delivering beautiful skin tones. Their film simulations, especially “Classic Chrome,” create a very special look - vivid but not saturated - which I haven’t been able to match with other systems.
Camera Recommendations:
Panasonic S5IIX: Great IBIS and low light performance. A great option if you might want to explore videography in addition to portraits and headshots.
Canon EOS R6: Excellent autofocus, color science, and low-light performance.
Fujifilm X-T5: Compact and offers stunning image quality with unique film simulation modes. My personal camera of choice.
Sony A7 IV: Versatile, with superb dynamic range and amazing autofocus.
Pro Tip: A camera with manual control options will give you the flexibility to tweak settings and get the most out of your gear. Learn the exposure triangle of aperture, shutter speed, and ISO to take control of the exposure of your images so that you can reliably achieve correct exposure and pristine image quality.
3. Lighting: The Key to Professional Results

Lighting makes all the difference when it comes to professional headshot photography. Whether you're using natural light or studio lighting setups, knowing how to manipulate light is essential.
Natural Light: Simple and Effective
The best natural light comes from a large window with sheer curtains to soften the light. It’s perfect for beginners. If you're outside, look for areas that offer diffused sunlight, like an alleyway or the corner of a building. The key is finding "feathered light", where the sunlight is soft and directional, creating flattering shadows.
Another great natural option is backlighting during golden hour (early morning or late afternoon). This creates a beautiful rim light around the subject’s hair and body, giving a glowing effect that adds to the cinematic quality of your shot.
Studio Lighting: More Control with continuous lighting
For controlled lighting in a studio, consider a 200+ watt continuous light as your key light. My go-to light is the SmallRig RC220D, paired with a large umbrella to provide soft, even light. If you need something more powerful, the Aputure C300 is a great option that offers a lot of power and flexibility in a small package.
It’s great to have a high-quality continuous light to work with, especially for DIY headshots. I prefer continuous light (over flash) because it provides a consistent source that many people find more comfortable. Plus, it’s crucial for you, the photographer, to have a setup where "what you see is what you get." This helps you visualize the final result in real-time, which is especially helpful when working on your own.
Lighting Patterns to Consider:
A studio light on its own is harsh, very harsh! After all, it’s a bright, concentrated point-source that will create hard shadows on the face.
To make it more flattering, we need to soften it. The solution? Soft modifiers like softboxes, umbrellas, beauty dishes, and octaboxes. These tools spread the light, making it larger and softer, which creates a much more flattering and even lighting.
Once you’ve softened your light, the next step is positioning it correctly. Here are some of my favorite lighting patterns for headshots, after modifying the light to a softer source (I’m a fan of the large 7-foot Westcott umbrella with a white diffusion panel):
Clamshell Beauty Lighting: Positioned with a key light above and a fill light below (I use a eyelighter reflector for fill), this pattern creates soft, even lighting and enhances the eyes—ideal for headshots.
Rembrandt Lighting: Creates a small triangle of light on the cheek, giving a dramatic, classic portraiture look that we associate with fine art.
Butterfly Lighting: Light placed above and in front of the subject to highlight cheekbones and provide a glamorous effect.
Loop Lighting: A more versatile option, creating soft shadows next to the nose, which is flattering for most face shapes.
To add interest to your headshots, consider adding:
Hair Light: A small Aputure MC light or similar can create separation between the subject and background. It’s especially useful for dark-haired subjects or dark backgrounds. Don’t overdo the hair light if you have light colored hair.
Eyelighter Reflector: A curved reflector that bounces key light into the subject’s eyes. This adds sparkle and can minimize shadows under the eyes, making the subject appear fresh and awake. I use this in a clamshell lighting pattern, which flatters everyone.
How to Decode Studio Lighting Using Eye Reflections
Learning studio lighting doesn’t have to be complicated - you can start by reverse-engineering photos you love. One powerful trick is to analyze the reflections in the subject’s eyes, also known as catchlights. These reflections reveal the lighting setup, including the type, placement, and number of lights used. If you understand the basics of studio lighting, this method can provide everything you need to replicate the shot. Want to dive deeper into this technique? Check out my blog post where I break down how to use this approach to improve your studio photography lighting skills.
Pro Tip: For consistent, accurate color, use daylight-balanced lights (5600K) and set your camera's white balance to match. This ensures that the color temperature remains steady throughout your shoot. Avoid using auto white balance (tempting as it is!), as it makes the camera guess the lighting temperature with each shot, leading to unpredictable results and inconsistent color.
4. Backdrop: Simple and Effective Options

Your backdrop doesn’t have to be complex or expensive. Here are some good options:
Simple Options: A clean wall, seamless paper rolls in neutral colors (white, gray, or beige), or even an outdoor setting like a concrete wall or brick wall. You can also shoot in areas with leading lines (e.g., fences or archways) to add dimension.
Professional Option: Savage produces collapsible backdrops that are portable, easy to store, and deliver a smooth, professional backdrop.
5. Tripod: Ensuring Consistency

For DIY professional headshots, a tripod is crucial for maintaining consistent framing and focus. Here are a few good options:
Manfrotto Befree Camera Tripod: Reliable and sturdy for maintaining consistent angles.
Neewer Tripod with Fluid Head: A great value for the price, providing smooth pan and tilt functionality.
6. Camera Trigger: Control Without the Timer
To take your DIY headshots, you'll need a way to trigger the camera remotely. I can highly recommend using the Pixel Pro Wireless Remote, a budget-friendly option that works very reliably.
7. Editing Software: Polishing Your Images
Once you’ve taken your shots, the next step is to enhance your images through editing. Here are the tools I recommend:
Capture One: This is the software I personally use and it is a game-changer!
Adobe Photoshop: Essential for retouching, but if you need a shortcut, Evoto is an AI-based editor that offers quick fixes for common issues.
Essential Editing Tips for Professional Headshots
Here’s how I approach editing professional headshots in Adobe Photoshop:
1. Correct the Color:
Start by ensuring the color balance is accurate. True gray should look gray, and true white should look white, so skin tones appear natural and lifelike. If the white balance is off, the subject may look overly red and flushed or yellow and unhealthy. I use the color panel in Camera Raw Filter to select an area of the photo that should be color-neutral.
2. Adjust Vibrance and Contrast:
For lighter or pale skin tones, a slight boost in vibrance can enhance the image by adding saturation to less colorful areas without overwhelming the photo. Increasing contrast also naturally boosts saturation, but I recommend combining it with vibrance adjustments for more nuanced results.
3. Remove Blemishes and Stray Hairs:
Photoshop’s healing and remove tools are excellent for cleaning up small blemishes, wrinkles, and stray hairs. This step instantly polishes the image without requiring advanced techniques.
4. Smooth Skin with Frequency Separation:
Frequency separation is a powerful method for softening deep wrinkles while preserving natural skin texture. Though it may take practice to master, this technique ensures the skin looks smooth without crossing into “over-retouched” territory.
5. Use Dodging and Burning:
Think of dodging and burning as digital contouring. This technique can subtly enhance the facial structure—softly defining features for women or sharpening a man’s jawline to make it appear more masculine.
6. Work with Layers for Subtle Edits:
Apply your edits on separate Photoshop layers and feel free to make adjustments with a heavy hand initially. Then, reduce the opacity of the layer to dial back the effect. Always revisit the image with fresh eyes to ensure the changes look natural.
7. Perfect the Background:
Professional headshots require smooth, distraction-free backgrounds. Use editing tools, including but not limited to applying Gaussian Blur filter to clean up any imperfections or inconsistencies.
8. Refine Features with Liquify:
Photoshop’s Liquify filter can help make subtle adjustments to the body outline, enhance hair volume, or fine-tune facial features. Use it sparingly to maintain a natural look.
These steps aren’t exhaustive, but they highlight the most impactful edits that elevate a headshot to a professional standard. Each adjustment contributes to a polished final result that clients will appreciate.
Final Thoughts: Bring Out the Best in Your Headshot
Creating a professional DIY headshot is within reach with the right gear, techniques, and a little practice. Whether you're aiming to update your LinkedIn profile, create a fresh image for your business, or simply have a professional photo that reflects your personality, the key is in preparation and knowing how to use your tools to enhance your best features.
Now that you have the tools, it’s time to put them into practice! The best way to improve is by experimenting with these techniques, observing what works, analyzing what doesn’t, and adjusting accordingly. The more you test, the more you’ll learn.
The final piece of the puzzle is capturing the right expression. Most people want their headshot to appear friendly and approachable, but that doesn’t mean you need to smile ear to ear or force a grin. Smiling with tension (and trying to hold a smile) can result in a stiff, awkward, or even nervous look. I use simple verbal and posing cues to draw out authentic, relaxed reactions while making natural conversation, but if you're working on this yourself, try taking bursts of photos while you genuinely laugh. Invite a fun friend over, watch a comedy you enjoy, and shoot continuously to capture those natural in-between moments—when you’re not overly smiling, but still showing your true self. One of those candid shots is likely to be your most genuine and flattering headshot.
While this guide provides the tools and techniques to elevate your headshots, there’s no substitute for the experience and expertise of a professional headshot photographer. If you find yourself overwhelmed or just want to get the most polished professional result, I’m always here to help with lighting, composition, and expression coaching to ensure your headshot makes a lasting impression and captures your natural confidence.

Apple iPhone 13, 14, 15 and 16 Cinematic Mode Explained: Enhancements in 2025
The neat thing about the Cinematic Mode effect is that if you have multiple subjects, the iPhone camera will figure out which subject you want to have in focus, and seamlessly shift focus between your subjects. That’s a trick that usually requires an on set “focus puller” to manually monitor and adjust in real-time. With the iPhone Cinematic Mode, simply re-center the camera towards the subject you want to have in focus, or have them walk into the frame, and the camera will smoothly pull focus to the new subject, making them sharp and blurring out the background.

With the release of the iPhone 16, Apple has further refined its Cinematic Mode, enabling users to capture videos with enhanced focus tracking and more natural background blurring. This update builds upon the foundations laid by the iPhone 13, 14 and 15, offering even more control and quality for mobile videography enthusiasts.
Cinematic Mode allows you to record videos with automatic focus racking and blurred backgrounds.
Updated Content:
Building upon its initial introduction, Cinematic Mode in the iPhone 16 offers significant enhancements:
Higher Resolution and Frame Rates: Users can now record in 4K Dolby Vision at up to 30 fps, providing crisper and more detailed cinematic footage.
Advanced Focus Control: The improved AI algorithms offer more precise subject detection and smoother focus transitions, allowing for professional-grade rack focusing effects.
Post-Recording Adjustments: The Photos app now enables users to modify the depth-of-field effect and focal points even after recording, granting greater flexibility in post-production editing.
These advancements make achieving a cinematic look more accessible to all users, regardless of their videography experience.
How does Cinematic mode work?
“With Cinematic mode, your iPhone camera can record videos with a shallow depth of field and add beautiful focus transitions for a cinema-grade look... Cinematic mode applies a depth-of-field effect that keeps the subject of your video sharp while creating a beautifully blurred foreground and background. iPhone automatically identifies the subject of the video and keeps it in focus throughout the recording; if a new subject is identified, iPhone automatically transitions the point of focus. You can also manually adjust the point of focus while you record, or change it later in the Photos app. Cinematic mode is available on all iPhone 13 models and iPhone 14 models.”
What is the depth-of-field effect?
In photography and cinematography, depth of field is the distance between the nearest and farthest objects in a scene that appear in sharp focus. A shallow depth of field means that only a small part of the scene is in focus, while a deep depth of field means that most or all of the scene is in focus. Depth of field is controlled by the aperture of the lens, which determines how much light is let in and how much of the scene is in focus.
What Apple is referring to as a depth-of-field effect is the blur or soft “bokeh,” in stark contrast to the sharpness of the subject.

“Bokeh balls,” soft blurring of the background from the depth-of-field effect
The neat thing about the Cinematic Mode effect is that if you have multiple subjects, the iPhone camera will figure out which subject you want to have in focus, and seamlessly shift focus between your subjects. That’s a trick that usually requires an on set “focus puller” to manually monitor and adjust in real-time. With the iPhone Cinematic Mode, simply re-center the camera towards the subject you want to have in focus, or have them walk into the frame, and the camera will smoothly pull focus to the new subject, making them sharp and blurring out the background.
With advancements in computational photography, the iPhone 16 simulates this effect using sophisticated software algorithms, allowing for adjustable background blur and focus effects that closely mimic those produced by professional cameras.
Will my videos really look like a film just by using Cinematic Mode?
While filmmakers and photographers often do make use of shallow depth of field, it’s not the only technique that can make a video or photo look cinematic.

There are many factors that can make a video look cinematic. Some of these include:
The use of a wide-angle lens to capture a scene, which can give the image a more expansive and immersive feel.
Careful composition of the shots, with the use of techniques such as the rule of thirds or leading lines to create a sense of depth and movement within the frame.
The use of color grading to create a specific visual aesthetic, such as a cool blue tone for a dramatic scene or a warm golden hue for a romantic one.
The use of creative lighting techniques, such as backlighting or rim lighting, to add depth and dimension to the images.
The use of visual effects and other post-production techniques to enhance the overall look and feel of the video.
Overall, achieving a cinematic look often involves a combination of these and other techniques, as well as a strong artistic vision and attention to detail.
Thoughts on Backlighting
In 2025, backlighting continues to be a powerful technique in creating cinematic visuals. With the iPhone 16's advanced camera capabilities, including improved dynamic range and low-light performance, capturing well-exposed backlit scenes has become more attainable. To effectively utilize backlighting:
Exposure Control: Use the iPhone's exposure adjustment tools to prevent overexposure of the background while keeping the subject well-lit.
Reflectors: Employ portable reflectors to bounce light onto the subject, reducing shadows and enhancing details.
Time of Day: Shooting during golden hours (early morning or late afternoon) provides softer backlight, adding warmth and depth to your footage.
iPhone Product Links - Cinematic mode is available on the following iPhone models:

The Definitive Guide to Corporate Lifestyle Photography
Corporate lifestyle photography is about capturing real moments that showcase your brand’s personality—team huddles, client meetings, and those spontaneous laughs that humanize your business.
As a professional photographer and expression coach, I specialize in helping businesses create compelling visual narratives. This guide will walk you through everything you need to know about corporate lifestyle photography: what it is, why it matters, how to plan your shoot, and how to maximize the value of your images.
Corporate lifestyle photography is all about capturing real moments that showcase your brand’s personality—team huddles, client meetings, and those spontaneous laughs that humanize your business. Is your brand telling the right story?
As a professional photographer and expression coach, I specialize in helping businesses create compelling visual narratives. This guide will walk you through everything you need to know about corporate lifestyle photography: what it is, why it matters, how to plan your shoot, and how to maximize the value of your images. So, let’s dive into the types of images you might need and how to get your team ready for a corporate lifestyle photography shoot.
Team Collaboration and Interaction
It’s important to capture genuine moments as they unfold, just as they do in real life, spontaneously and authentically. And that's exactly what makes them so real, it’s because they are!
Show the dynamic of your team with photos of employees engaging in brainstorming sessions, lively discussions, or celebrating milestones.

MindBody Talent Healthcare Corporate Lifestyle Photography

Research Lab Team Corporate Lifestyle Photography
Candid moments bring your company's culture to life and highlight the energy within the workplace.
Highlight moments like casual chats by the coffee machine, a glimpse of your creative workspace, or a group lunch. These images help bring a human face your brand by showing the heart of your company.
Productive Team Meetings
Showcase your team's collaborative spirit through images of group sessions, whether it's a strategic round-table discussion or a focused huddle.

Emphasize teamwork and collective effort, ideal for demonstrating a cooperative work environment.
Employee Action Shots
Focus on individuals as they work in their element. Whether it's a technician solving technical problems, a designer sketching a new concept, or a manager leading a project, these action portraits illustrate the dedication and expertise behind each role.

WashU Medicine Action Shot - Zipfel Neuroscience Research Lab in St. Louis

Architectural Firm Employee Action Shot
These lifestyle images not only showcase the specific skills and passion of your team, but also give clients and partners an insider’s perspective on your day-to-day operations. By capturing candid moments of problem-solving, collaboration, and innovation, action portraits help humanize your brand and emphasize the value your employees bring to every project.
Office Workspace and Culture
Work and Culture images convey the physical space where your team thrives and allow potential clients or partners to connect with the company culture.
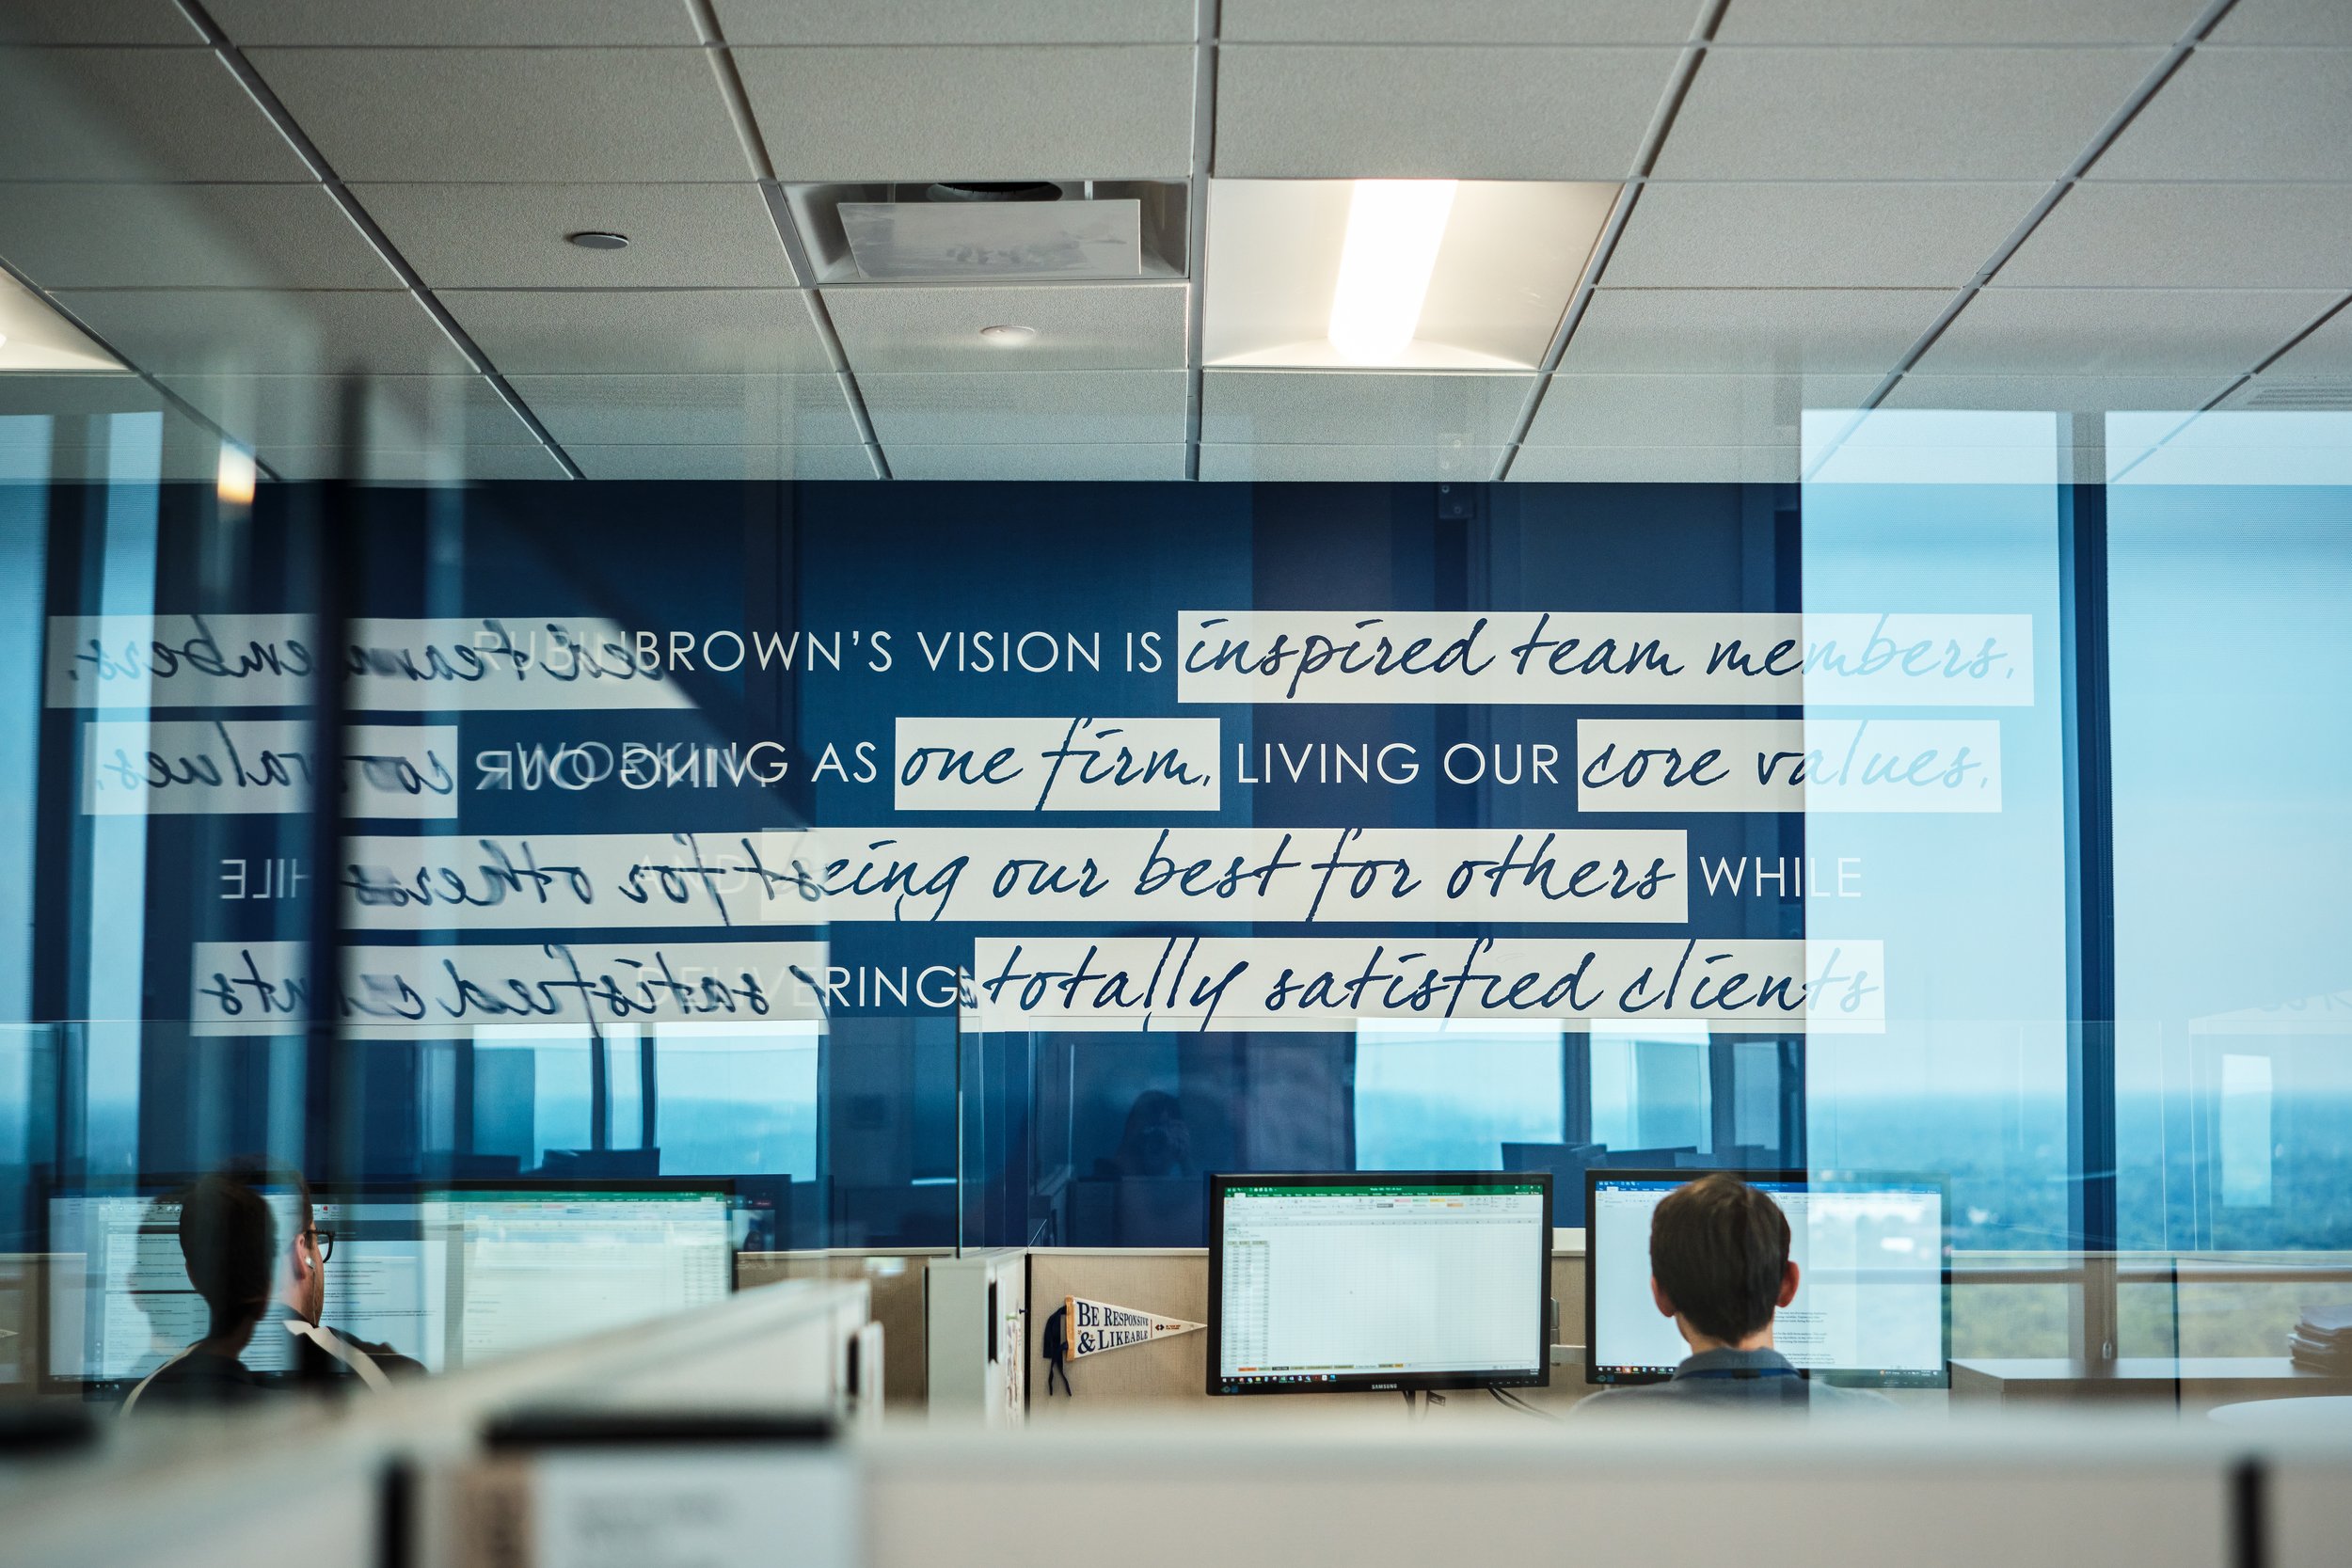
RubinBrown St. Louis Offices, Centene Building in St. Louis MO

Wiegmann Associates, Mechanical Engineering
Give a view of the workspace with artistically framed shots of your office. From open, collaborative environments to quiet, focused areas, these images reflect the values and atmosphere that drive your team. They provide potential clients and partners with a visual narrative of how your organization operates, fosters creativity, and prioritizes employee well-being, making it easier for them to envision themselves working with you.
Environmental Portraits
Combine professional headshots with contextual surroundings that tell a story. For example, an executive standing in front of the company building, or a staff member at their workspace can communicate professionalism while maintaining an authentic, relatable vibe.

Alter Trading Corporate Office Environmental Portrait

Heartland Dental Corporate Lifestyle Environmental Portrait
Client Engagement and Relationship-Building
Highlight the trust and rapport your team has with clients or partners. Photos of staff members engaging with clients illustrate the positive relationships that are central to your business’s success and communicate trustworthiness.

John Robert "Jay" Ashcroft, Secretary of State of Missouri engages with a St. Louis business leader
Creative Angles for Visual Interest
Use unique perspectives to add dynamism to your images. Over-the-shoulder shots, angled views, or close-ups can create engaging, visually interesting moments that break the conventional photo style.

A low-to-high angle creates a powerful hero shot, emphasizing authority and expertise.
Brand Integration
Incorporate your company’s branding elements—such as logos, color schemes, or merchandise—into the photography. This reinforces your company’s identity without overwhelming the scene, ensuring brand recognition in a natural and seamless way.

Planning Your Corporate Lifestyle Shoot
Define Your Goals
What story are you telling? Are you highlighting your team’s collaboration, showcasing your state-of-the-art facility, or emphasizing client interactions? Clear goals will shape the shoot’s direction.
Assemble Your Team
Identify team members who best represent your brand. Speak with them to ensure they’re comfortable in front of the camera and understand the importance and primary goals of the shoot.
Choose the Right Locations
Consider your office space, outdoor settings, or client-facing areas that reflect your brand’s identity. If your workspace lacks visual appeal, a studio session with curated props might be the better option.
Wardrobe and Styling
Ensure clothing aligns with your branding. Neutral colors, clean lines, and minimal patterns work well. Consider hiring a stylist for a polished look.
Create a Shot List
Plan for a mix of team interactions, candid moments, and environmental details. For example:
A brainstorming session in the conference room.
Welcoming a client at the front desk.
A creative team collaborating on a whiteboard.
Close-ups of hands typing, note-taking, or using equipment.
Behind-the-Scenes Process
Pre-Shoot Consultation
We start with a deep dive into your brand’s vision, values, and goals. This helps us craft a tailored approach to your shoot.
Guided Shoot Experience
Our approach ensures every team member feels comfortable. From lighting setups to expression coaching, we direct each shot to capture genuine, confident moments.
Efficient and Organized Execution
On shoot day, we follow a detailed timeline to minimize disruptions while ensuring every planned shot is covered.
Maximizing the Impact of Your Photos
Versatility Across Marketing Channels These photos aren’t just for your website. Use them on social media, email campaigns, annual reports, recruitment materials, and press releases. A well-planned shoot can provide a library of content for months, even years.
Website Revamp
Use the images to refresh your website’s homepage, team bios, and service pages. A modern, cohesive look will make a strong first impression.
Social Media Strategy
A library of lifestyle photos allows you to maintain a consistent posting schedule with high-quality, on-brand visuals.
Recruitment Campaigns
Show prospective employees why they’d want to join your team by highlighting your workplace culture.
Client Presentations and Proposals
Impress clients with polished visuals in your presentations, proposals, and reports.
Public Relations
Submit professional images alongside press releases to enhance media coverage and brand perception.
Next Steps
Are you ready to create a visual library that elevates your brand and showcases your team? Let’s start planning your corporate lifestyle photography session today.
Contact us to schedule a consultation, and let’s bring your brand story to life through imagery.

iPhone 16 Camera Upgrades: Guide to Features, Comparisons, and Buying Advice
The iPhone 16 Pro Max excels with a larger 48 MP sensor, 5x telephoto zoom, and USB-C for faster workflow—perfect for pro-level creators. The Pro offers similar features in a smaller size. Compared to the iPhone 15, the 16 adds better low-light performance and a more powerful A18 chip. Casual creators can opt for the 16 Plus, which balances price and performance, while older iPhones like the 14 lack advanced camera tech like ProRes 4K and Night Mode improvements.
Main Camera: Sharper and Smarter
iPhone 16 Camera Upgrades: A Photographer's Perspective
The iPhone 16 series offers four variations: iPhone 16, 16 Plus, 16 Pro, and 16 Pro Max. The Pro models stand out for content creators due to their advanced features, such as a larger 48 MP sensor for better low-light performance, 5x telephoto zoom (on the Pro Max), and USB-C for faster data transfers. The A18 Pro chip ensures superior performance for video editing, making the Pro Max ideal for those who demand top-tier capabilities. For casual creators, the 16 Plus strikes a balance between price and capability.
TL;DR: iPhone 16 for Content Creators
The iPhone 16 Pro Max excels with a larger 48 MP sensor, 5x telephoto zoom, and USB-C for faster workflow—perfect for pro-level creators. The Pro offers similar features in a smaller size. Compared to the iPhone 15, the 16 adds better low-light performance and a more powerful A18 chip. Casual creators can opt for the 16 Plus, which balances price and performance, while older iPhones like the 14 lack advanced camera tech like ProRes 4K and Night Mode improvements.
Main Camera: Sharper and Smarter
48MP Sensor: Like the iPhone 15, the iPhone 16 has a 48MP sensor, but Apple seems to have fine-tuned its performance. The larger quad-pixel design improves dynamic range, especially in tricky lighting. For portrait or landscape work, this means fewer compromises between highlights and shadows.
Improved Low-Light Performance: The upgraded ultra-wide lens (f/2.2) allows for better indoor and night shots without resorting to flash.
Spatial Video: A Game-Changer if you have Apple Vision Pro!
For photographers or videographers dabbling in 3D storytelling, spatial video opens up possibilities. It’s built for Apple Vision Pro but could also inspire new ways to shoot immersive, narrative-driven content. Imagine capturing a family moment in 3D and experiencing it like a memory bubble later—it's more emotional than traditional video.
Enhanced Macro Capabilities
While I love using macro photography to highlight textures or tiny details, the iPhone 16’s refinements make this mode sharper and more intuitive. It’s ideal for hobbyists or pros who like to experiment.
Video Recording Upgrades
120fps Dolby Vision in 4K: This is a leap forward. The buttery-smooth footage at 120fps could make slow-motion shots feel cinematic, whether you’re filming nature, weddings, or personal projects.
Audio Enhancements: The addition of studio-quality mics and wind noise reduction isn’t something to overlook. Clean audio means less post-production work—something I always appreciate when recording interviews or live events.

How Does it Compare?
The iPhone 16 builds on Apple’s reputation for mobile photography innovation, offering features that make it a serious contender for both casual users and professionals. The main improvements include spatial photography for AR/VR experiences, better low-light performance through its wider ultra-wide aperture, and 4K video recording at 120 fps for cinematic storytelling.
The 48MP sensor, introduced in the iPhone 15, remains but is more refined on the iPhone 16, delivering improved detail and dynamic range. Macro photography capabilities also stand out, making it easier to capture intricate textures and details. Video upgrades, like Dolby Vision HDR at higher frame rates, and studio-quality microphones, are perfect for creators looking for pro-level results with minimal gear.

Who Should Upgrade?
Content Creators: If you rely on your phone for shooting client work or social media, the iPhone 16's video upgrades and spatial photography are worth it.
As someone who shoots both professionally and personally, here’s what stood out in testing:
The spatial video feature has incredible potential for creating immersive content. While testing it during a family outing, the 3D effect added an emotional layer to moments that regular video couldn’t capture.
Shooting at night was much smoother with the iPhone 16. In one test, I photographed cityscapes under dim streetlights, and the details in shadows and highlights were impressive compared to the iPhone 15.
Macro mode let me explore textures in new ways. For instance, capturing dew on a spiderweb produced stunning results that rival my dedicated macro lens.
Photography Enthusiasts: For someone who pushes the limits of mobile photography, the improved dynamic range and low-light performance could replace or supplement your camera.
Casual Shooters with Older Phones: If you're coming from the iPhone 14 or older, the jump is noticeable—higher resolution, better stabilization, and new creative tools.

iPhone 16 is ideal for content creation: If you regularly post videos, run a YouTube channel, or shoot social content, the iPhone 16’s 4K/120fps video and studio microphones make it a fantastic portable rig.
Do You Need It?
For me, the iPhone 16 isn’t just about specs. It’s a creative tool. If you find joy in capturing the world, whether through stills or video, it’s worth considering. However, if you already have the iPhone 15 and don’t feel limited, you’re not missing much!
If you’re ready to elevate your mobile photography, the iPhone 16 is worth a closer look. Buy the new iPhone 16 on Amazon.

Versatile Branding Photography: A Rebranding Session at Forest Park and WashU
Choosing the right location and timing is key to a successful branding photoshoot. In this session, we captured a variety of looks at Forest Park and Washington University in St. Louis, blending natural outdoor settings with refined architectural backdrops. The soft, warm light of golden hour added a natural glow, perfect for creating professional headshots and versatile branding images that reflect both authenticity and confidence.
In the fast-evolving world of healthcare marketing, personal branding is more important than ever. Sabrina Cox, a healthcare marketing strategist specializing in pharmaceutical sales, recently reached out for a lifestyle photoshoot to reflect her professional growth and rebranding aspirations. Our goal was to capture a variety of looks and moods that aligned with her vision—images that could be used across platforms like LinkedIn, her professional website, and beyond.

Sabrina at Art Hill, capturing her in a relaxed yet professional pose.
Collaborative Planning: Aligning Photography with Professional Goals
Every successful photoshoot starts with understanding the client's goals. During our initial consultation, Sabrina and I discussed her vision: she wanted images that would reflect both her warmth and professionalism—traits essential in healthcare marketing. Our conversation helped us decide on looks that could convey confidence, approachability, and expertise.
It was clear that versatility was a priority. Sabrina needed a variety of shots that could be used in different professional contexts. This led us to choose two St. Louis locations: Forest Park’s Art Hill and Washington University’s Danforth Campus. Both offered the flexibility we needed, from natural outdoor settings to sophisticated, architectural backdrops.
The Perfect Locations: Forest Park and WashU

Sabrina framed by the collegiate architecture of WashU’s campus, blending classical elegance with modern professionalism.
Choosing the right setting for a branding photoshoot is about more than just aesthetics—it’s about conveying the right message. Forest Park, with its expansive greenery and iconic views, provided a more relaxed, approachable atmosphere. Here, we focused on natural light and open space to create images that felt welcoming and genuine.
WashU’s Danforth Campus, on the other hand, offered a more structured, formal backdrop. The classical arches and clean, modern lines of the university’s architecture gave us the opportunity to highlight Sabrina’s strategic, forward-thinking side. The contrast between the two locations allowed us to capture a range of looks, all within a 90-minute session.
Golden Hour: Capturing Natural Light at Its Best
Timing plays a critical role in photography, and for this session, we chose the golden hour—those two hours before sunset when the light is soft and warm. Golden hour light is particularly flattering, creating a subtle glow and adding depth to portraits.
During the shoot, we used the natural light to its fullest advantage. Shooting with the sun behind Sabrina added a beautiful rim light, creating a glowing edge to her silhouette.
Golden hour is often the best time for professional headshots or lifestyle branding sessions, as it produces warm, natural tones that can elevate the mood of the images without extensive post-processing.

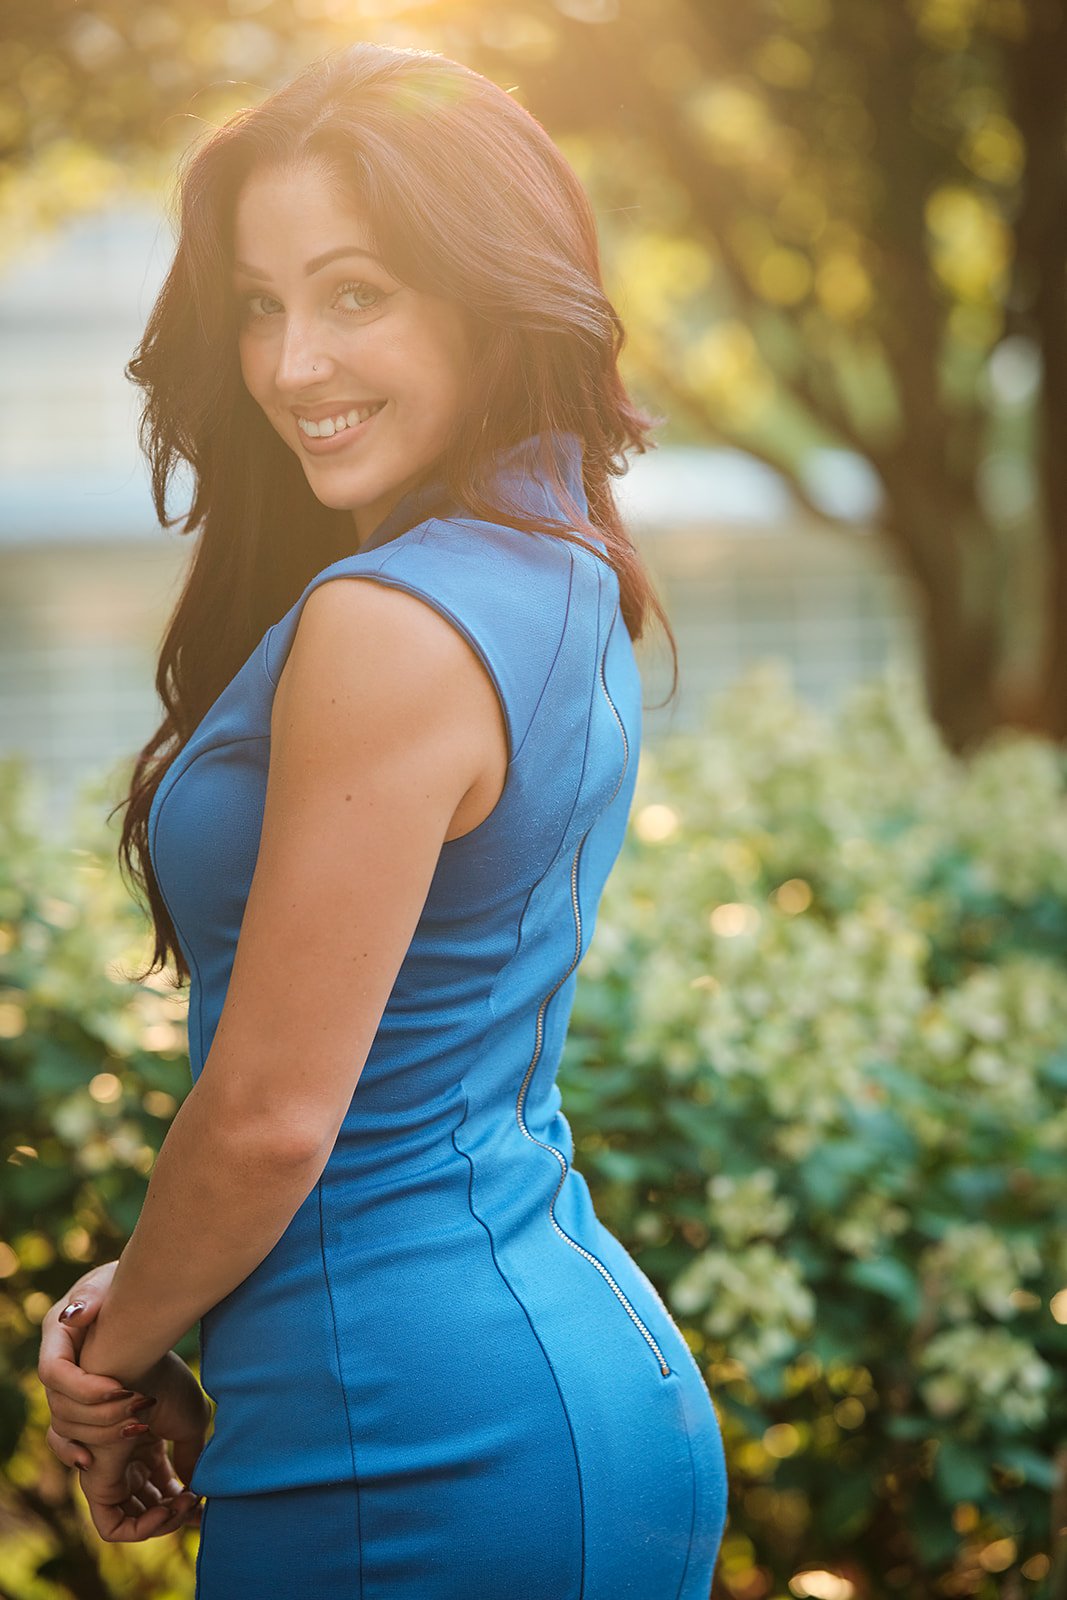


Golden hour light outlining Sabrina’s profile as the sun sets, showcasing the natural beauty of golden hour.
Wardrobe and Preparation: Key to a Successful Photoshoot
Sabrina’s preparation was instrumental in the success of this shoot. She came ready with multiple outfits, each tailored to the specific environments we’d be working in. From relaxed, business-casual looks for Forest Park to more formal attire for the architectural shots at WashU, her wardrobe choices allowed us to create a cohesive yet varied collection of images.
Her attention to detail extended beyond her outfits. Hair and makeup were perfectly done, which helped us move efficiently from one location to the next. The end result was a set of photos that could easily serve her professional needs for years to come, offering a versatile portfolio without the need for multiple sessions.
The Outcome: A Versatile, Professional Portfolio

A clean, polished headshot of Sabrina, perfect for LinkedIn and professional profiles.
By the end of the session, we had created a comprehensive set of images that reflected Sabrina’s professional identity from multiple angles. Whether for use on LinkedIn, her website, or other professional networks, these photos will allow her to present herself as both approachable and authoritative—qualities essential in her industry.
The combination of location, timing, and preparation resulted in a portfolio that provides her with flexibility for years to come, as though we had done multiple photoshoots in one.
Final Thoughts: The Importance of Thoughtful Photography in Personal Branding
Photography for personal branding is about more than just taking pictures—it’s about telling a story that resonates with your professional identity. Sabrina’s session was a great example of how choosing the right locations, timing, and preparation can result in a versatile portfolio that reflects both your personality and professional goals.
For professionals looking to rebrand or refresh their image, thoughtful planning and attention to detail make all the difference. Whether you’re in healthcare, marketing, or any other field, investing in a customized photoshoot can help you elevate your brand and stand out in today’s competitive landscape.

SmallRig RC220D Continuous Light Review: Great Performance with a Design Flaw
As a portrait and headshot photographer, I've been using the SmallRig RC220D as my main continuous key light, and overall, it performs exceptionally well. The light provides powerful, clean daylight output with excellent color accuracy, making it a go-to for professional shoots. I appreciate the Bowens mount, which is compatible with a wide range of light modifiers. It’s an ideal setup for both photography and video work.
As a portrait and headshot photographer, I've been using the SmallRig RC220D as my main continuous key light, and overall, it performs exceptionally well. The light provides powerful, clean daylight output with excellent color accuracy, making it a go-to for professional shoots. I appreciate the Bowens mount, which is compatible with a wide range of light modifiers. It’s an ideal setup for both photography and video work.

Umbrella stem and power cord block one another in the SmallRig RC220D.
However, there is one frustrating issue: the placement of the umbrella mount. While the Bowens mount is well-designed, the umbrella mount is positioned in a way that conflicts with the AC adapter plug. They press against each other, which led to damage in my setup—my power plug failed, and the umbrella itself developed a bow. Although SmallRig replaced the power adapter promptly, the core issue with the mounting design remains unfixed.
Aside from that, the light is extremely bright and efficient, reaching almost 100,000 lux at one meter with the included reflector. It's great for handling any lighting needs, even in more demanding setups. The light stays cool thanks to a quiet fan system that only kicks in when necessary - and it really is quiet - and it’s compact and portable for on-location shoots.
For those looking for a high-performing continuous light with great value with accurate daylight color, the SmallRig RC220D is worth considering—just keep the umbrella mount flaw in mind. You can buy the SmallRig RC220D here.
Key specs for the SmallRig RC220D continuous LED light, ideal for professional photography and videography:
Power Output: 220W
Brightness: 98,700 lux at 1 meter (with included hyper-reflector)
Color Temperature: Daylight balanced at 5600K
Color Accuracy: CRI 95+, TLCI 96+
Dimming Range: 1% to 100% stepless dimming
Beam Angle: 60°
Cooling System: Active, ultra-quiet fan (30dB noise at 1 meter)
Control: App-based via the SmallGoGo app (Bluetooth)
Power Options: AC adapter or optional V-Mount battery
Mount: Standard Bowens mount for compatibility with various modifiers

iPhone 16 vs iPhone 15 & 14: Does the New Camera Justify an Upgrade?
The iPhone 16’s camera offers groundbreaking features like a 48 MP sensor, periscope zoom for 6x optical magnification, and enhanced LiDAR technology for faster autofocus and better AR experiences. But do these upgrades make it worth switching if you already have an iPhone 15 or iPhone 14? Our detailed comparison breaks down whether the iPhone 16 camera truly justifies the upgrade.
The iPhone 16 has made waves with its impressive camera upgrades, but does it really justify an upgrade if you already own an iPhone 15 or iPhone 14? Whether you’re a mobile photography enthusiast, content creator, or casual user, this comprehensive guide will break down the iPhone 16’s camera features, compare them with the iPhone 15 and iPhone 14, and help you decide whether it’s worth the - rather hefty - investment.
iPhone 16 Camera: What’s New?
The iPhone 16 camera is designed to push the limits of mobile photography in 2024. Here are the standout features:
48 MP Primary Sensor: Upgraded for better low-light performance and sharper detail.
Periscope Telephoto Lens: Offers up to 6x optical zoom without loss of quality.
Improved Night Mode: Faster capture times and more detail in low light.
Cinematic Mode at 4K: Now supports 4K resolution at 30 fps.
Enhanced LiDAR Scanner: Improved for faster autofocus and better depth mapping.
Why Periscope Technology is a Game-Changer for Zoom
The iPhone 16’s periscope lens is one of its most exciting upgrades, offering 6x optical zoom—a huge leap over previous iPhones. But how does periscope technology work, and why is it better than traditional zoom?

What is Periscope Technology?
The periscope lens uses a series of mirrors to fold the lens horizontally inside the phone. This allows Apple to achieve much greater optical zoom without increasing the phone’s thickness. By bending light through mirrors, the iPhone 16 can offer 6x optical zoom without compromising image quality or making the camera module bulky.
Is There a Loss in Quality?
Unlike digital zoom, which simply enlarges pixels and reduces image quality, optical zoom magnifies the image using the lens itself, preserving full resolution. With periscope technology, even at maximum zoom, images remain sharp and clear.
Optical vs. Digital Zoom: Why Optical Matters
Optical Zoom: Captures the image through lens magnification, keeping full resolution and sharpness.
Digital Zoom: Crops the image and enlarges it, leading to pixelation and loss of detail.
For those who enjoy travel, nature, or portrait photography, the iPhone 16’s optical zoom offers a clear advantage. With 6x optical zoom, you can capture distant subjects with the same quality as closer shots, making it a must-have for zoom-intensive photography.
What is LiDAR Technology, and Why is It Important?
The iPhone 16 comes equipped with an enhanced LiDAR scanner, offering powerful benefits for both photography and augmented reality (AR). But what exactly is LiDAR, and how does it improve your iPhone experience?
What is LiDAR?
LiDAR (Light Detection and Ranging) is a sensor that uses lasers to measure the distance between the phone and objects by bouncing light off them and calculating the time it takes for the light to return. In practical terms, this creates highly accurate depth maps.

How Does LiDAR Improve Photography?
LiDAR enhances autofocus, especially in low-light conditions. With traditional autofocus, the camera struggles in low light because it can’t detect enough contrast. LiDAR solves this by instantly identifying distances and focusing more quickly, ensuring sharp portraits and accurate subject isolation (bokeh) even in difficult lighting.
LiDAR in AR and 3D Scanning
Beyond photography, LiDAR is crucial for augmented reality (AR) applications. It allows for precise object placement and interaction within AR environments. From home design apps to interactive gaming, LiDAR elevates the AR experience by making it more realistic and responsive.
Specs Comparison: iPhone 16 vs iPhone 15 vs iPhone 14
To help you decide if the iPhone 16 is worth the upgrade, let’s compare its camera features with the iPhone 15 and iPhone 14.
| Feature | iPhone 16 | iPhone 15 | iPhone 14 |
|---|---|---|---|
| Main Camera | 48 MP (enhanced sensor) | 48 MP | 12 MP |
| Telephoto | 6x Optical Zoom (Periscope Lens) | 3x Optical Zoom | 2x Optical Zoom |
| Ultra-Wide Camera | 12 MP | 12 MP | 12 MP |
| Night Mode | Improved with better detail | Standard | Basic |
| Cinematic Mode | 4K at 30 fps | 1080p at 30 fps | 1080p at 30 fps |
| LiDAR Scanner | Enhanced | Standard | Absent |
| Front Camera | 12 MP with improved autofocus | 12 MP | 12 MP |
| Video Recording | ProRes, Cinematic 4K | ProRes, Cinematic | Standard, no ProRes |
Who Should Upgrade?
If You Have an iPhone 15
The iPhone 16 camera provides improvements, particularly with the periscope lens and LiDAR scanner. However, the leap may not be significant enough for casual users. If you are a mobile photography enthusiast or use zoom extensively, the upgrade might be worth it. Otherwise, the improvements may not justify the cost. As a user of the iPhone 15, I’m not sold on the upgrade. However…
If You Have an iPhone 14
The iPhone 16 is a huge step up, especially if photography is important to you. The jump from a 12 MP camera to a 48 MP sensor, the introduction of the 6x optical zoom, and the addition of LiDAR for faster focus and AR applications make this a major upgrade.
Final Verdict: Is It Worth Upgrading?
If you own an iPhone 15, upgrading to the iPhone 16 might not feel like a major leap unless you specifically value the periscope zoom and enhanced LiDAR for AR and low-light photography. For iPhone 14 users, however, the iPhone 16 offers a huge upgrade across the board, making it a more compelling choice.
FAQs
What makes the iPhone 16 camera better than the iPhone 15?
The main upgrades include the periscope telephoto lens, which offers 6x optical zoom without loss of quality, and the improved LiDAR scanner, which enhances autofocus in low-light conditions.
Is it worth upgrading from the iPhone 14 to the iPhone 16?
Yes, the jump in camera quality is significant. The iPhone 16’s 48 MP sensor, optical zoom, and new LiDAR technology make it a substantial improvement over the iPhone 14.
How does the iPhone 16’s LiDAR improve AR?
The enhanced LiDAR scanner improves depth detection, making AR applications more accurate and responsive. It also boosts autofocus speed, especially in low-light environments.
Conclusion: Should You Upgrade to the iPhone 16 for the Camera?
Whether or not you should upgrade to the iPhone 16 depends on your current phone and your needs as a photographer or content creator. If you're passionate about mobile photography or AR applications, the iPhone 16 camera's periscope zoom, enhanced LiDAR, and improved Night Mode make it a worthwhile investment, especially for iPhone 14 users.
For iPhone 15 owners, the improvements may be appealing but might not warrant an upgrade unless you have specific use cases like zoom photography or low-light videography.
Interested in upgrading? Check out the new Apple iPhone 16 here.

AI Headshots vs. Professional Headshots: The Smart Choice for Marketing Teams
At first, the thought of AI-generated headshots sounds convenient and budget-friendly. But here's what happens in practice: AI requires each team member to upload 15-25 photos, a task that involves constant reminders, emails, and follow-ups.
As a marketing director, getting professional headshots for your team can feel like one more item on an already packed to-do list. The rise of AI headshot generators promises a shortcut, but there’s a hidden cost when you go that route. Let's dive into the realities of AI-generated headshots versus the benefits of hiring a professional photographer, and why making the right choice saves you time, money, and sanity.
The AI Headshot Hassle: More Work Than You Think
At first, the thought of AI-generated headshots sounds convenient and budget-friendly. But here's what happens in practice: AI requires each team member to upload 15-25 photos, a task that involves constant reminders, emails, and follow-ups. As the person managing this project, you're stuck playing administrator, chasing down images and dealing with missed deadlines. Once the photos are finally in, AI-generated headshots often leave employees saying, “That doesn’t look like me!” Now, you’ve wasted time coordinating for mediocre results.
Even worse, the final product lacks consistency. Employees end up with varying lighting, angles, and sometimes unnatural enhancements—none of which reflect your company’s professional image. Imagine the frustration when you realize that, after all this work, the headshots don’t align, creating a disjointed look on your website or marketing materials. Suddenly, the “quick” AI solution has ballooned into an inefficient, time-consuming task, and you’re no closer to the polished results you envisioned.
The Professional Headshot Advantage: We Do the Work For You
When you choose Henry David Photography, you hand over the coordination to us. Our process is designed to save you hours of admin work and to ensure the best possible result. We handle everything from scheduling your team to the final retouching of images.
Seamless Scheduling: Using our easy-to-use online system, each team member books their session at a convenient time. No more chasing people or organizing back-and-forth emails. We come to your office, or they visit our studio—whatever works for your team.
On-Site Image Review: During the session, each employee sees their images in real-time, selecting their favorite immediately. No post-shoot approvals are needed. This not only speeds up the process but ensures each person is happy with their headshot.
Consistency Across the Board: We create a uniform, professional style that reflects your brand. Every headshot matches, whether it’s for your leadership team, sales team, or support staff, making your company’s marketing look polished and cohesive.
Why Quality Matters: Trust, Authority, and Your Brand Image
In today’s digital world, your team’s headshots are often the first impression clients and potential partners see. A professional headshot isn’t just about looking good—it’s about presenting your team as confident, approachable, and unified. When headshots vary in quality or look awkward due to AI enhancements, it detracts from your brand’s trustworthiness.
Henry David Photography ensures your team looks professional and authentic, allowing you to showcase your company’s people in the best light. Studies show that businesses with cohesive, high-quality imagery experience higher engagement and build stronger relationships with their customers. So, while AI may seem like the cheaper option upfront, the long-term value of professional headshots more than makes up for the difference.
Save Time, Save Money, and Get it Right the First Time
Choosing AI headshots means hidden costs—time wasted on administration, subpar quality, and eventual rework. With Henry David Photography, you get it right the first time, saving both time and money. You won’t be chasing team members, fixing errors, or dealing with complaints about inaccurate photos. Instead, we provide:
Expert Guidance: We know how to capture each person’s best angles and expressions, ensuring their headshot looks natural and authentic.
Quick Turnaround: Your polished, retouched photos are delivered within two business days, ready for immediate use.
Stress-Free Coordination: We take the lead on managing your headshot session, from booking to final delivery. No more endless coordination.
Stop wasting time and get the polished, professional headshots your team deserves. Let’s make your life easier. Contact Henry David Photography to schedule your company’s headshot session today!

See Your Headshots in Real Time: A New Way to Collaborate
As soon as we capture a shot, it's displayed on a screen for instant feedback. Clients can instantly see their images at full resolution. That allows them to accurately assess how they look, suggest adjustments, and feel reassured that we're capturing them at their best. It eliminates the guesswork and helps everyone stay on the same page throughout the session.
At Henry David Photography, we understand how important it is to feel confident during a photo session. That's why we've built our process around tethered shooting—a feature that allows our clients to view their photos in real-time as they’re being taken.
This means that as soon as we capture a shot, it's displayed on a screen for instant feedback. Clients can instantly see their images at full resolution. That allows them to accurately assess how they look, suggest adjustments, and feel reassured that we're capturing them at their best. It eliminates the guesswork and helps everyone stay on the same page throughout the session.
This approach helps reduce any worry or stress, especially for those who are nervous about not liking the final photos. It’s a collaboration from the first click to the last, ensuring the final images reflect not only their professional persona but their confidence and individuality.
We’ve adopted a cutting-edge method for capturing headshots that allows you to be involved every step of the way. By shooting tethered, we connect our camera directly to a screen so that you can see each photo as it’s taken. Think of it like watching yourself in a mirror while getting ready—you’ll be able to tell right away if you love the shot or want to make small adjustments. This process gives you immediate peace of mind.
Get Instant Feedback During Your Session
One of the most significant advantages of tethered shooting is that you don’t have to wait until after the session to see your photos. We take the guesswork out by showing you your professional headshots instantly on a larger display. Whether it’s adjusting a smile, pose, or expression, this immediate feedback helps you walk away confident that we’ve captured the perfect look.
A Collaborative Experience
Our approach ensures that creating your headshot is a collaborative experience. You’re part of the process—reviewing each shot in real time, making decisions on the spot, and working alongside us to fine-tune every detail. We aim to capture exactly what you need, and with your input, we make it happen right there during the session. It’s professional, efficient, and stress-free.
Confidence Right Away: No Waiting for Proofs
Gone are the days of waiting to see proofs after your photoshoot. With our tethered system, you can pick and filter your favorite images immediately. This means you leave the session knowing that we’ve captured shots you love. Many clients have said this is a game-changing feature that makes the entire experience smoother and more satisfying.
A Seamless Process Using the Best Technology
We’re proud to use TetherTools, a leader in tethering technology that allows us to deliver the best possible client experience. The process is streamlined and precise, ensuring the entire session runs smoothly. TetherTools helps us maintain the highest standards in headshot photography, and you get the benefit of instant image review and selection.
If you’re interested in how this works, check out TetherTools on their YouTube channel to see the technology in action. Or, learn more about their products on the TetherTools website.
At Henry David Photography, we always strive to incorporate the latest innovations to make your experience exceptional. Tethered shooting is just one of the ways we ensure you get high-quality headshots and a seamless, collaborative process every time.

Viltrox 75mm f/1.2 vs. Fujinon 90mm f/2: A Portrait Photographer’s Perspective
Enter the Viltrox 75mm f/1.2. Although I was initially skeptical, this recently released “Pro” lens has become my go-to lens, particularly in challenging shooting environments. Here's a closer look at why the Viltrox 75mm has edged out the 90mm f/2 in my day-to-day work, and why both lenses still hold a place in my photography arsenal.
When it comes to headshot photography, the choice of lens has a huge impact the quality and character of the final image. The lens is even more important than the camera body—after all, as the saying goes, "Date your camera body, marry your lenses."
Many portrait and headshot photographers love to go with a “nifty fifty” or something close to that range, and the Fuji 56mm f/1.2 is a very popular choice for good reason. Although it is a fantastic lens, my secret weapon for stunning headshots has been the Fujinon 90mm f/2—a lens that has consistently delivered stunning results.
Enter the Viltrox 75mm f/1.2. Although I was initially skeptical, this recently released “Pro” lens has become my go-to lens, particularly in challenging shooting environments. Here's a closer look at why the Viltrox 75mm has edged out the 90mm f/2 in my day-to-day work, and why both lenses still hold a place in my photography arsenal.
The Challenge of Small Spaces: Why Focal Length Matters
As a headshot photographer, I often find myself working in less-than-ideal conditions—conference rooms, offices, or even small meeting spaces. In these environments, the focal length of a lens becomes crucial.
The longer the focal length, the more you need to step back from your subject to fit them comfortably in the frame. With the Fujinon 90mm f/2, I sometimes found myself pressed up against a wall, struggling to capture the shot I envisioned.
Since I shoot on the Fujifilm X system, which uses an APS-C crop sensor, the effective focal length of these lenses is even longer. On a crop sensor, the focal length is multiplied by 1.5 times, so the 90mm f/2 behaves like a 135mm lens on a full-frame camera, and the 75mm f/1.2 acts like a 112.5mm lens. This crop factor further emphasizes the need for extra room when using longer focal lengths, making the Viltrox 75mm's slightly wider angle of view even more valuable in tight spaces.
The Viltrox 75mm f/1.2, with its full-frame equivalent focal length of 112.5mm, offers a slightly shorter reach compared to the 135mm equivalent of the Fujinon 90mm. This difference might seem minor on paper—just 22.5mm—but in practice, it gives me the crucial extra space I need to compose my shots without feeling cramped. The 75mm still delivers the compression effect I love that is so flattering for capturing faces, but with the added benefit of being more adaptable to confined areas.
Image Quality: The Art of Sharpness, Bokeh, and Rendering
When we talk about image quality in photography, we’re referring to a combination of factors like sharpness, bokeh, and rendering.
Sharpness is all about how well the lens captures fine details. The Fujinon 90mm f/2 has a well-deserved reputation for producing incredibly sharp images, with every strand of hair and every pore rendered in crisp detail.
Bokeh refers to the quality of the out-of-focus areas in a photo. A lens with good bokeh creates a smooth, pleasing blur in the background, which helps to make the subject stand out.
Rendering is a broader term that encompasses how a lens handles colors, contrast, and the overall look and feel of the image.
For years, the Fujinon 90mm f/2 was unmatched in these areas. It’s a lens that produces images with a certain "magic"—a combination of sharpness, beautiful bokeh, and a distinct rendering style that makes portraits truly stand out. I was initially skeptical that the Viltrox 75mm f/1.2 could compete on the same level.
To my surprise, the Viltrox 75mm delivers image quality that rivals the 90mm. The sharpness is excellent, capturing fine details with precision. The bokeh is creamy and smooth, ensuring that the subject is always the focal point of the image. And the overall rendering is stunning, with vibrant colors and contrast that give my headshots a professional and polished look. There’s no noticeable sacrifice in image quality when switching to the Viltrox 75mm.
Build Quality: A Lens Designed to Last
One of the most impressive aspects of the Viltrox 75mm f/1.2 is its build quality. This new “Pro” line of Viltrox lenses, including the 75mm, offers a fit and finish that rivals the native Fuji lenses. The lens feels solid and durable in hand, with a metal construction that exudes quality. It's clear that Viltrox is investing in creating lenses that will stand the test of time and withstand long-term hands-on use. This attention to detail in the design and construction makes the Viltrox 75mm not only a powerful tool for capturing stunning images but also a reliable piece of equipment that I trust in my professional work.
Autofocus: Speed and Precision
Autofocus is a critical feature in any lens, especially for a portrait photographer. When capturing headshots, it’s essential that the lens locks onto the subject’s eyes quickly and accurately, as even the slightest delay or misfocus can result in a less-than-perfect shot.
The Fujinon 90mm f/2 is known for its linear autofocus system, which is one of the fastest and most reliable in Fujifilm’s lineup. It’s a lens that has never let me down in fast-paced environments, where I need to capture a fleeting expression or subtle movement.
The Viltrox 75mm f/1.2, while not boasting the same linear autofocus system, is no slouch in this department. Its autofocus is quick and responsive, allowing me to capture sharp images with confidence. In most scenarios, the difference in autofocus speed between the two lenses is negligible, making the Viltrox 75mm a solid performer in both studio and on-location shoots.
Where the Fujinon 90mm f/2 Still Shines
Despite the advantages of the Viltrox 75mm f/1.2, the Fujinon 90mm f/2 isn’t leaving my kit anytime soon. There are certain situations where the 90mm still reigns supreme, particularly in outdoor natural light photography.
In outdoor settings, where I have more room to move around, the longer focal length of the 90mm becomes an asset rather than a limitation. It allows me to stand farther back from my subject, creating a sense of distance that enhances the natural environment in the frame. Additionally, the 90mm f/2 offers a unique rendering quality—a slight coolness in color temperature and a level of microcontrast detail that adds depth and texture to the image. This "je ne sais quoi" is something I haven’t found in any other lens, and it’s why the 90mm remains my go-to for certain outdoor shoots.

Excellent sharpness and background separation with the Fuji 90mm f/2, shot on Fujifilm X-T5
Conclusion: The New Everyday Favorite
For day-to-day headshot photography, particularly in small, confined spaces, the Viltrox 75mm f/1.2 has become my new favorite lens. It provides the perfect focal length for maneuvering in tight environments while still delivering the compression and image quality that make headshots stand out. The autofocus is reliable, the rendering is beautiful, and the overall performance is on par with the legendary Fujinon 90mm f/2. On top of that, the build quality of the Viltrox 75mm is outstanding, making it a durable and trustworthy addition to my kit.
However, the 90mm f/2 isn’t going anywhere. It still has a special place in my kit for those outdoor shoots where its longer reach and unique rendering qualities shine. In the end, both lenses have their strengths, and having them both allows me to tackle a wide range of photographic challenges with confidence. But for everyday use, the Viltrox 75mm f/1.2 has become my go-to lens, proving that sometimes, a slight change in focal length can make all the difference.


Image quality samples, shot with the excellent Viltrox 75mm f/1.2 Pro on Fuji X-T5
Stay tuned for my next blog post, where I'll dive into the practical differences between using the Fuji X-T4 and X-T5. As a long-time user of both cameras, I’ll share insights on how they stack up in real-world shooting scenarios.
Product Links:

Henry David Photography Featured in Redfin's St. Louis Bucket List!
We're thrilled to announce that Henry David Photography has been featured in a recent Redfin article titled Experience the Best of St. Louis: A Bucket List for Every Explorer!
As a St. Louis-based photographer, it's an honor to be recognized alongside some of the city's most iconic spots and hidden gems. The article highlights must-see locations and experiences that capture the essence of our vibrant city, and we're proud to be a part of this exclusive list.
Whether you're a local or planning a visit, this bucket list is a fantastic guide to exploring St. Louis. From historical landmarks to unique cultural experiences, there's something for everyone. And, of course, if you're looking to capture your own St. Louis memories, we're here to help with professional photography that brings your stories to life.
Check out the full article here, and don’t hesitate to reach out if you’d like to schedule a session or learn more about what we do!
Thank you, Redfin, for the feature—it's always a pleasure to represent the best of St. Louis!

Unlocking Local SEO Power: The New "Add Update" Feature on Google My Business
In the landscape of digital marketing, one often-overlooked SEO tool holds immense power for businesses aiming to dominate local search results: Google My Business (GMB). We all know that an SEO optimized website is extremely important, but local map and search results on Google are becoming increasingly vital. Despite their importance, many businesses neglect to harness their full potential, missing out on critical tools for improving their local SEO and connecting with potential customers.
#SEO #DigitalMarketing #GoogleMyBusiness #GoogleMaps #LocalSEO #SEOTips
In the landscape of digital marketing, one often-overlooked SEO tool holds immense power for businesses aiming to dominate local search results: Google My Business (GMB). We all know that an SEO optimized website is extremely important, but local map and search results on Google are becoming increasingly vital. Despite their importance, many businesses neglect to harness their full potential, missing out on critical tools for improving their local SEO and connecting with potential customers.
The Crucial Role of Google My Business
Want your company to rank higher in local Google search results? Claiming, optimizing, and consistently developing your Google My Business Profile is one of the most crucial things you can do for visibility. GMB gives you access to local customers and drives engagement and interest. If you want Google to take your business seriously and outrank your competitors in local search results, investing in GMB profile optimization is a must.
The New "Add Update" Feature is a Game-Changer
Recently, Google rolled out a game-changing feature on GMB: the "add update" option. This feature transforms your GMB profile into a mini-blog, allowing businesses to regularly share updates, stories, and offers directly on their listing. Here's why this feature is a game-changer for local SEO:

How to find the “Add update” feature on your Google My Business Profile Listing
Storytelling Opportunity: The "add update" feature isn't just about posting updates; it's about storytelling. Businesses can now share behind-the-scenes glimpses, success stories, customer testimonials, and industry insights, creating a compelling narrative that resonates with potential customers. Although there isn’t much space for text, use the opportunity to organically integrate keywords. Visuals are at the play a pivotal role in captivating your audience and telling compelling stories and Google places great emphasis on this.
Connection Building: By sharing authentic and engaging content, businesses can forge deeper connections with their audience. This humanizes the brand, fosters trust, and encourages customer loyalty. Use the power of visuals to tell captivating stories about your business, sharing behind-the-scenes moments, client interactions, and testimonials made into graphics. Allowing your audience to get to know you through visuals allows you to increase your likeability and trust factors.
Visibility and Ranking Boost: Google values fresh and relevant content and will consider a GMB profile that consistently shows up to be one of greater authority.

How to Rank on Google Maps
We’ve all seen search results on Google Maps show up alongside website results. It’s no secret that Google is changing the way we find local businesses. Google often adds “near me” suggestions to the search user, helps Google know that search user’s intent. They want to find a business (like yours!) that is in their local area to help them solve their problem.
To get your Google My Business profile to rank when people near you search for your products or services, it’s important to understand the way Google’s Local SEO algorithm works.
According to Google, the three main local ranking factors are: Distance, Relevance, and Prominence.
You may not be able to control close you are to the search user, but you can absolutely improve your Relevance and Prominence with regular updates.
Search Relevance is all about how closely you are matching the searcher’s query. Can you solve their problem, and do your updates show them how you are able to do that? Prominence is about how well liked and trusted your business is. With the add update feature, demonstrate your likeability, creating familiarity with photos of you, your employees, and your office. Show social proof by sharing testimonials and client reviews.
Leveraging the Power of "Add Update" for Business Growth
To get the most out of the "add update" feature and enhance your local SEO strategy consider implementing:
Consistent, Short, and Impactful Updates: Posting once or twice a week is optimal for maintaining engagement. Keep your posts short, keyword rich, with concise captions that complement your visuals and convey your message effectively. Focus on delivering content that resonates with your audience and encourages them to engage with your services. Be sure to mention your local area to show up in relevant local map packs.
Keyword Optimization: Incorporate relevant keywords and location-specific phrases in your updates to improve visibility for local searches, while highlighting your expertise and trustworthiness.
Visual Appeal: Use high-quality images and videos to make your updates visually appealing and attention-grabbing. Hire a local professional photographer so your audience knows that you and your business are committed to a high level of quality and professionalism. Ask your photographer to cross-promote your business!
Call-to-Action (CTA): Make it easy for potential clients to connect with you directly from your GMB profile. Include clear CTAs in your updates to encourage actions such as visiting your website, contacting you, or making a purchase. The “Add Update” has many different Calls-to-Action to choose from. Help your audience take that all-important next step and have them reach you directly.
Respond: Respond promptly to reviews, messages, and comments to demonstrate your commitment to customer satisfaction.

Conclusion
In conclusion, the "add update" feature on Google My Business is a game-changer for businesses serious about dominating local search results and connecting with their target audience. By embracing this feature and crafting compelling updates with professional visual content, businesses can strengthen their online presence, improve rankings, and attract new customers. Don't overlook the power of GMB in your local SEO strategy—it's the key to unlocking success in the digital age.

Capturing Moments of Influence: Insights from the US India Business Council - US Chamber of Commerce Meetings in St. Louis
Secretary of State Jay Ashcroft's presence added gravitas to the event, highlighting the importance of international business relations and India-US relations.
#eventphotography #chamberofcommerce #stlouisbusiness #businessleadership
I had the honor of being part of a prestigious event that brought together some of the most influential figures in business and politics in St. Louis this past week. The US India Business Council meetings were a gathering of minds that aimed to strengthen relationships and create new opportunities for collaboration between the two countries.


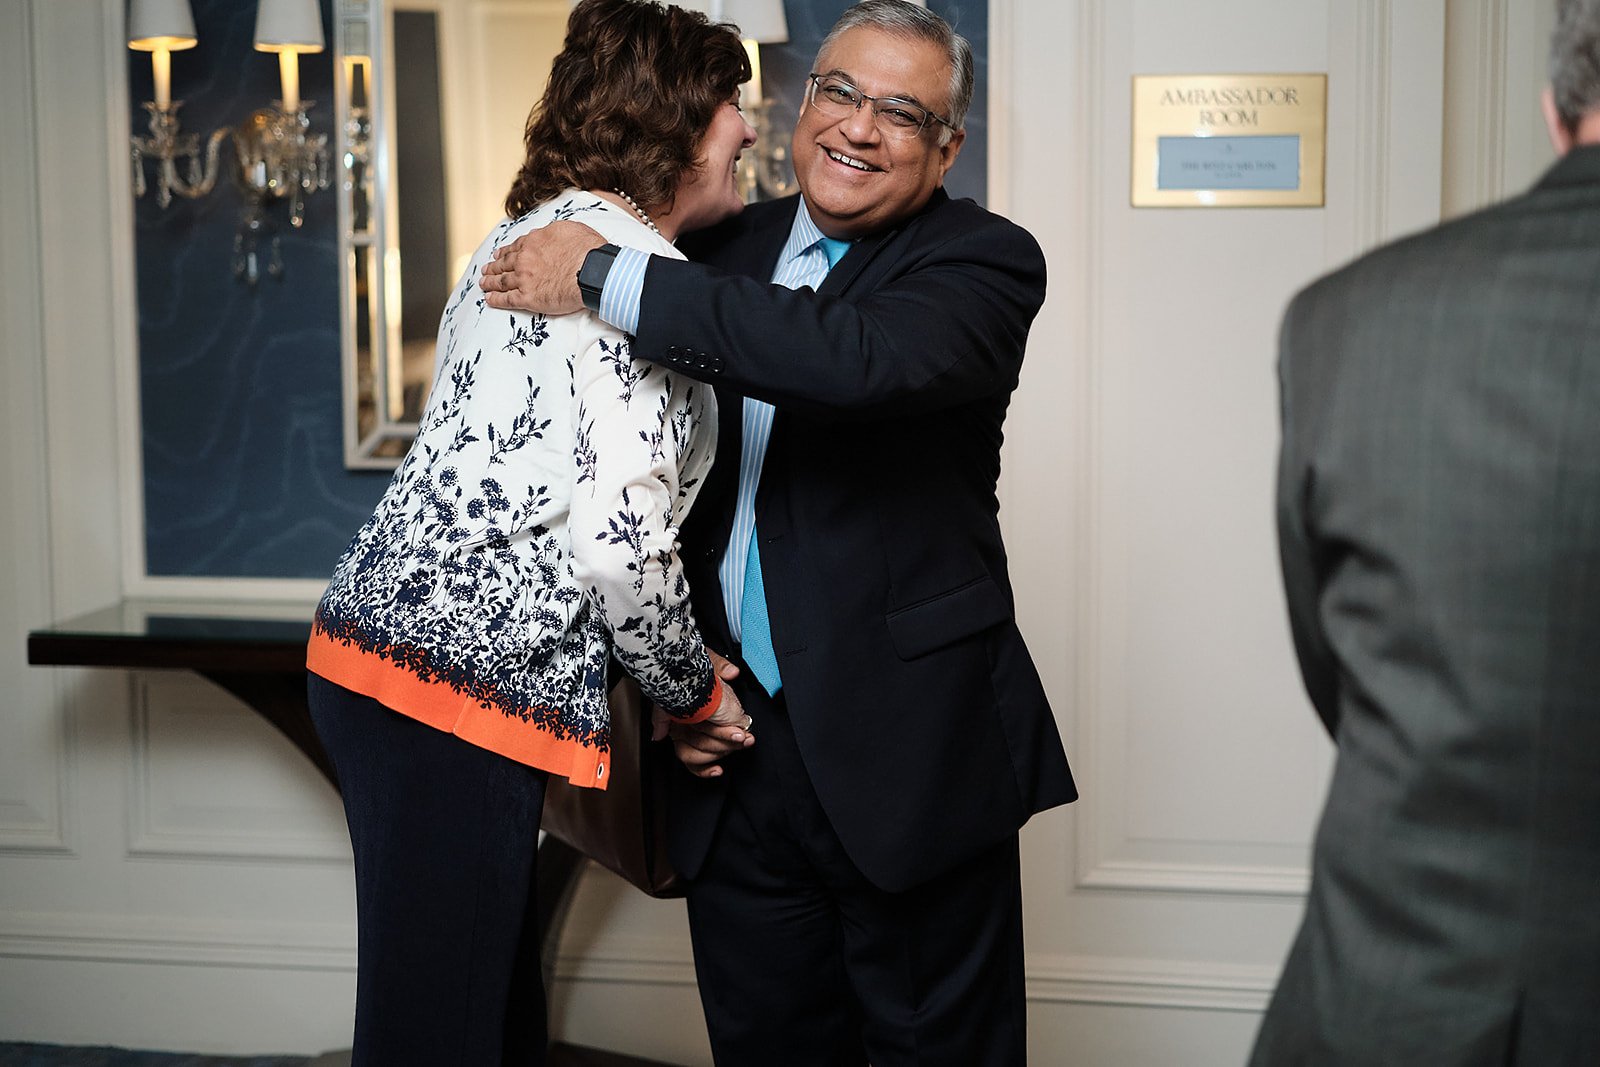

One of the highlights was the luncheon at the Ritz Carlton, where the US Chamber of Commerce convened with business leaders from St. Louis. This gathering served as a platform for insightful discussions on Missouri governance and politics, strategic collaborations among Missouri business leaders, and the forging of new partnerships.
Secretary of State Jay Ashcroft's presence added gravitas to the event, highlighting the importance of international business relations and India-US relations.

Missouri Secretary of State John R. (Jay) Ashcroft addresses the concerns of business leaders in St. Louis
Rhonda Hamm-Niebruegge, Director of St. Louis Lambert International Airport, was also in attendance, bringing her wealth of experience in aviation management to the discussions. She has been at the helm of STL since January 2010, overseeing its role as the primary air carrier facility for the St. Louis region, serving more than 14.7 million passengers annually.

My goal as a corporate event photographer was to not only document the event but to also capture the emotions and interactions that were unfolding before me. More than just taking pictures, my role was about telling a story and immortalizing important moments. Challenges were inevitable, as the event was fast-paced and dynamic. I had to be quick on my feet, constantly adjusting my settings to ensure that each shot was perfect. However, these challenges only fueled my passion for photography, pushing me to strive for excellence.
As the day turned to evening and the guests moved to The Four Seasons for dinner, I knew that I had a unique opportunity to capture the magic of the event in a different light. The ambiance was elegant and sophisticated, with candles flickering and glasses clinking as toasts were made.


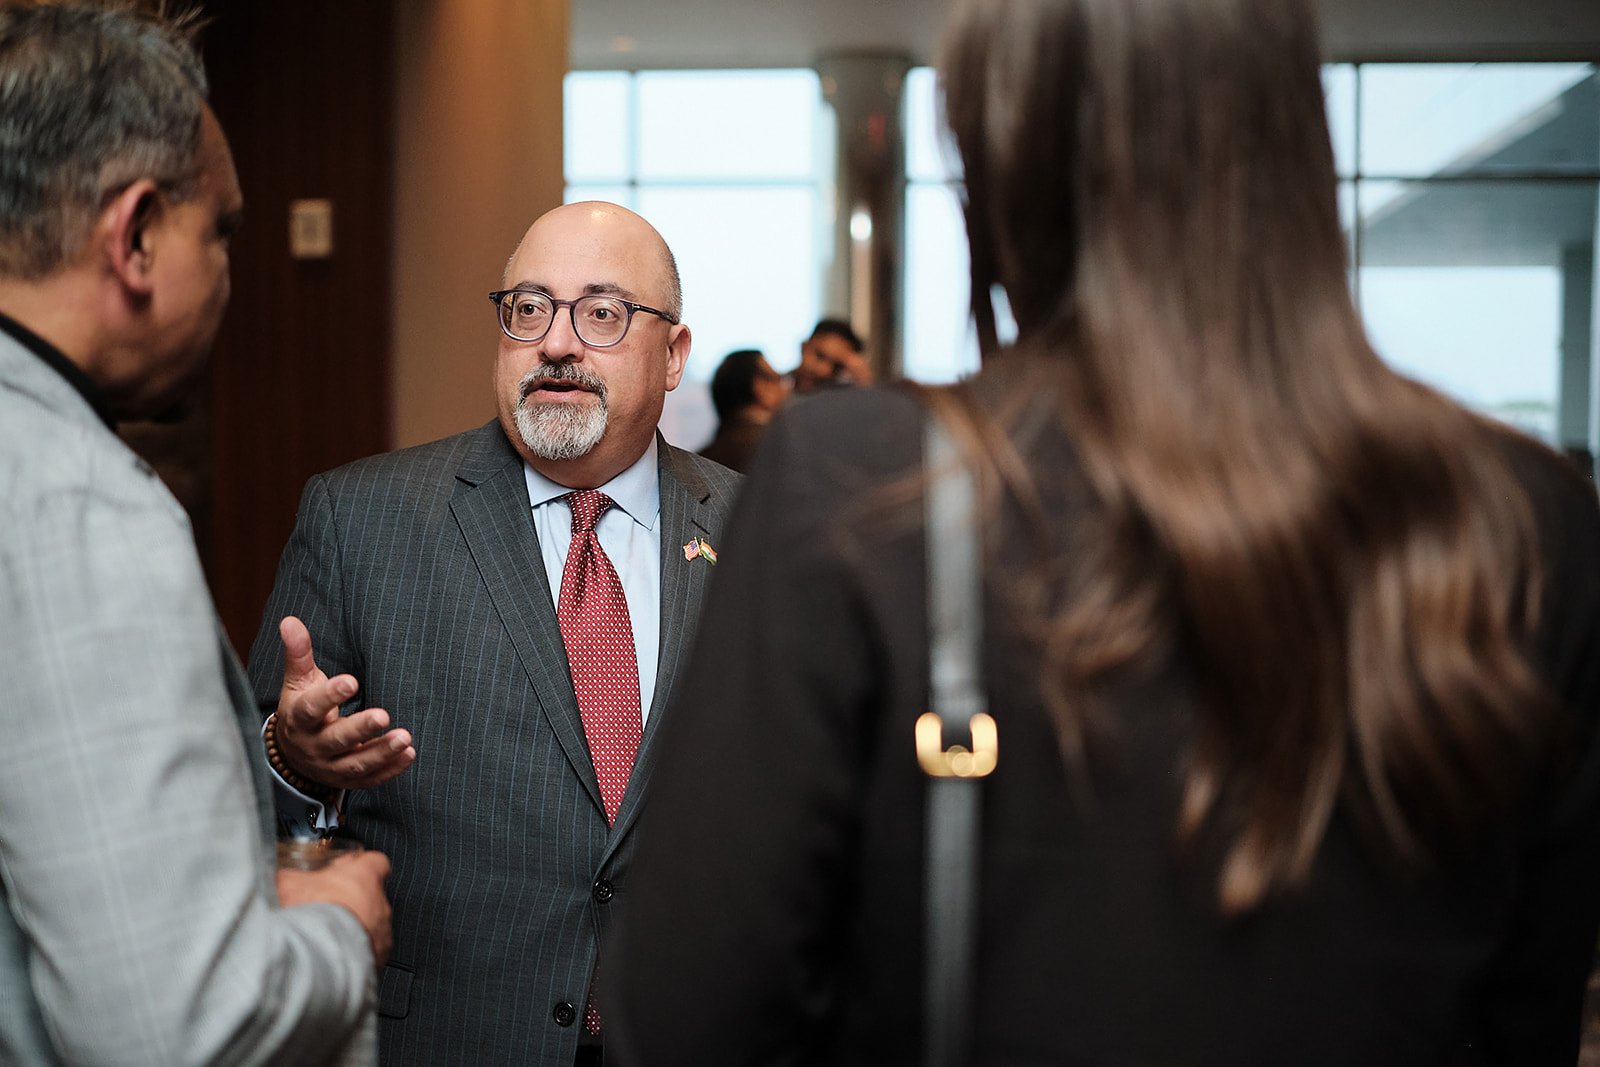


The evening continued with a dinner at The Four Seasons, where conversations delved deeper into economic opportunities, global partnerships, and the future of commerce between the US and India. Ambassador Atul Keshap led engaging discussions that explored avenues for growth and cooperation, emphasizing the role of diplomacy in fostering business ties.

Vivek Malek, State Treasurer of Missouri and a prominent figure in Missouri politics and business, sharing his inspiring vision and immigrant experience.
Looking back on the experience, I am filled with gratitude for being able to be a part of such a significant event. The connections made, the conversations had, and the moments captured will stay with me for a lifetime. Corporate event photography has a way of bringing people together, forging alliances, and creating lasting impressions. I am honored to have played a small role in this grand scheme of things, and I look forward to the next opportunity to capture moments that matter.