

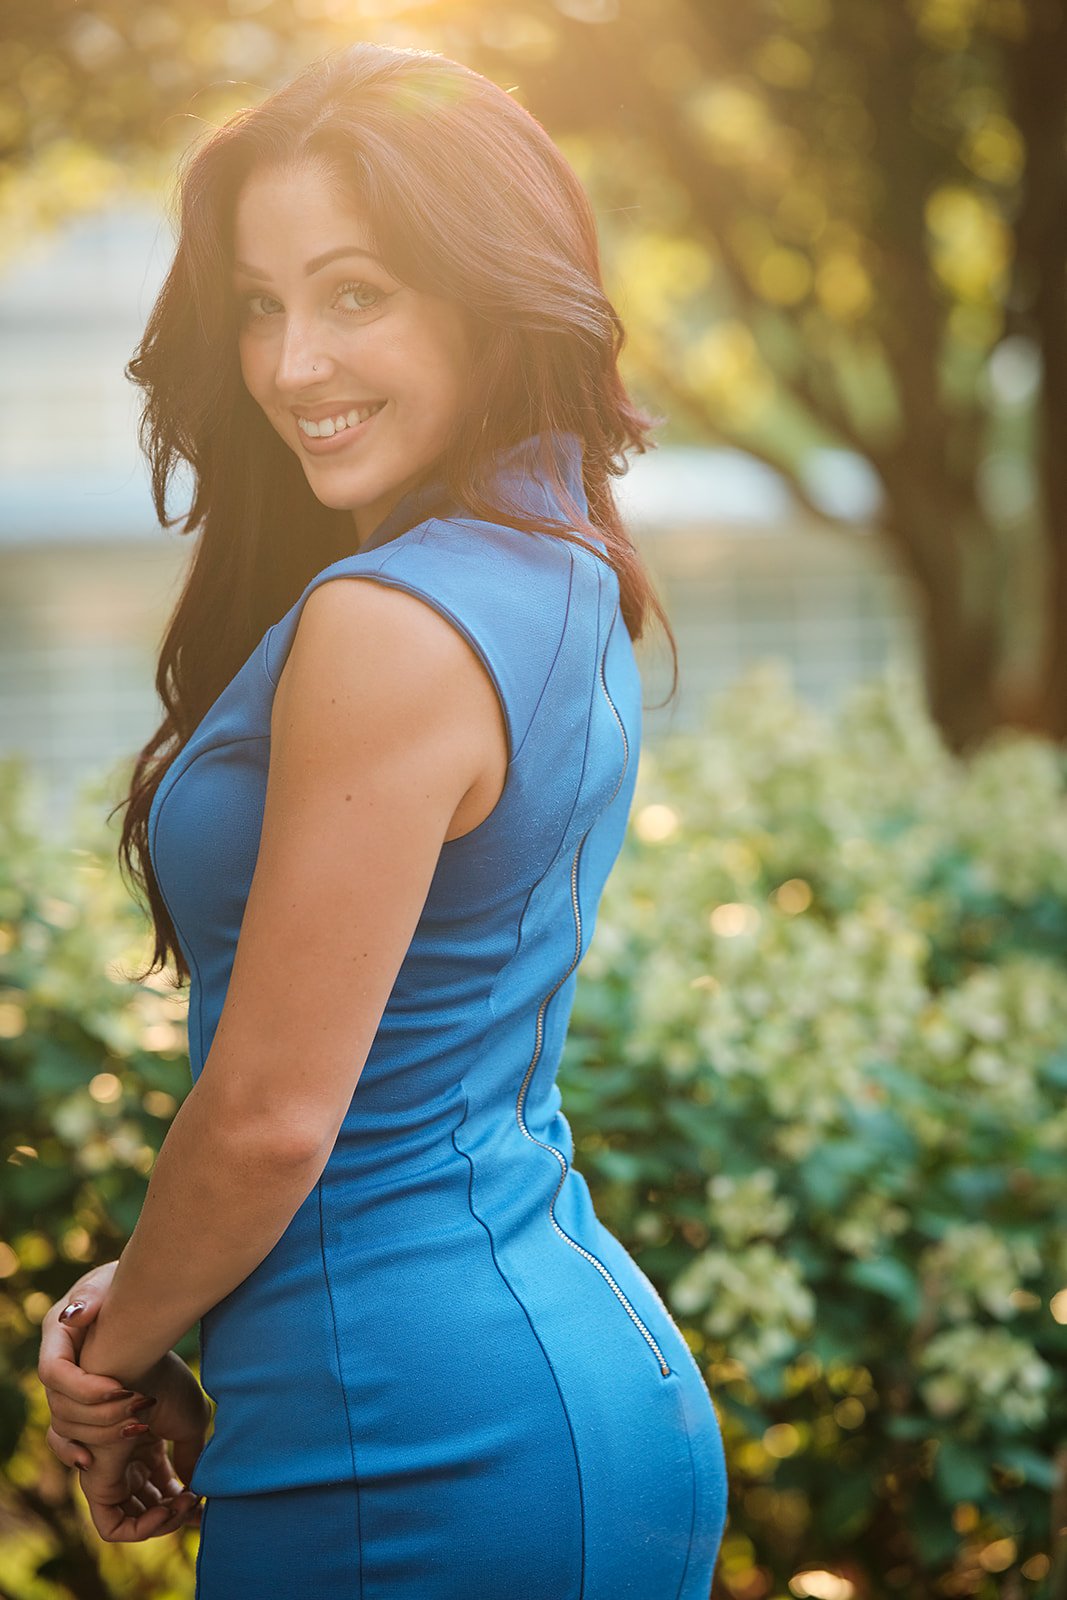
The Ultimate Guide to DIY Headshots: Gear, Tools, Tips, and Techniques
One of the most common questions I get is, “What gear do you use for professional headshots?” While I could simply list my equipment, I think it’s more valuable to explain why I chose each piece. Photography gear is like any set of tools - having the right tools for the job makes a big difference, but your technique, creativity, and preparation are just as critical, if not more so.
Professional headshot photography can be expensive, and not everyone has the budget for it. Luckily, with the right gear and a bit of know-how, you can create quality headshots on your own. Whether you're a small business owner, an aspiring photographer, or simply in need of a great headshot, this guide will help you achieve professional-looking results.
One of the most common questions I get is, “What gear do you use for professional headshots?” While I could simply list my equipment, I think it’s more valuable to explain why I chose each piece. Photography gear is like any set of tools - having the right tools for the job makes a big difference, but your technique, creativity, and preparation are just as critical, if not more so.
Drawing from years of experience in professional headshot photography, I’ll share some of my insights on essential tools, techniques, and best practices to help you get started.
Here’s what we’ll cover:
Key Equipment for DIY Headshot Photography: Cameras, lenses, and accessories for creating flattering portraits.
Lighting Essentials: The ideal lighting setups to highlight your best features.
Backdrop Tips: Choosing the right background for clean and professional results.
Editing Basics: Simple post-processing tips to polish your photos.
By the end of this guide, you'll have the knowledge and confidence to capture headshots that look polished and professional—perfect for LinkedIn, resumes, websites, or social media. Whether you're setting up your first headshot session or looking to refine your skills, this guide is your step-by-step roadmap to success.
So, let’s dive in and take a look at the key equipment necessary for DIY headshot photography, the best camera and lens choices for flattering portraits, ideal lighting setups, backdrop options, and editing tips.
1. Choosing the Right Lens for Flattering Headshots

The lens is the first key consideration (not the camera!) when it comes to capturing the human face in a flattering way. Avoid using wide-angle lenses, as they can distort proportions and result in an unflattering image. The shortest focal length I can recommend for portraits is 50mm. While 85mm is often considered THE classic focal length for portraits, I personally love the look of even longer telephoto lenses such as 105mm, 135mm, or even 200mm. These lenses are commonly used in beauty portraits because they offer a flattering representation of facial proportions.
How is that achieved?
Short telephoto lenses, typically in the 85mm to 135mm range on a full-frame camera, are flattering for headshots and portraits because they reduce distortion and create a natural, proportional representation of the face. Unlike wide-angle lenses that exaggerate features closer to the camera, such as the nose, short telephoto lenses minimize this effect. The compression effect, caused by the narrower field of view, makes objects at different distances appear closer together, subtly bringing facial features into better balance and enhancing symmetry for a more pleasing aesthetic.
Here are some of my favorite lenses across different portrait focal lengths (note that APS-C lenses will have a different effective full-frame focal length):
PRO TIP: In my experience, 135mm lenses are fantastic for individuals with more angular or thinner facial features, while those with fuller faces often benefit from the 50mm-58mm range for a more flattering result.
2. Camera: Selecting the Right Tool for the Job

While the latest high-resolution camera may seem like the answer to everything, professional headshots are typically delivered at dimensions well under 3000px on the long side. So, a super-high-res camera really isn’t necessary for stunning results. Any DSLR or mirrorless that produces an image 20 megapixels and up will be plenty.
What’s much more important is your ability to control the image’s exposure, focus, and lighting, and again, the lens choice. While I recommend that you select the camera based on the lens that produces your desired look, here are some additional considerations, especially since there are many lens manufacturers that create the same lens for different camera systems:
Key Camera Features:
Autofocus: If autofocus is important to you, Sony, Canon, and Panasonic are excellent choices. I personally love Sony for its fast, reliable autofocus, and this seems to be the consensus among professional headshot photographers who value the convenience of autofocus.
In-Body Image Stabilization (IBIS): For sharper images in lower light, Panasonic leads the market in IBIS, which helps you avoid camera shake and maintain image clarity. If you have a low powered key light, this is very useful. If you’re using a tripod with a remote trigger, this won’t matter nearly as much, but if you have a friend or family member taking your photos handheld, IBIS can prove very useful.
Color Science: For the best skin tones and flattering color, I recommend Fujifilm or Canon. Fujifilm’s color science is particularly well-suited for headshots, delivering beautiful skin tones. Their film simulations, especially “Classic Chrome,” create a very special look - vivid but not saturated - which I haven’t been able to match with other systems.
Camera Recommendations:
Panasonic S5IIX: Great IBIS and low light performance. A great option if you might want to explore videography in addition to portraits and headshots.
Canon EOS R6: Excellent autofocus, color science, and low-light performance.
Fujifilm X-T5: Compact and offers stunning image quality with unique film simulation modes. My personal camera of choice.
Sony A7 IV: Versatile, with superb dynamic range and amazing autofocus.
Pro Tip: A camera with manual control options will give you the flexibility to tweak settings and get the most out of your gear. Learn the exposure triangle of aperture, shutter speed, and ISO to take control of the exposure of your images so that you can reliably achieve correct exposure and pristine image quality.
3. Lighting: The Key to Professional Results

Lighting makes all the difference when it comes to professional headshot photography. Whether you're using natural light or studio lighting setups, knowing how to manipulate light is essential.
Natural Light: Simple and Effective
The best natural light comes from a large window with sheer curtains to soften the light. It’s perfect for beginners. If you're outside, look for areas that offer diffused sunlight, like an alleyway or the corner of a building. The key is finding "feathered light", where the sunlight is soft and directional, creating flattering shadows.
Another great natural option is backlighting during golden hour (early morning or late afternoon). This creates a beautiful rim light around the subject’s hair and body, giving a glowing effect that adds to the cinematic quality of your shot.
Studio Lighting: More Control with continuous lighting
For controlled lighting in a studio, consider a 200+ watt continuous light as your key light. My go-to light is the SmallRig RC220D, paired with a large umbrella to provide soft, even light. If you need something more powerful, the Aputure C300 is a great option that offers a lot of power and flexibility in a small package.
It’s great to have a high-quality continuous light to work with, especially for DIY headshots. I prefer continuous light (over flash) because it provides a consistent source that many people find more comfortable. Plus, it’s crucial for you, the photographer, to have a setup where "what you see is what you get." This helps you visualize the final result in real-time, which is especially helpful when working on your own.
Lighting Patterns to Consider:
A studio light on its own is harsh, very harsh! After all, it’s a bright, concentrated point-source that will create hard shadows on the face.
To make it more flattering, we need to soften it. The solution? Soft modifiers like softboxes, umbrellas, beauty dishes, and octaboxes. These tools spread the light, making it larger and softer, which creates a much more flattering and even lighting.
Once you’ve softened your light, the next step is positioning it correctly. Here are some of my favorite lighting patterns for headshots, after modifying the light to a softer source (I’m a fan of the large 7-foot Westcott umbrella with a white diffusion panel):
Clamshell Beauty Lighting: Positioned with a key light above and a fill light below (I use a eyelighter reflector for fill), this pattern creates soft, even lighting and enhances the eyes—ideal for headshots.
Rembrandt Lighting: Creates a small triangle of light on the cheek, giving a dramatic, classic portraiture look that we associate with fine art.
Butterfly Lighting: Light placed above and in front of the subject to highlight cheekbones and provide a glamorous effect.
Loop Lighting: A more versatile option, creating soft shadows next to the nose, which is flattering for most face shapes.
To add interest to your headshots, consider adding:
Hair Light: A small Aputure MC light or similar can create separation between the subject and background. It’s especially useful for dark-haired subjects or dark backgrounds. Don’t overdo the hair light if you have light colored hair.
Eyelighter Reflector: A curved reflector that bounces key light into the subject’s eyes. This adds sparkle and can minimize shadows under the eyes, making the subject appear fresh and awake. I use this in a clamshell lighting pattern, which flatters everyone.
How to Decode Studio Lighting Using Eye Reflections
Learning studio lighting doesn’t have to be complicated - you can start by reverse-engineering photos you love. One powerful trick is to analyze the reflections in the subject’s eyes, also known as catchlights. These reflections reveal the lighting setup, including the type, placement, and number of lights used. If you understand the basics of studio lighting, this method can provide everything you need to replicate the shot. Want to dive deeper into this technique? Check out my blog post where I break down how to use this approach to improve your studio photography lighting skills.
Pro Tip: For consistent, accurate color, use daylight-balanced lights (5600K) and set your camera's white balance to match. This ensures that the color temperature remains steady throughout your shoot. Avoid using auto white balance (tempting as it is!), as it makes the camera guess the lighting temperature with each shot, leading to unpredictable results and inconsistent color.
4. Backdrop: Simple and Effective Options

Your backdrop doesn’t have to be complex or expensive. Here are some good options:
Simple Options: A clean wall, seamless paper rolls in neutral colors (white, gray, or beige), or even an outdoor setting like a concrete wall or brick wall. You can also shoot in areas with leading lines (e.g., fences or archways) to add dimension.
Professional Option: Savage produces collapsible backdrops that are portable, easy to store, and deliver a smooth, professional backdrop.
5. Tripod: Ensuring Consistency

For DIY professional headshots, a tripod is crucial for maintaining consistent framing and focus. Here are a few good options:
Manfrotto Befree Camera Tripod: Reliable and sturdy for maintaining consistent angles.
Neewer Tripod with Fluid Head: A great value for the price, providing smooth pan and tilt functionality.
6. Camera Trigger: Control Without the Timer
To take your DIY headshots, you'll need a way to trigger the camera remotely. I can highly recommend using the Pixel Pro Wireless Remote, a budget-friendly option that works very reliably.
7. Editing Software: Polishing Your Images
Once you’ve taken your shots, the next step is to enhance your images through editing. Here are the tools I recommend:
Capture One: This is the software I personally use and it is a game-changer!
Adobe Photoshop: Essential for retouching, but if you need a shortcut, Evoto is an AI-based editor that offers quick fixes for common issues.
Essential Editing Tips for Professional Headshots
Here’s how I approach editing professional headshots in Adobe Photoshop:
1. Correct the Color:
Start by ensuring the color balance is accurate. True gray should look gray, and true white should look white, so skin tones appear natural and lifelike. If the white balance is off, the subject may look overly red and flushed or yellow and unhealthy. I use the color panel in Camera Raw Filter to select an area of the photo that should be color-neutral.
2. Adjust Vibrance and Contrast:
For lighter or pale skin tones, a slight boost in vibrance can enhance the image by adding saturation to less colorful areas without overwhelming the photo. Increasing contrast also naturally boosts saturation, but I recommend combining it with vibrance adjustments for more nuanced results.
3. Remove Blemishes and Stray Hairs:
Photoshop’s healing and remove tools are excellent for cleaning up small blemishes, wrinkles, and stray hairs. This step instantly polishes the image without requiring advanced techniques.
4. Smooth Skin with Frequency Separation:
Frequency separation is a powerful method for softening deep wrinkles while preserving natural skin texture. Though it may take practice to master, this technique ensures the skin looks smooth without crossing into “over-retouched” territory.
5. Use Dodging and Burning:
Think of dodging and burning as digital contouring. This technique can subtly enhance the facial structure—softly defining features for women or sharpening a man’s jawline to make it appear more masculine.
6. Work with Layers for Subtle Edits:
Apply your edits on separate Photoshop layers and feel free to make adjustments with a heavy hand initially. Then, reduce the opacity of the layer to dial back the effect. Always revisit the image with fresh eyes to ensure the changes look natural.
7. Perfect the Background:
Professional headshots require smooth, distraction-free backgrounds. Use editing tools, including but not limited to applying Gaussian Blur filter to clean up any imperfections or inconsistencies.
8. Refine Features with Liquify:
Photoshop’s Liquify filter can help make subtle adjustments to the body outline, enhance hair volume, or fine-tune facial features. Use it sparingly to maintain a natural look.
These steps aren’t exhaustive, but they highlight the most impactful edits that elevate a headshot to a professional standard. Each adjustment contributes to a polished final result that clients will appreciate.
Final Thoughts: Bring Out the Best in Your Headshot
Creating a professional DIY headshot is within reach with the right gear, techniques, and a little practice. Whether you're aiming to update your LinkedIn profile, create a fresh image for your business, or simply have a professional photo that reflects your personality, the key is in preparation and knowing how to use your tools to enhance your best features.
Now that you have the tools, it’s time to put them into practice! The best way to improve is by experimenting with these techniques, observing what works, analyzing what doesn’t, and adjusting accordingly. The more you test, the more you’ll learn.
The final piece of the puzzle is capturing the right expression. Most people want their headshot to appear friendly and approachable, but that doesn’t mean you need to smile ear to ear or force a grin. Smiling with tension (and trying to hold a smile) can result in a stiff, awkward, or even nervous look. I use simple verbal and posing cues to draw out authentic, relaxed reactions while making natural conversation, but if you're working on this yourself, try taking bursts of photos while you genuinely laugh. Invite a fun friend over, watch a comedy you enjoy, and shoot continuously to capture those natural in-between moments—when you’re not overly smiling, but still showing your true self. One of those candid shots is likely to be your most genuine and flattering headshot.
While this guide provides the tools and techniques to elevate your headshots, there’s no substitute for the experience and expertise of a professional headshot photographer. If you find yourself overwhelmed or just want to get the most polished professional result, I’m always here to help with lighting, composition, and expression coaching to ensure your headshot makes a lasting impression and captures your natural confidence.

Versatile Branding Photography: A Rebranding Session at Forest Park and WashU
Choosing the right location and timing is key to a successful branding photoshoot. In this session, we captured a variety of looks at Forest Park and Washington University in St. Louis, blending natural outdoor settings with refined architectural backdrops. The soft, warm light of golden hour added a natural glow, perfect for creating professional headshots and versatile branding images that reflect both authenticity and confidence.
In the fast-evolving world of healthcare marketing, personal branding is more important than ever. Sabrina Cox, a healthcare marketing strategist specializing in pharmaceutical sales, recently reached out for a lifestyle photoshoot to reflect her professional growth and rebranding aspirations. Our goal was to capture a variety of looks and moods that aligned with her vision—images that could be used across platforms like LinkedIn, her professional website, and beyond.

Sabrina at Art Hill, capturing her in a relaxed yet professional pose.
Collaborative Planning: Aligning Photography with Professional Goals
Every successful photoshoot starts with understanding the client's goals. During our initial consultation, Sabrina and I discussed her vision: she wanted images that would reflect both her warmth and professionalism—traits essential in healthcare marketing. Our conversation helped us decide on looks that could convey confidence, approachability, and expertise.
It was clear that versatility was a priority. Sabrina needed a variety of shots that could be used in different professional contexts. This led us to choose two St. Louis locations: Forest Park’s Art Hill and Washington University’s Danforth Campus. Both offered the flexibility we needed, from natural outdoor settings to sophisticated, architectural backdrops.
The Perfect Locations: Forest Park and WashU

Sabrina framed by the collegiate architecture of WashU’s campus, blending classical elegance with modern professionalism.
Choosing the right setting for a branding photoshoot is about more than just aesthetics—it’s about conveying the right message. Forest Park, with its expansive greenery and iconic views, provided a more relaxed, approachable atmosphere. Here, we focused on natural light and open space to create images that felt welcoming and genuine.
WashU’s Danforth Campus, on the other hand, offered a more structured, formal backdrop. The classical arches and clean, modern lines of the university’s architecture gave us the opportunity to highlight Sabrina’s strategic, forward-thinking side. The contrast between the two locations allowed us to capture a range of looks, all within a 90-minute session.
Golden Hour: Capturing Natural Light at Its Best
Timing plays a critical role in photography, and for this session, we chose the golden hour—those two hours before sunset when the light is soft and warm. Golden hour light is particularly flattering, creating a subtle glow and adding depth to portraits.
During the shoot, we used the natural light to its fullest advantage. Shooting with the sun behind Sabrina added a beautiful rim light, creating a glowing edge to her silhouette.
Golden hour is often the best time for professional headshots or lifestyle branding sessions, as it produces warm, natural tones that can elevate the mood of the images without extensive post-processing.


Golden hour light outlining Sabrina’s profile as the sun sets, showcasing the natural beauty of golden hour.
Wardrobe and Preparation: Key to a Successful Photoshoot
Sabrina’s preparation was instrumental in the success of this shoot. She came ready with multiple outfits, each tailored to the specific environments we’d be working in. From relaxed, business-casual looks for Forest Park to more formal attire for the architectural shots at WashU, her wardrobe choices allowed us to create a cohesive yet varied collection of images.
Her attention to detail extended beyond her outfits. Hair and makeup were perfectly done, which helped us move efficiently from one location to the next. The end result was a set of photos that could easily serve her professional needs for years to come, offering a versatile portfolio without the need for multiple sessions.
The Outcome: A Versatile, Professional Portfolio

A clean, polished headshot of Sabrina, perfect for LinkedIn and professional profiles.
By the end of the session, we had created a comprehensive set of images that reflected Sabrina’s professional identity from multiple angles. Whether for use on LinkedIn, her website, or other professional networks, these photos will allow her to present herself as both approachable and authoritative—qualities essential in her industry.
The combination of location, timing, and preparation resulted in a portfolio that provides her with flexibility for years to come, as though we had done multiple photoshoots in one.
Final Thoughts: The Importance of Thoughtful Photography in Personal Branding
Photography for personal branding is about more than just taking pictures—it’s about telling a story that resonates with your professional identity. Sabrina’s session was a great example of how choosing the right locations, timing, and preparation can result in a versatile portfolio that reflects both your personality and professional goals.
For professionals looking to rebrand or refresh their image, thoughtful planning and attention to detail make all the difference. Whether you’re in healthcare, marketing, or any other field, investing in a customized photoshoot can help you elevate your brand and stand out in today’s competitive landscape.
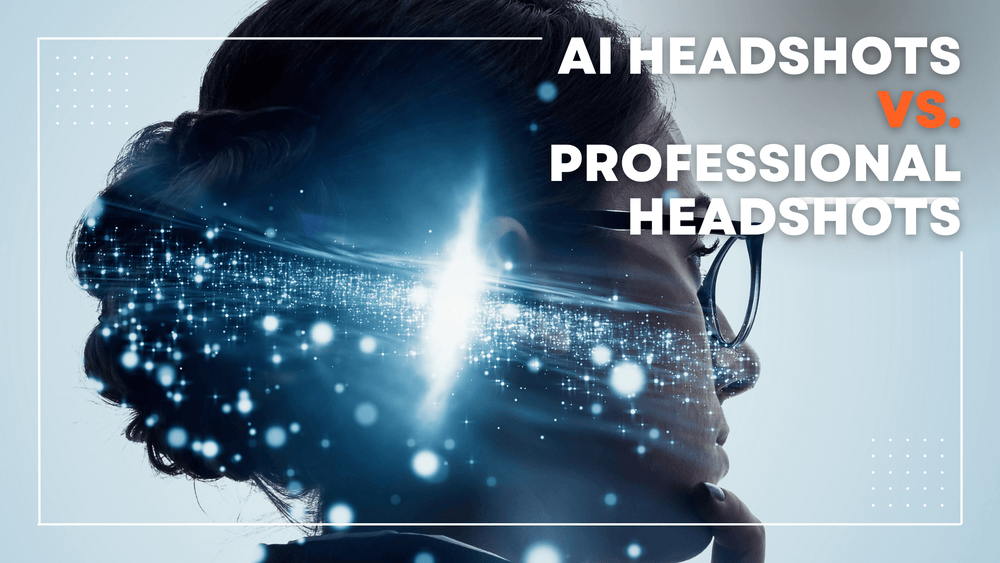
AI Headshots vs. Professional Headshots: The Smart Choice for Marketing Teams
At first, the thought of AI-generated headshots sounds convenient and budget-friendly. But here's what happens in practice: AI requires each team member to upload 15-25 photos, a task that involves constant reminders, emails, and follow-ups.
As a marketing director, getting professional headshots for your team can feel like one more item on an already packed to-do list. The rise of AI headshot generators promises a shortcut, but there’s a hidden cost when you go that route. Let's dive into the realities of AI-generated headshots versus the benefits of hiring a professional photographer, and why making the right choice saves you time, money, and sanity.
The AI Headshot Hassle: More Work Than You Think
At first, the thought of AI-generated headshots sounds convenient and budget-friendly. But here's what happens in practice: AI requires each team member to upload 15-25 photos, a task that involves constant reminders, emails, and follow-ups. As the person managing this project, you're stuck playing administrator, chasing down images and dealing with missed deadlines. Once the photos are finally in, AI-generated headshots often leave employees saying, “That doesn’t look like me!” Now, you’ve wasted time coordinating for mediocre results.
Even worse, the final product lacks consistency. Employees end up with varying lighting, angles, and sometimes unnatural enhancements—none of which reflect your company’s professional image. Imagine the frustration when you realize that, after all this work, the headshots don’t align, creating a disjointed look on your website or marketing materials. Suddenly, the “quick” AI solution has ballooned into an inefficient, time-consuming task, and you’re no closer to the polished results you envisioned.
The Professional Headshot Advantage: We Do the Work For You
When you choose Henry David Photography, you hand over the coordination to us. Our process is designed to save you hours of admin work and to ensure the best possible result. We handle everything from scheduling your team to the final retouching of images.
Seamless Scheduling: Using our easy-to-use online system, each team member books their session at a convenient time. No more chasing people or organizing back-and-forth emails. We come to your office, or they visit our studio—whatever works for your team.
On-Site Image Review: During the session, each employee sees their images in real-time, selecting their favorite immediately. No post-shoot approvals are needed. This not only speeds up the process but ensures each person is happy with their headshot.
Consistency Across the Board: We create a uniform, professional style that reflects your brand. Every headshot matches, whether it’s for your leadership team, sales team, or support staff, making your company’s marketing look polished and cohesive.
Why Quality Matters: Trust, Authority, and Your Brand Image
In today’s digital world, your team’s headshots are often the first impression clients and potential partners see. A professional headshot isn’t just about looking good—it’s about presenting your team as confident, approachable, and unified. When headshots vary in quality or look awkward due to AI enhancements, it detracts from your brand’s trustworthiness.
Henry David Photography ensures your team looks professional and authentic, allowing you to showcase your company’s people in the best light. Studies show that businesses with cohesive, high-quality imagery experience higher engagement and build stronger relationships with their customers. So, while AI may seem like the cheaper option upfront, the long-term value of professional headshots more than makes up for the difference.
Save Time, Save Money, and Get it Right the First Time
Choosing AI headshots means hidden costs—time wasted on administration, subpar quality, and eventual rework. With Henry David Photography, you get it right the first time, saving both time and money. You won’t be chasing team members, fixing errors, or dealing with complaints about inaccurate photos. Instead, we provide:
Expert Guidance: We know how to capture each person’s best angles and expressions, ensuring their headshot looks natural and authentic.
Quick Turnaround: Your polished, retouched photos are delivered within two business days, ready for immediate use.
Stress-Free Coordination: We take the lead on managing your headshot session, from booking to final delivery. No more endless coordination.
Stop wasting time and get the polished, professional headshots your team deserves. Let’s make your life easier. Contact Henry David Photography to schedule your company’s headshot session today!

Viltrox 75mm f/1.2 vs. Fujinon 90mm f/2: A Portrait Photographer’s Perspective
Enter the Viltrox 75mm f/1.2. Although I was initially skeptical, this recently released “Pro” lens has become my go-to lens, particularly in challenging shooting environments. Here's a closer look at why the Viltrox 75mm has edged out the 90mm f/2 in my day-to-day work, and why both lenses still hold a place in my photography arsenal.
When it comes to headshot photography, the choice of lens has a huge impact the quality and character of the final image. The lens is even more important than the camera body—after all, as the saying goes, "Date your camera body, marry your lenses."
Many portrait and headshot photographers love to go with a “nifty fifty” or something close to that range, and the Fuji 56mm f/1.2 is a very popular choice for good reason. Although it is a fantastic lens, my secret weapon for stunning headshots has been the Fujinon 90mm f/2—a lens that has consistently delivered stunning results.
Enter the Viltrox 75mm f/1.2. Although I was initially skeptical, this recently released “Pro” lens has become my go-to lens, particularly in challenging shooting environments. Here's a closer look at why the Viltrox 75mm has edged out the 90mm f/2 in my day-to-day work, and why both lenses still hold a place in my photography arsenal.
The Challenge of Small Spaces: Why Focal Length Matters
As a headshot photographer, I often find myself working in less-than-ideal conditions—conference rooms, offices, or even small meeting spaces. In these environments, the focal length of a lens becomes crucial.
The longer the focal length, the more you need to step back from your subject to fit them comfortably in the frame. With the Fujinon 90mm f/2, I sometimes found myself pressed up against a wall, struggling to capture the shot I envisioned.
Since I shoot on the Fujifilm X system, which uses an APS-C crop sensor, the effective focal length of these lenses is even longer. On a crop sensor, the focal length is multiplied by 1.5 times, so the 90mm f/2 behaves like a 135mm lens on a full-frame camera, and the 75mm f/1.2 acts like a 112.5mm lens. This crop factor further emphasizes the need for extra room when using longer focal lengths, making the Viltrox 75mm's slightly wider angle of view even more valuable in tight spaces.
The Viltrox 75mm f/1.2, with its full-frame equivalent focal length of 112.5mm, offers a slightly shorter reach compared to the 135mm equivalent of the Fujinon 90mm. This difference might seem minor on paper—just 22.5mm—but in practice, it gives me the crucial extra space I need to compose my shots without feeling cramped. The 75mm still delivers the compression effect I love that is so flattering for capturing faces, but with the added benefit of being more adaptable to confined areas.
Image Quality: The Art of Sharpness, Bokeh, and Rendering
When we talk about image quality in photography, we’re referring to a combination of factors like sharpness, bokeh, and rendering.
Sharpness is all about how well the lens captures fine details. The Fujinon 90mm f/2 has a well-deserved reputation for producing incredibly sharp images, with every strand of hair and every pore rendered in crisp detail.
Bokeh refers to the quality of the out-of-focus areas in a photo. A lens with good bokeh creates a smooth, pleasing blur in the background, which helps to make the subject stand out.
Rendering is a broader term that encompasses how a lens handles colors, contrast, and the overall look and feel of the image.
For years, the Fujinon 90mm f/2 was unmatched in these areas. It’s a lens that produces images with a certain "magic"—a combination of sharpness, beautiful bokeh, and a distinct rendering style that makes portraits truly stand out. I was initially skeptical that the Viltrox 75mm f/1.2 could compete on the same level.
To my surprise, the Viltrox 75mm delivers image quality that rivals the 90mm. The sharpness is excellent, capturing fine details with precision. The bokeh is creamy and smooth, ensuring that the subject is always the focal point of the image. And the overall rendering is stunning, with vibrant colors and contrast that give my headshots a professional and polished look. There’s no noticeable sacrifice in image quality when switching to the Viltrox 75mm.
Build Quality: A Lens Designed to Last
One of the most impressive aspects of the Viltrox 75mm f/1.2 is its build quality. This new “Pro” line of Viltrox lenses, including the 75mm, offers a fit and finish that rivals the native Fuji lenses. The lens feels solid and durable in hand, with a metal construction that exudes quality. It's clear that Viltrox is investing in creating lenses that will stand the test of time and withstand long-term hands-on use. This attention to detail in the design and construction makes the Viltrox 75mm not only a powerful tool for capturing stunning images but also a reliable piece of equipment that I trust in my professional work.
Autofocus: Speed and Precision
Autofocus is a critical feature in any lens, especially for a portrait photographer. When capturing headshots, it’s essential that the lens locks onto the subject’s eyes quickly and accurately, as even the slightest delay or misfocus can result in a less-than-perfect shot.
The Fujinon 90mm f/2 is known for its linear autofocus system, which is one of the fastest and most reliable in Fujifilm’s lineup. It’s a lens that has never let me down in fast-paced environments, where I need to capture a fleeting expression or subtle movement.
The Viltrox 75mm f/1.2, while not boasting the same linear autofocus system, is no slouch in this department. Its autofocus is quick and responsive, allowing me to capture sharp images with confidence. In most scenarios, the difference in autofocus speed between the two lenses is negligible, making the Viltrox 75mm a solid performer in both studio and on-location shoots.
Where the Fujinon 90mm f/2 Still Shines
Despite the advantages of the Viltrox 75mm f/1.2, the Fujinon 90mm f/2 isn’t leaving my kit anytime soon. There are certain situations where the 90mm still reigns supreme, particularly in outdoor natural light photography.
In outdoor settings, where I have more room to move around, the longer focal length of the 90mm becomes an asset rather than a limitation. It allows me to stand farther back from my subject, creating a sense of distance that enhances the natural environment in the frame. Additionally, the 90mm f/2 offers a unique rendering quality—a slight coolness in color temperature and a level of microcontrast detail that adds depth and texture to the image. This "je ne sais quoi" is something I haven’t found in any other lens, and it’s why the 90mm remains my go-to for certain outdoor shoots.

Excellent sharpness and background separation with the Fuji 90mm f/2, shot on Fujifilm X-T5
Conclusion: The New Everyday Favorite
For day-to-day headshot photography, particularly in small, confined spaces, the Viltrox 75mm f/1.2 has become my new favorite lens. It provides the perfect focal length for maneuvering in tight environments while still delivering the compression and image quality that make headshots stand out. The autofocus is reliable, the rendering is beautiful, and the overall performance is on par with the legendary Fujinon 90mm f/2. On top of that, the build quality of the Viltrox 75mm is outstanding, making it a durable and trustworthy addition to my kit.
However, the 90mm f/2 isn’t going anywhere. It still has a special place in my kit for those outdoor shoots where its longer reach and unique rendering qualities shine. In the end, both lenses have their strengths, and having them both allows me to tackle a wide range of photographic challenges with confidence. But for everyday use, the Viltrox 75mm f/1.2 has become my go-to lens, proving that sometimes, a slight change in focal length can make all the difference.


Image quality samples, shot with the excellent Viltrox 75mm f/1.2 Pro on Fuji X-T5
Stay tuned for my next blog post, where I'll dive into the practical differences between using the Fuji X-T4 and X-T5. As a long-time user of both cameras, I’ll share insights on how they stack up in real-world shooting scenarios.
Product Links:

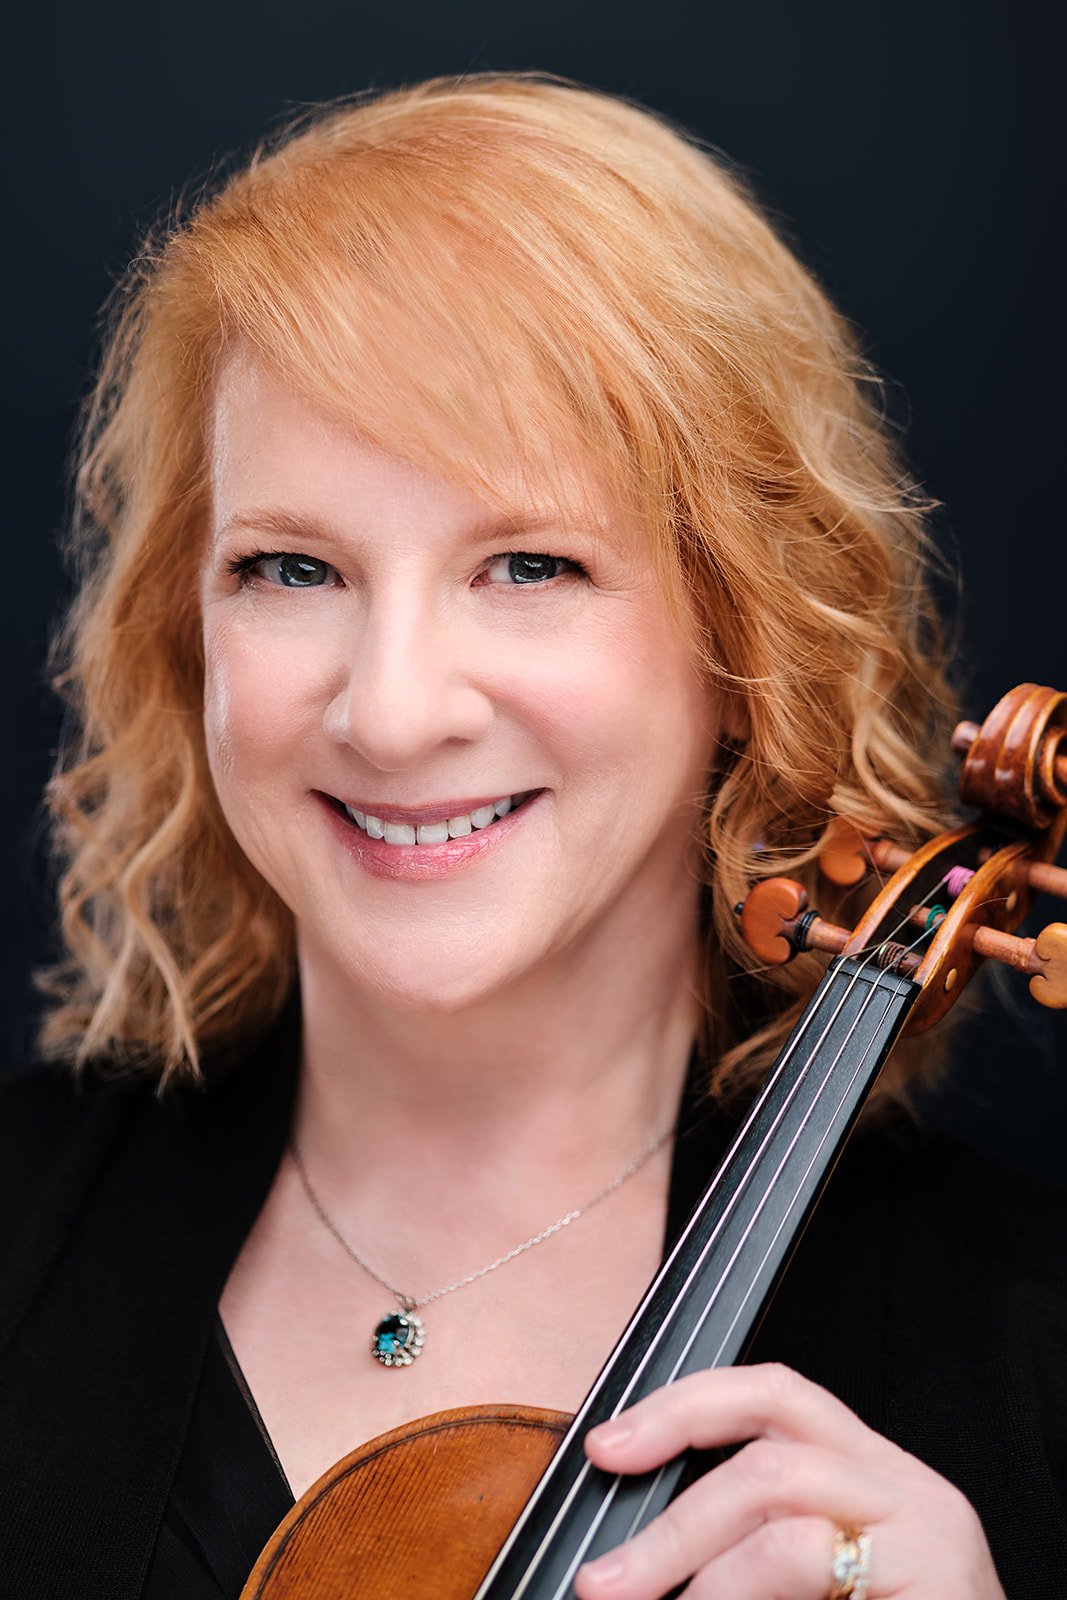
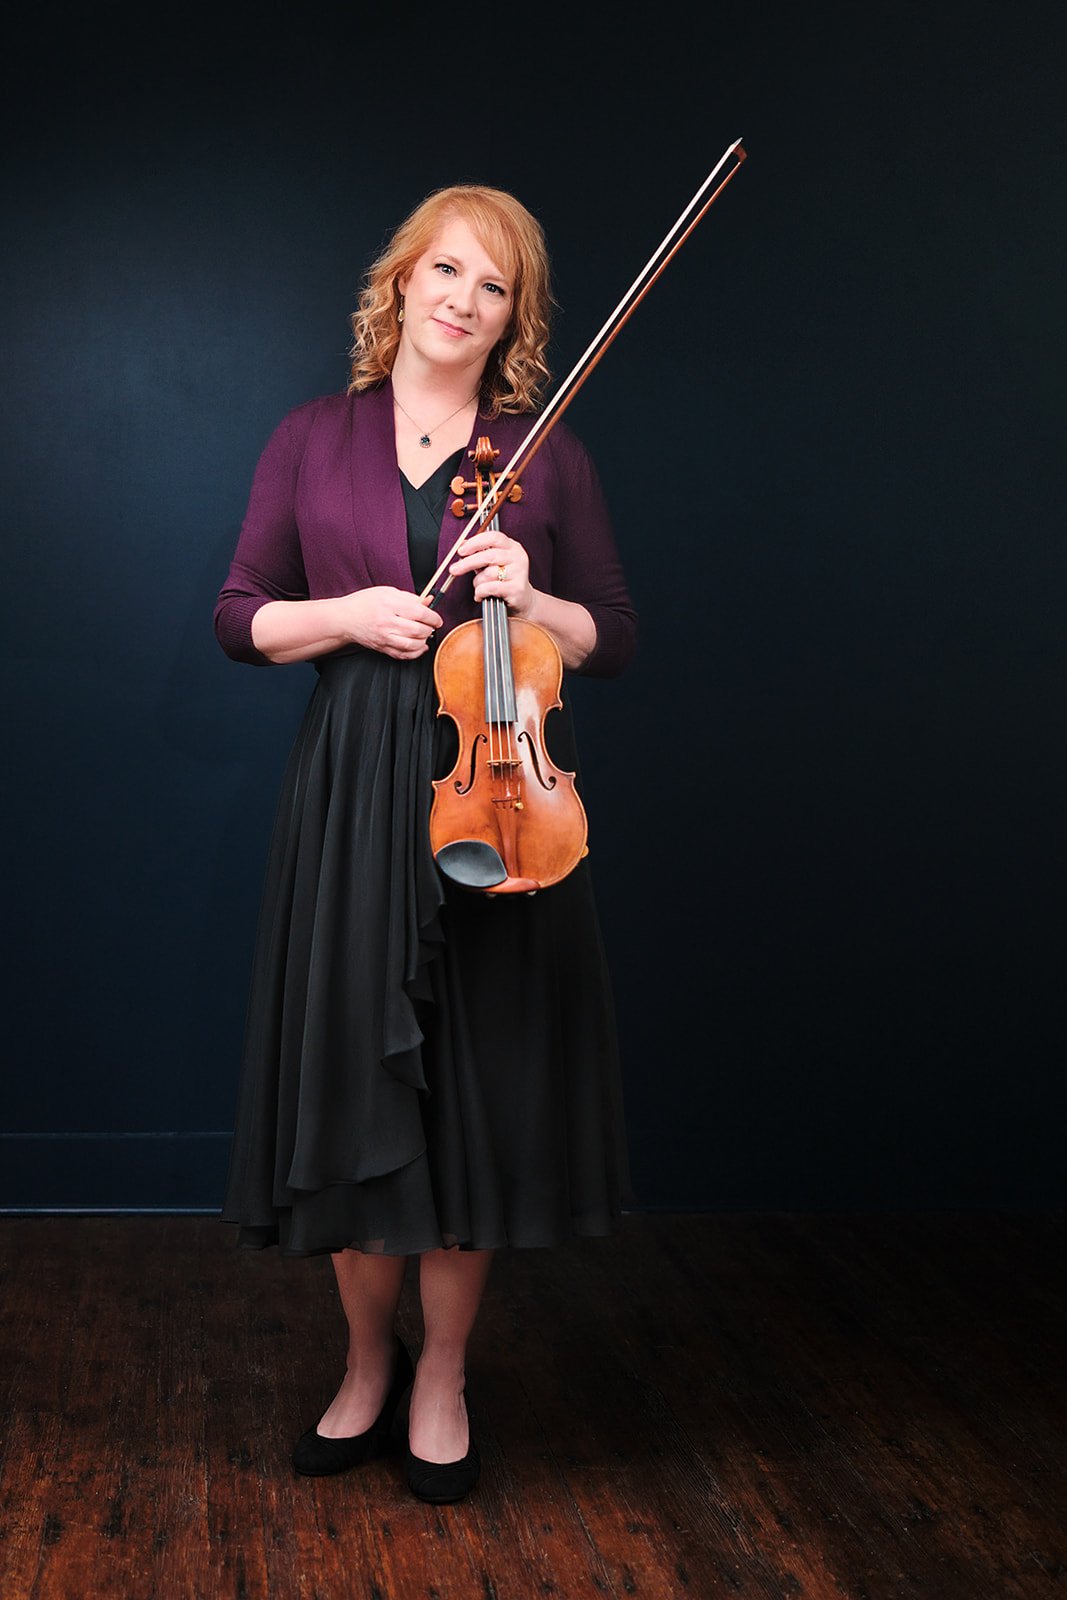
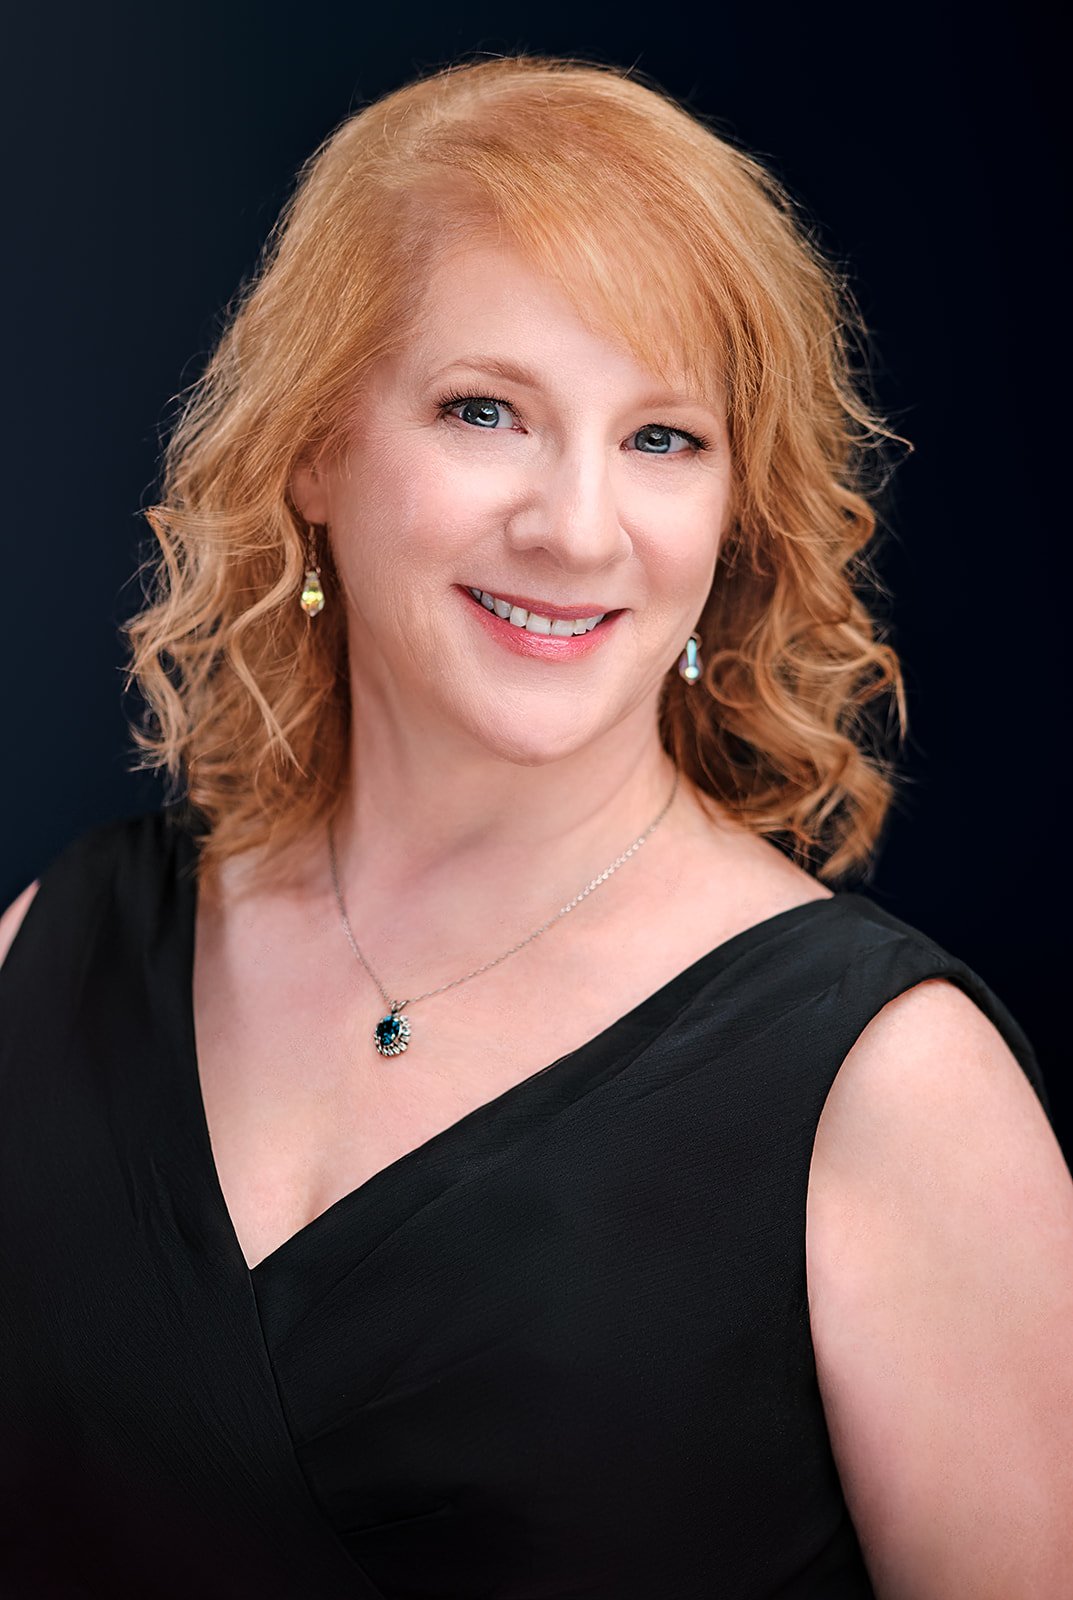
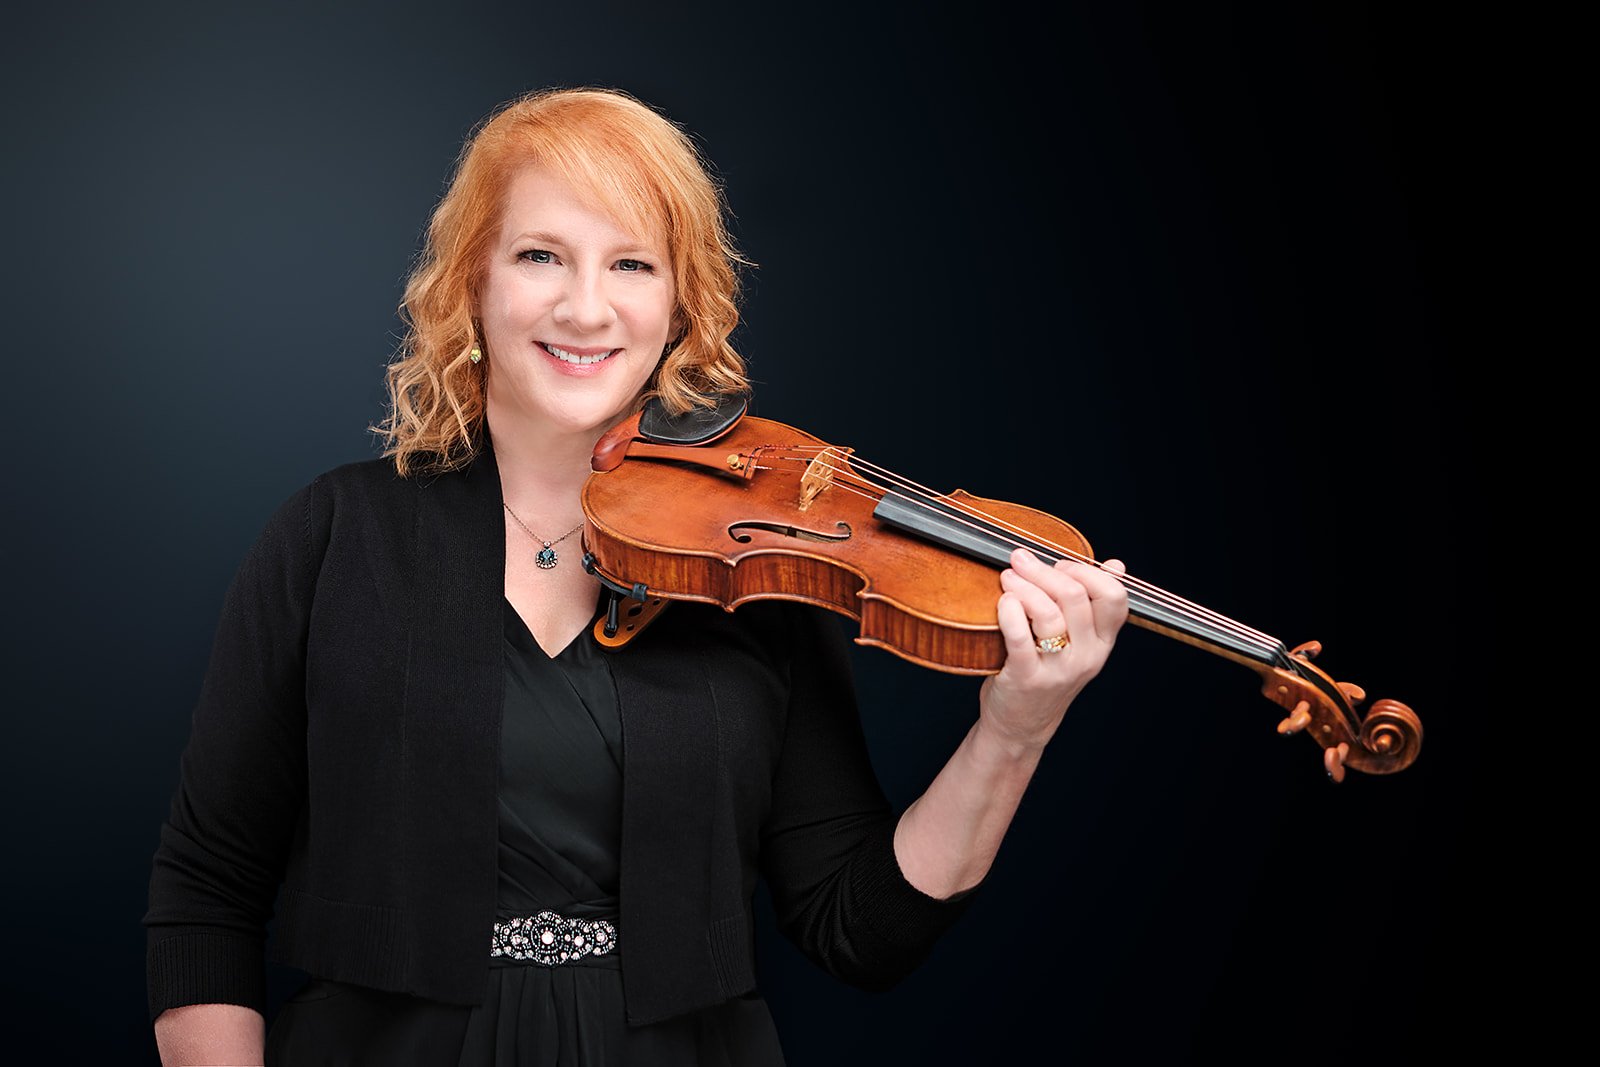
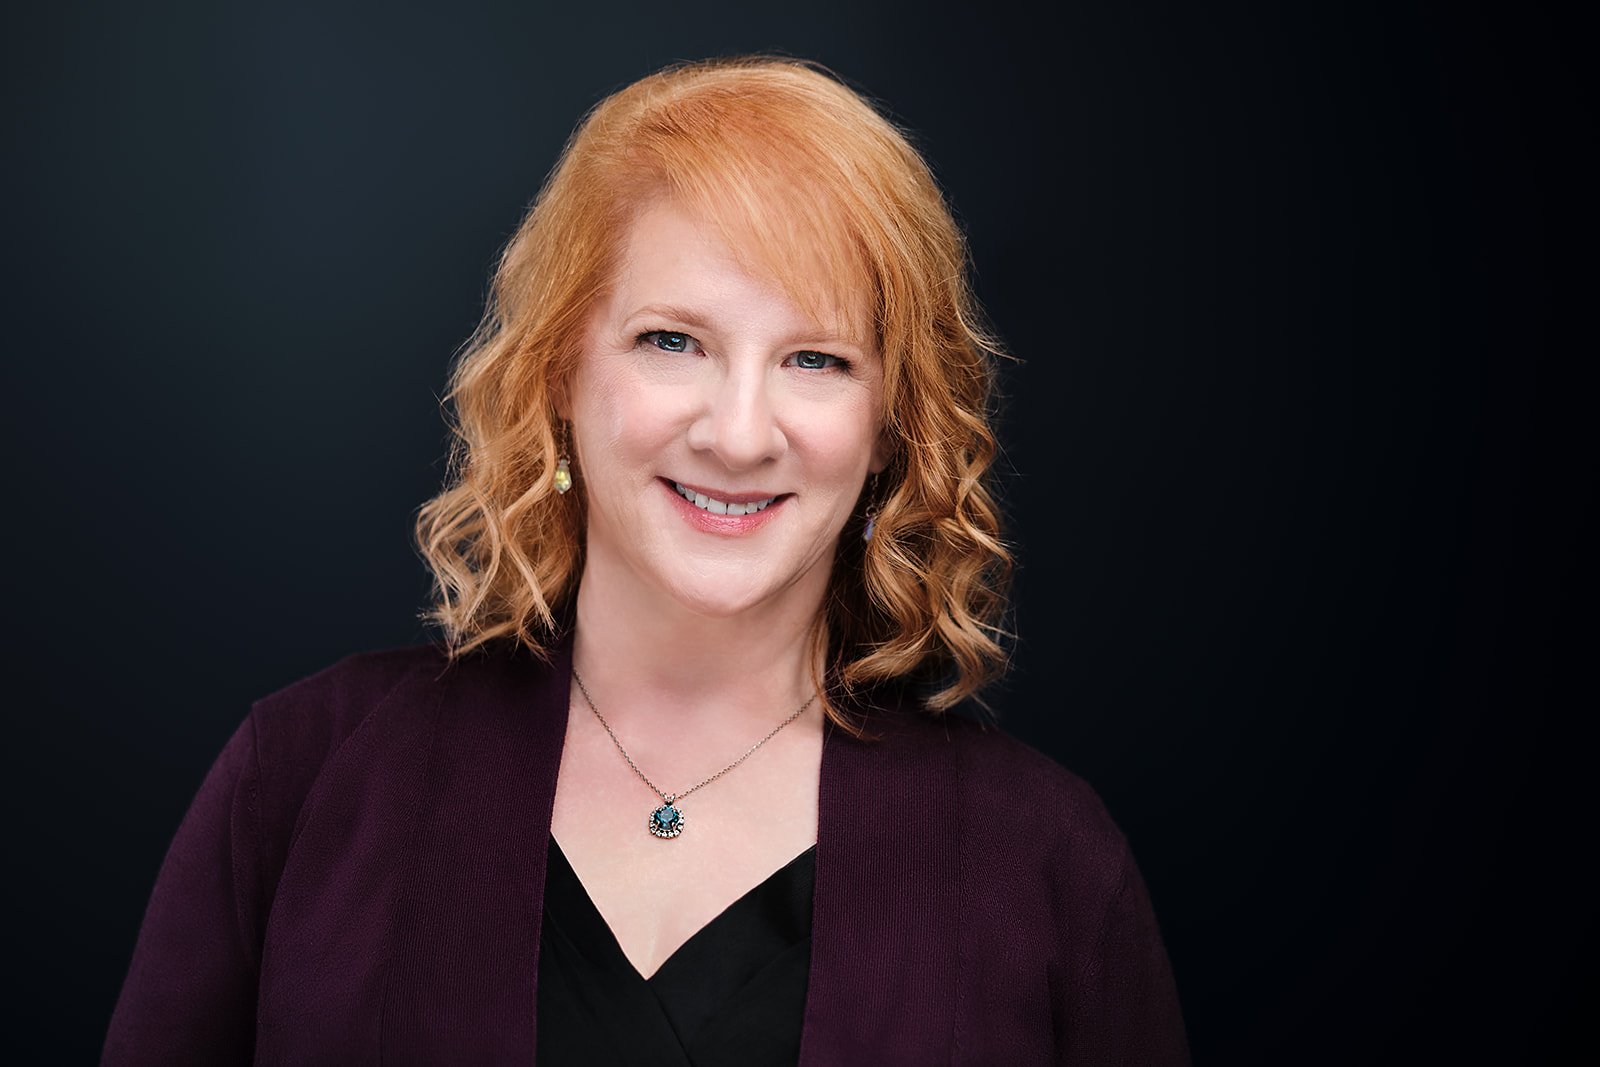
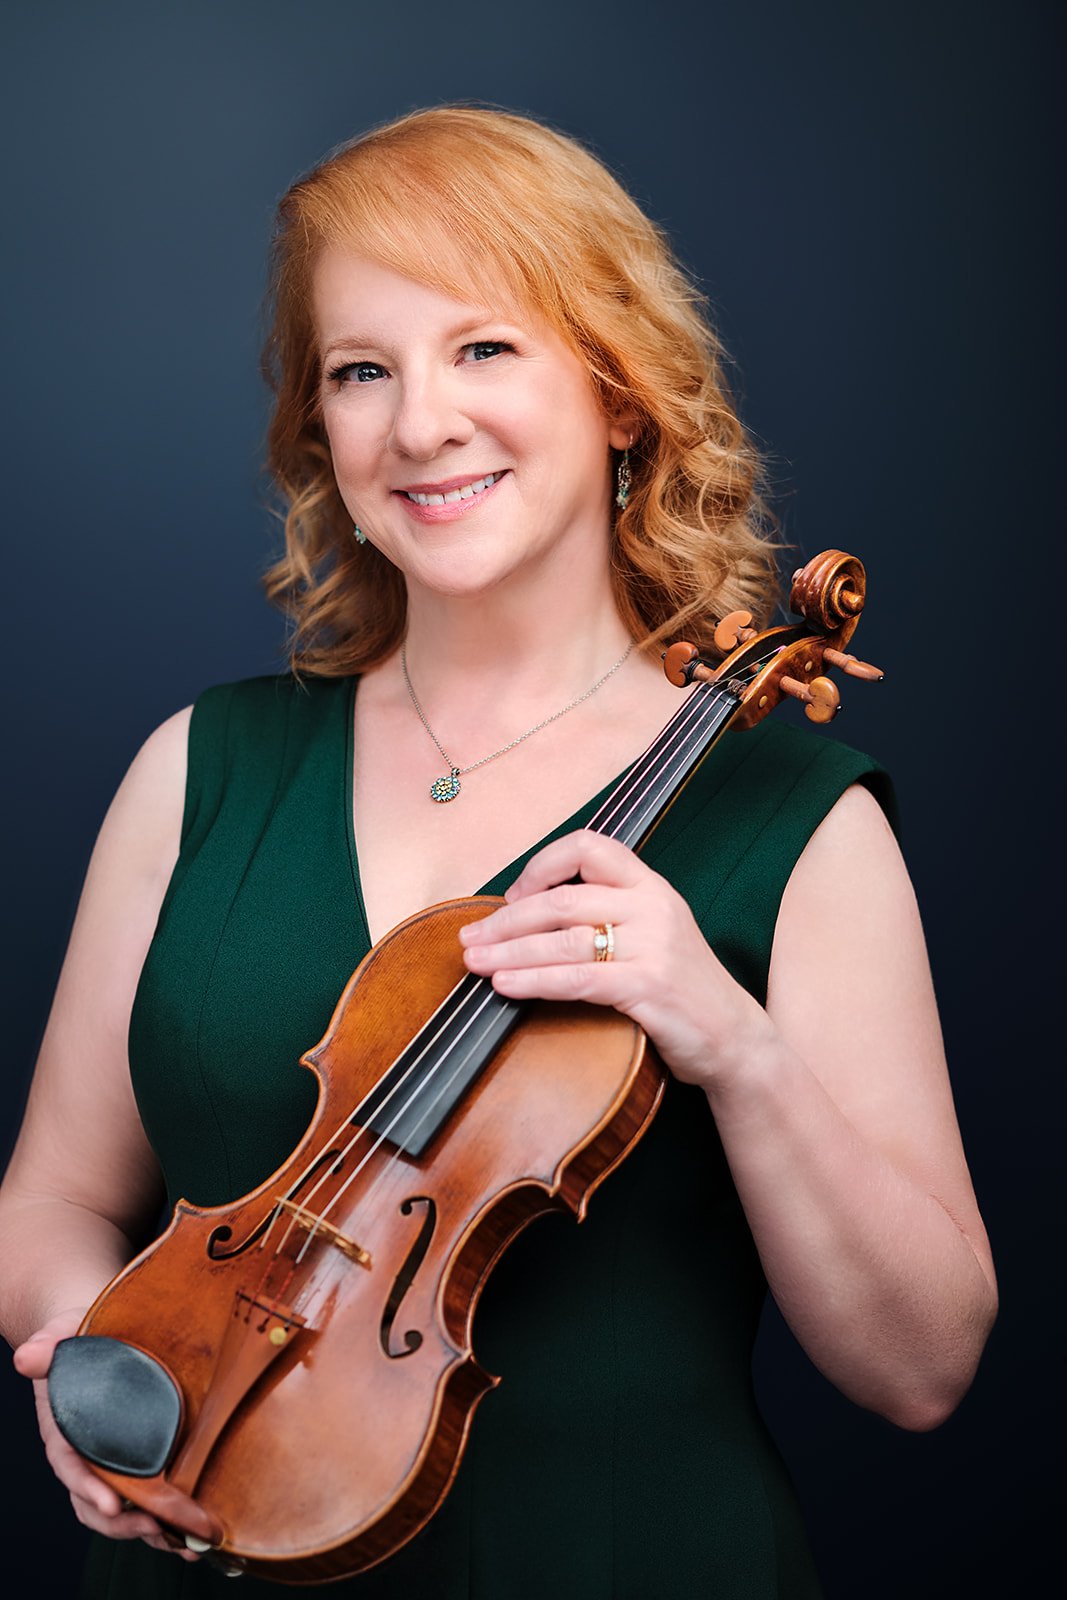
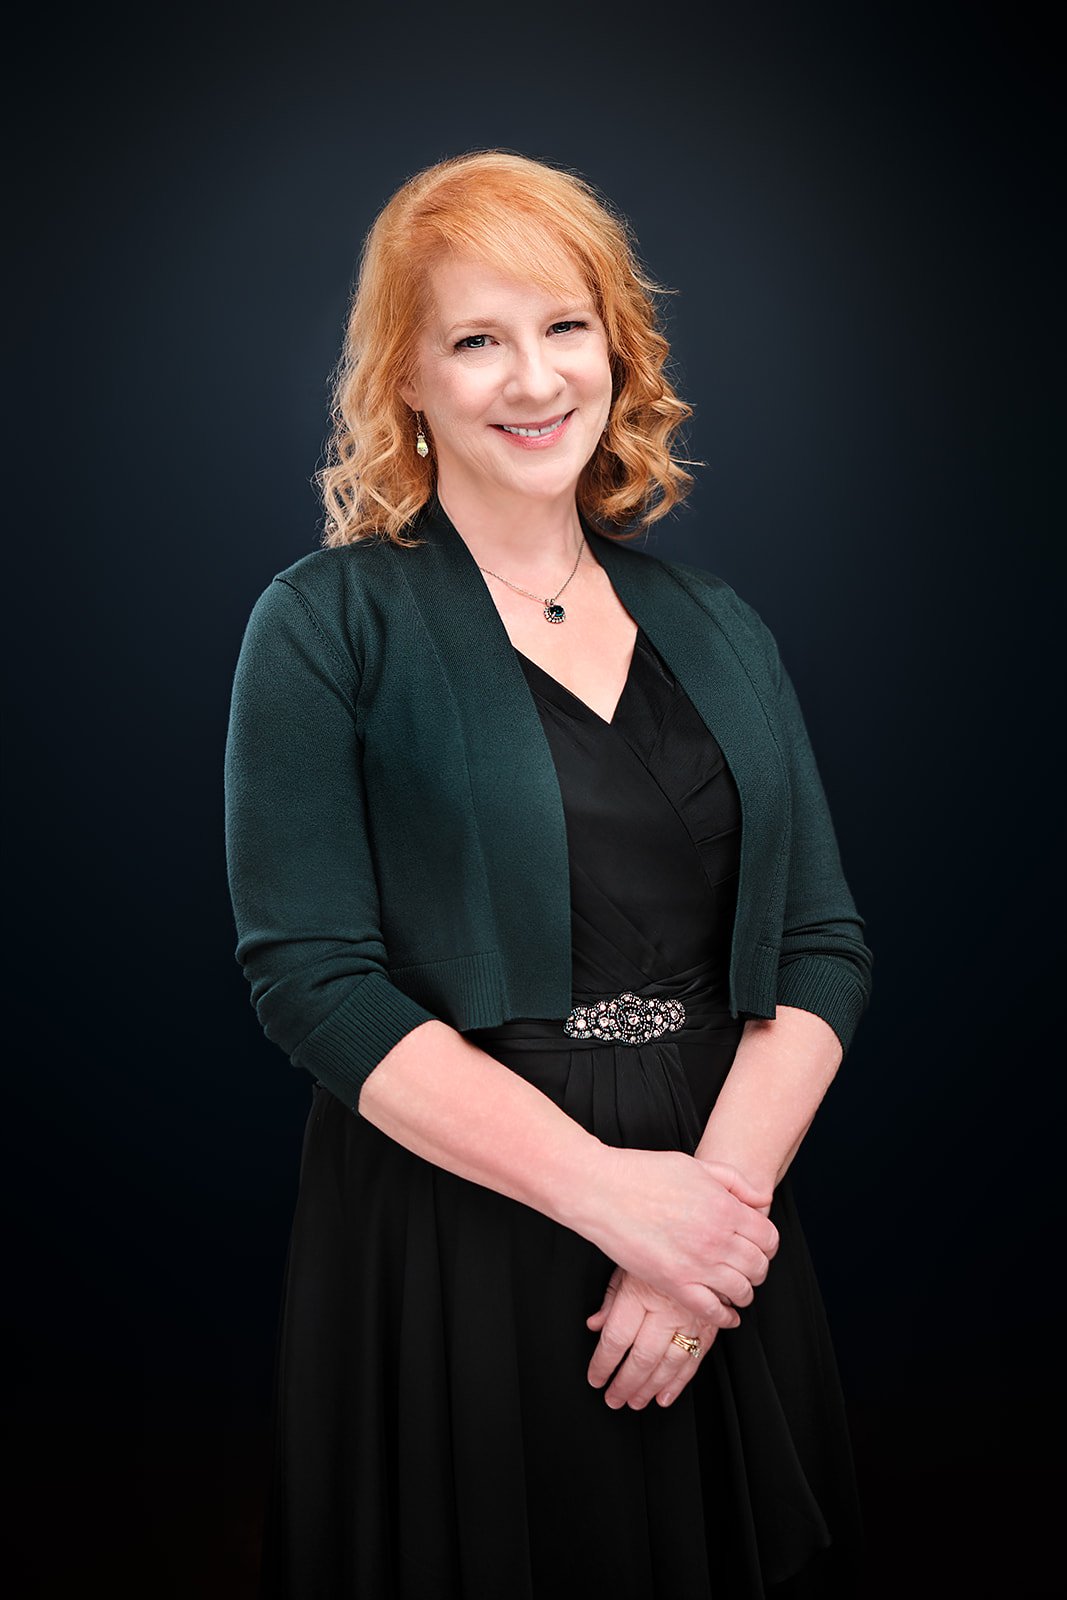
Portrait of an Artist: Professional Photography for Violinist and Suzuki Teacher Trainer Susan McDonald
Professional photography for Susan McDonald was a collaborative journey that was about more than capturing pretty photos: it was about unraveling the layers of a talented musician, violinist, and experienced pedagogue.
I recently had the pleasure of working with Susan McDonald, an incredibly talented violinist, teacher, and passionate Suzuki teacher trainer.
It was a collaborative journey that was about more than capturing pretty photos: it was about unraveling the layers of a talented musician, violinist, and experienced pedagogue.

Artist Portrait of Susan McDonald, photo by Henry David Photography
Photoshoot Planning
Although initially camera shy, Susan's innate love for music became the focal point of our work together.
When it comes to artist profiles and headshots, capturing the essence of the individual is crucial. This was Susan’s first professional photoshoot and she came in feeling more than a little nervous.
Feeling apprehensive about having your photos taken is completely normal. Part of my job as a professional photographer is to help my clients get feeling comfortable before we start taking photos.
Getting to know each other as fellow artists helped Susan relax, and our love for the musical arts set the tone for a relaxed photoshoot. This process started even before we met in the studio. Susan is a great communicator, and after she reached out by email we started to discuss what she was hoping to get out of the session.
She showed me references of musician portraits she liked, sent me a few selfies, and shared with me the headshots she was currently using. I appreciated that she was willing to openly share her insecurities and concerns, because it allowed us to be mindful of these aspects as we planned our photoshoot.
We spoke in detail on how we could improve upon her previous headshots at her session, what she could expect from the editing process that would come after the photoshoot, and how we would best collaboratively execute on her vision, going from concept, to studio, and finally into post-production.
Professional Hair & Makeup
Many people worry about looking too glamorous or not like themselves when they hire a professional makeup artist, and rightly so! Finding a balance between looking your best and still looking like you is really important for professional headshots. It's okay to look a better than usual, but it's not good if you look completely different.
Knowing Susan had this concern, I suggested she work with a makeup artist who understands the importance of keeping things looking authentic.
That's when Alexis B from AB Beauty STL came in. She did a great job with Susan's makeup and hair, making sure it looked just right and stayed true to Susan's genuine self.
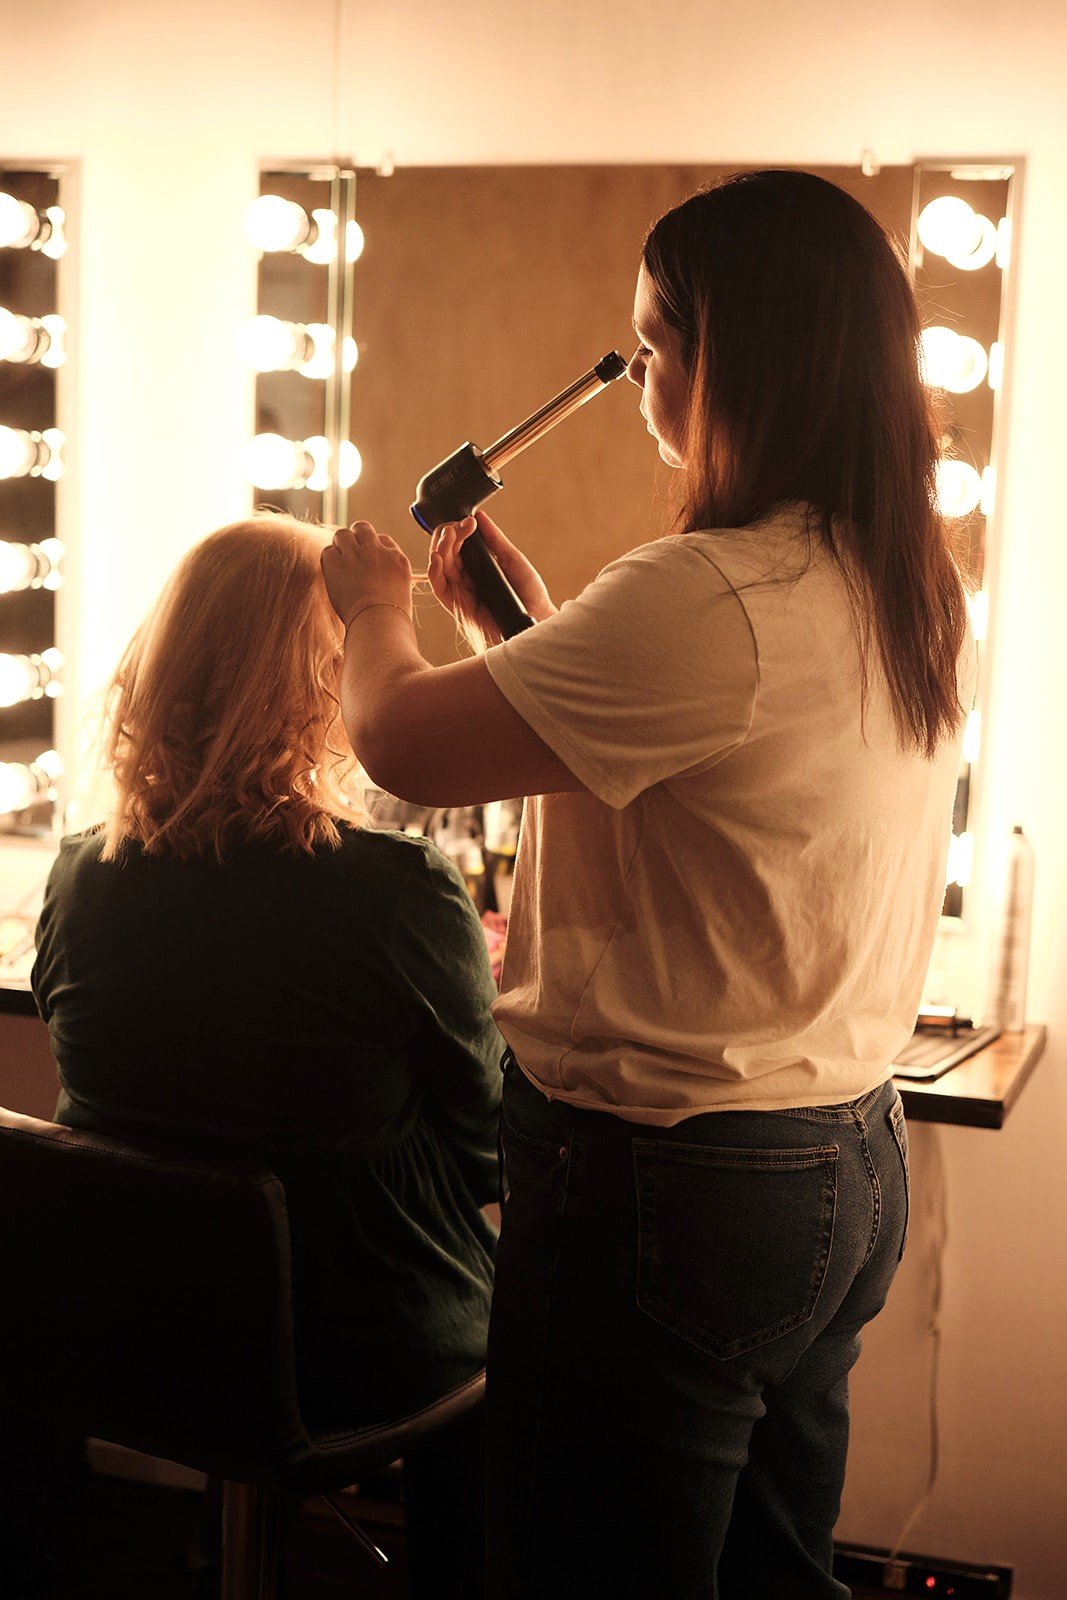
Makeup Artist and Stylist Alexis B of AB Beauty STL, putting the final touches on Susan’s hair
Studio Photography
Moving in the studio, we took the time to work together, ensuring that every detail was perfect. We knew how important it was to create timeless images that Susan could use to promote herself as a musician and music educator.
Musician photography requires a unique approach. It's about capturing the artist's passion and talent in a visual medium. As a photographer, my goal was to showcase Susan's skills and dedication to her craft through the images we created together. As a photographer with a classical music background myself, I understood her audience and the messaging that would be resonate best with them.
Susan wanted to be sure we’d capture a range of photos and poses for diverse use cases. Our must-have list included a professional headshot, shots with and without the violin, a performance snapshot, and a full-body shot. We also wanted to capture a variety of vibrant outfit options.
“The collaborative conversation Susan and I shared allowed me to have a thorough understanding of her vision and helped us craft great results.”
Editing and Retouching
Reviewing Susan’s photos, I selected the shots that had the best expressions, those with a sparkle and drama that jumped off the screen and communicated something emotional with the viewer. I wanted to pick only the photos that would leave a lasting impression. A great photo isn’t just about high resolution and good lighting, it needs to connect with the viewer and tell a story about the subject.
Susan was delighted with her photos, even with out any editing. She then chose her favorite shots from among her proofing gallery and I went to work on editing.
We went back and forth with a few rounds of editing until we got each image perfect.
Communication is key: The collaborative conversation Susan and I shared allowed me to have a thorough understanding of her vision and helped us craft great results.
Our multiple rounds of editing allowed us to retouch the photographs to perfection, enhancing her features while keeping the authenticity intact.
Working with Susan McDonald was very artistically rewarding: we were able to capture her natural radiance and essence as a musician and create captivating, timeless images that will undoubtedly help her in her career as a violinist, teacher, and Suzuki teacher trainer.
Investing in professional photography is investing in your future as an artist. A well-crafted image has the power to convey your artistry and professionalism before you even step foot on stage. Take the time to find a photographer who can help bring your vision to life and create compelling images that represent you and your talent.

ERAS Medical Residency Headshots: Requirements and Pro Tips for Success
When Amelia Mangan, a dedicated 4th-year medical student at Saint Louis University, approached me for assistance with her ERAS® headshots, she recognized the importance of a successful headshot in giving her an edge with her Plastic Surgery residency application.
She was explicitly told that if there were two equally qualified candidates, the quality of the headshot would be the determining factor in selecting the winning candidate.
ERAS® Headshot Photos for Medical Residency Applicants
Technical Requirements:
According to ERAS® your photo file needs to be no larger than 150kb, with dimensions of 2.5 inches x 3.5 inches, and a resolution of 150dpi.
It's essential that the image is a recent, full-color photograph snapped within the last six months. The head and shoulders should be in the frame with a light gray or plain white or and uploaded in JPEG format.
Why is it important to get your ERAS® photo correct?

ERAS® Headshot for Medical Residency Applicant
When Amelia Mangan, a dedicated 4th-year medical student at Saint Louis University, approached me for assistance with her ERAS® headshots, she recognized the importance of a successful headshot in giving her an edge with her Plastic Surgery residency application.
She was explicitly told that if there were two equally qualified candidates, the quality of the headshot would be the determining factor in selecting the winning candidate.
Understanding that her headshot could have considerable influence over the evaluation of her applications, she sought out professional assistance to get the highest quality results.
To set herself apart from the competition, she aimed for a headshot that not only captured her unique personality but also radiated professionalism and poise.
When Is the Best Time to Take your Medical Residency Headshot?
Residency programs review applications in October, it’s best that you take your ERAS® photos well in advance of the deadline.
Enlisting Professional Help
To craft a successful ERAS® headshot, it’s important to enlist the help of a professional photographer. Look for a headshot photographer with the experience, equipment and skills needed to guarantee a high-quality image that's perfectly lit and in sharp focus. Come to their studio dressed professionally with a warm and inviting smile, and you will be sure to leave a positive impression on residency program directors.
If you are in the St. Louis area, contact Henry David Photography to schedule your ERAS® headshot session.
Should I have my ERAS® photo retouched?
Absolutely. Retouching is crucial to any successful headshot, as long as it is not overdone. ERAS® encourages that your headshot photo be professionally retouched, as it shows that you take your presentation seriously. Editing and retouching refines your presentation by addressing common touch-ups, including but not limited to: blemish removal, skin smoothing, removing flyaway hairs, color correction, teeth whitening, and more.

First Impressions and the Importance of a Great Headshot
"First impressions are lasting" understates the actual case. The first impression, with startling frequency, is also the final decision.
"First impressions are lasting" understates the actual case. The first impression, with startling frequency, is also the final decision.
-You, Inc.: The Art of Selling Yourself, by Harry Beckwith and Christine K. Clifford
A 2006 study by Janine Willis and Alexander Todorov showed that people make a judgement about a person's likeability, trustworthiness, and competence, in one-tenth of a second. Furthermore, their research confirms that this first impression does not change with time.
In 2016, Vivian Zayas, professor of psychology at Cornell University, and her colleagues found that first impressions were formed simply from looking at a photograph predicted how people felt and thought about the person after a live interaction that took place one month to six months later.
This is an incredibly powerful argument for making sure your headshots are the best they can possibly be.

Headshot Impression Test on Photofeeler.com
I recently discovered Photofeeler.com and I think it’s a fun way to test out what kind of impression your headshot is making. Photofeeler crowdsources votes from real people who will score the photo on metrics like competency, likeability, and influence. Disclaimer: I’m not in any way associated with this service, but I do think it’s a useful tool.
Written by Henry David, St. Louis Headshot and Portrait Photographer

Studio Lighting and Mood
Simple but powerful, small changes in studio lighting can dramatically change the mood of a portrait.

Small changes in studio lighting can dramatically change the mood of a portrait.
I recently had the pleasure of working with author Dr. Tahir Rahman, Associate Professor of Psychiatry at Washington University in St. Louis.
Clamshell Lighting for Commercial Portraiture
Oxford University Press needed an approachable, commercial looking headshot to promote Dr. Rahman’s newest book.
We used a clamshell setup with a soft key light source above the subject’s face (the top part of the “clamshell”), and a broadly curved reflector for the lower part of the shell.
The key light above provides flattering wrap-around light, while the bottom fills in the shadows and smooths out the skin. I often find that adding a hair light opposite the key light adds depth and provides subtle background separation:

Commercial Portrait with Clamshell Lighting (Angler 48 inch BoomBox + Westcott Eyelighter + Gridded Hair Light)
Single Light Dramatic Portrait
By removing the reflector and hair light, we are left with just the key light. Moving the key light to one side of the subject’s face creates a classic Rembrandt lighting setup with deep shadows cast on the other side of the face. Removing a few light modifiers and changing the placement of our key light creates a profoundly different mood:

Single Light Dramatic Portrait (Angler 48 Octobox, feathered)
Post-Production
Lighting is paramount to controlling the mood of a portrait, but we can go one step further with editing and retouching in Photoshop. Black and White conversion, exposure reduction, contrast rebalancing, and detail enhancing all work together to add a sense of mystery and deepen the drama of the portrait:
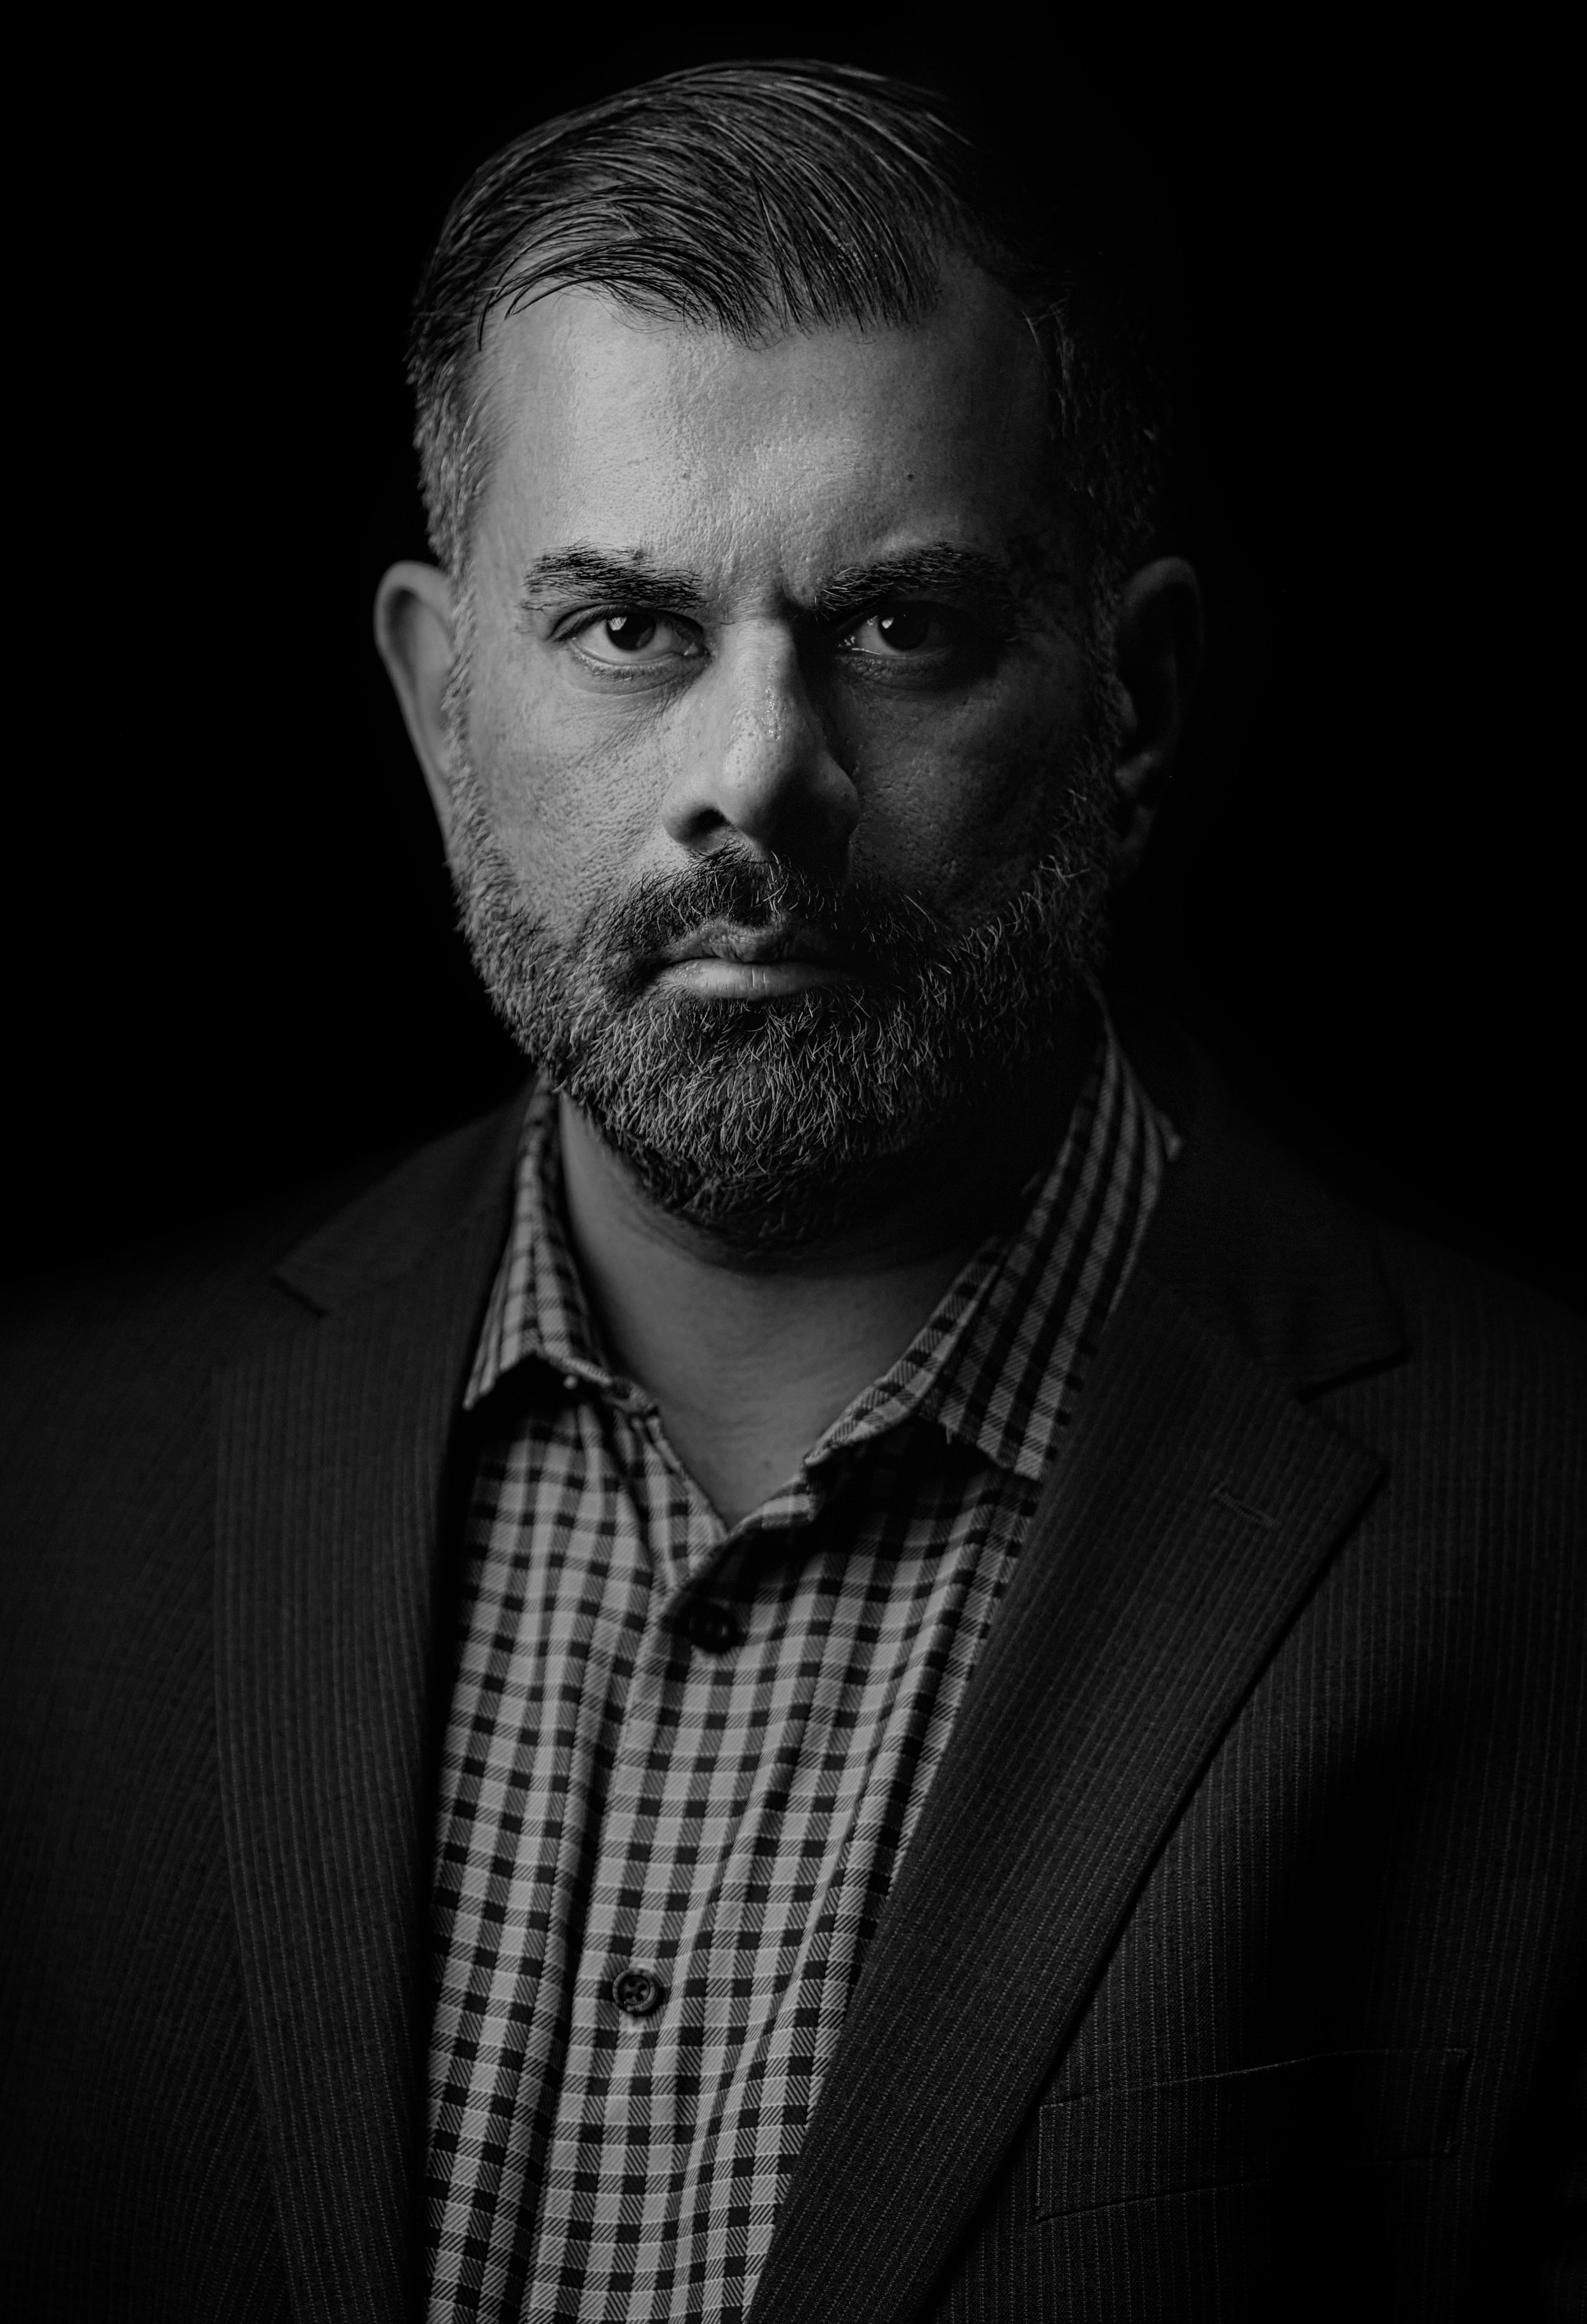
Black and White Edit, Adobe Photoshop