

SmallRig RC220D Continuous Light Review: Great Performance with a Design Flaw
As a portrait and headshot photographer, I've been using the SmallRig RC220D as my main continuous key light, and overall, it performs exceptionally well. The light provides powerful, clean daylight output with excellent color accuracy, making it a go-to for professional shoots. I appreciate the Bowens mount, which is compatible with a wide range of light modifiers. It’s an ideal setup for both photography and video work.
As a portrait and headshot photographer, I've been using the SmallRig RC220D as my main continuous key light, and overall, it performs exceptionally well. The light provides powerful, clean daylight output with excellent color accuracy, making it a go-to for professional shoots. I appreciate the Bowens mount, which is compatible with a wide range of light modifiers. It’s an ideal setup for both photography and video work.

Umbrella stem and power cord block one another in the SmallRig RC220D.
However, there is one frustrating issue: the placement of the umbrella mount. While the Bowens mount is well-designed, the umbrella mount is positioned in a way that conflicts with the AC adapter plug. They press against each other, which led to damage in my setup—my power plug failed, and the umbrella itself developed a bow. Although SmallRig replaced the power adapter promptly, the core issue with the mounting design remains unfixed.
Aside from that, the light is extremely bright and efficient, reaching almost 100,000 lux at one meter with the included reflector. It's great for handling any lighting needs, even in more demanding setups. The light stays cool thanks to a quiet fan system that only kicks in when necessary - and it really is quiet - and it’s compact and portable for on-location shoots.
For those looking for a high-performing continuous light with great value with accurate daylight color, the SmallRig RC220D is worth considering—just keep the umbrella mount flaw in mind. You can buy the SmallRig RC220D here.
Key specs for the SmallRig RC220D continuous LED light, ideal for professional photography and videography:
Power Output: 220W
Brightness: 98,700 lux at 1 meter (with included hyper-reflector)
Color Temperature: Daylight balanced at 5600K
Color Accuracy: CRI 95+, TLCI 96+
Dimming Range: 1% to 100% stepless dimming
Beam Angle: 60°
Cooling System: Active, ultra-quiet fan (30dB noise at 1 meter)
Control: App-based via the SmallGoGo app (Bluetooth)
Power Options: AC adapter or optional V-Mount battery
Mount: Standard Bowens mount for compatibility with various modifiers
Studio Lighting for Portrait Photography: Mastering the Single Light
The best way to learn about lighting is to experiment with a single light and learn how to use it effectively.
In this article we will discuss how to study light, reverse engineer lighting setups, and how to vary a single light source to create a wide range of looks.
Photography is all about lighting.
Lighting is an important aspect of portrait photography because it helps to create a mood and bring out the best features of the subject. Different lighting techniques can be used to flatter the subject and create a desired effect.
For example, using soft, diffused light can help to create a warm and inviting atmosphere, while using hard light can create a more dramatic and intense effect. Good lighting can also help to reduce the appearance of blemishes and imperfections, and bring out the natural beauty of the subject.
Additionally, lighting can help to set the tone of the photograph and convey a specific message or emotion.
Natural vs. Studio Light
When we shoot portraits outdoors without the use of flash, we are only able to use available light.
Natural light can be very beautiful and effective, and some forms of natural light are very difficult to recreate in the studio.
However, if we want to have ultimate control over what a portrait communicates, it’s imperative that we master studio lighting.
Start with a Single Light
As a beginner photographer, the best way to learn about lighting is to experiment with a single light and learn how to use it effectively.
In the fashion photography world, using a single light is standard. That’s right - most of the magazine covers you’ve seen use just a single key light.
In this article we will discuss how to study light, reverse engineer lighting setups, and how to vary a single light source to create a wide range of looks.
Study the reflection in the eyes
We can reverse engineer the lighting just by looking at the reflection in the eyes. Let’s learn how to recreate most any lighting setup just by looking at the resulting photo.
The reflection made in the eyes (known as a “catch light”) of the subject gives us a lot of information about what lighting setup was used.
Let’s dive in!

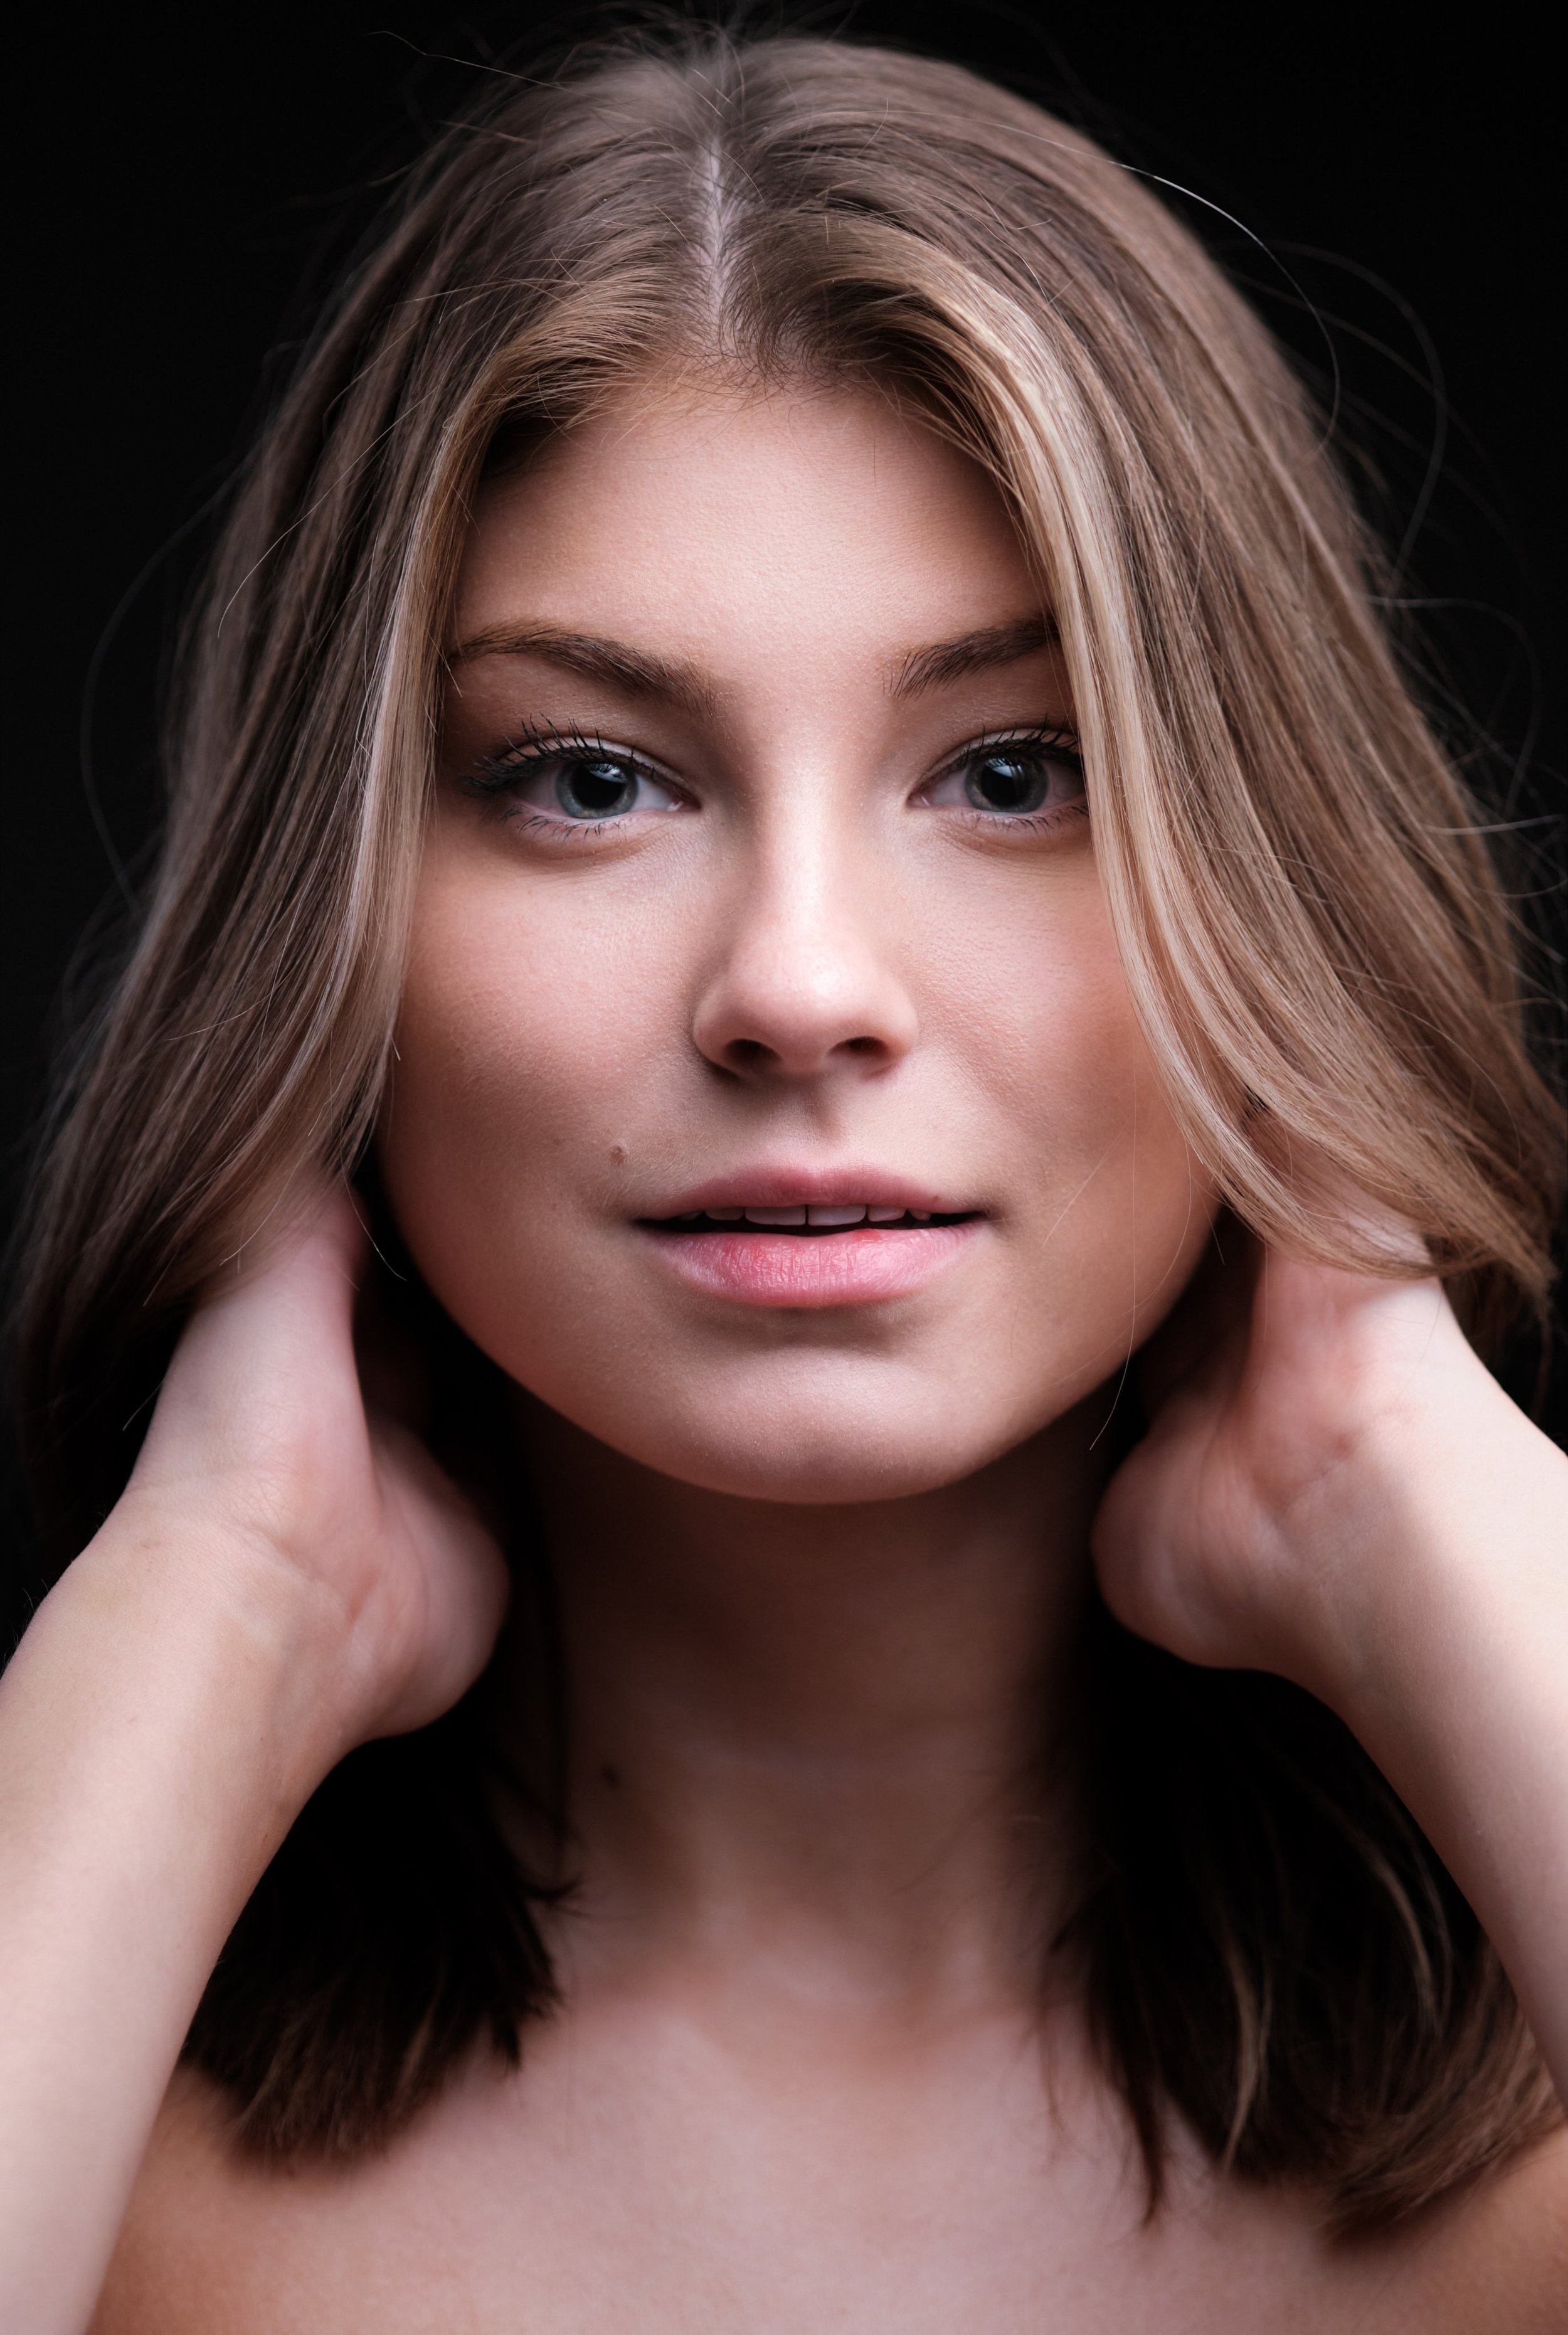
In this first example, we see a relatively large reflection that is slightly off center.
The large size indicates that this is a soft light source, which should produce a very blended fall-off from highlights to shadows.
The centering of the light should yield even lighting across the face, with perhaps a bit more shadow on the left (subject’s right-hand side) - opposite the side of the light source.
Here’s what we get:

Soft Overhead (slightly off-center) Lighting Example - Full Photo. Model: Emma Sweeney
Let’s try another one:

The catch light shows a large light source on the very left of the subject's left eye. What should the full photo look like?

Soft Side Lighting Example - Full Photo. Model: Taylor Natvig
Did you guess correctly?
Study the transition between highlights and shadows to determine whether a hard light or a soft light was used.
In photography and lighting, the terms "soft light" and "hard light" refer to the quality of the light source. Soft light refers to light that is diffused and creates soft, gentle shadows. This type of light is often described as warm and inviting. Hard light, on the other hand, is more direct and creates sharp, well-defined shadows. Hard light is often described as cold and harsh. Harsh lighting may sound unflattering but in certain instances, particularly in fashion and contemporary beauty publications, it can be used to great effect, producing bold, eye-catching images.
Examine the size of the catch light. This shortcut reveals a universal rule of photography. As a light source becomes smaller relative to the subject, the light turns from soft to hard.
There are two ways to achieve a smaller light source: 1. use a smaller light modifier, or 2. move the light away from the subject (in this case you will need to turn up the power to correct for exposure).

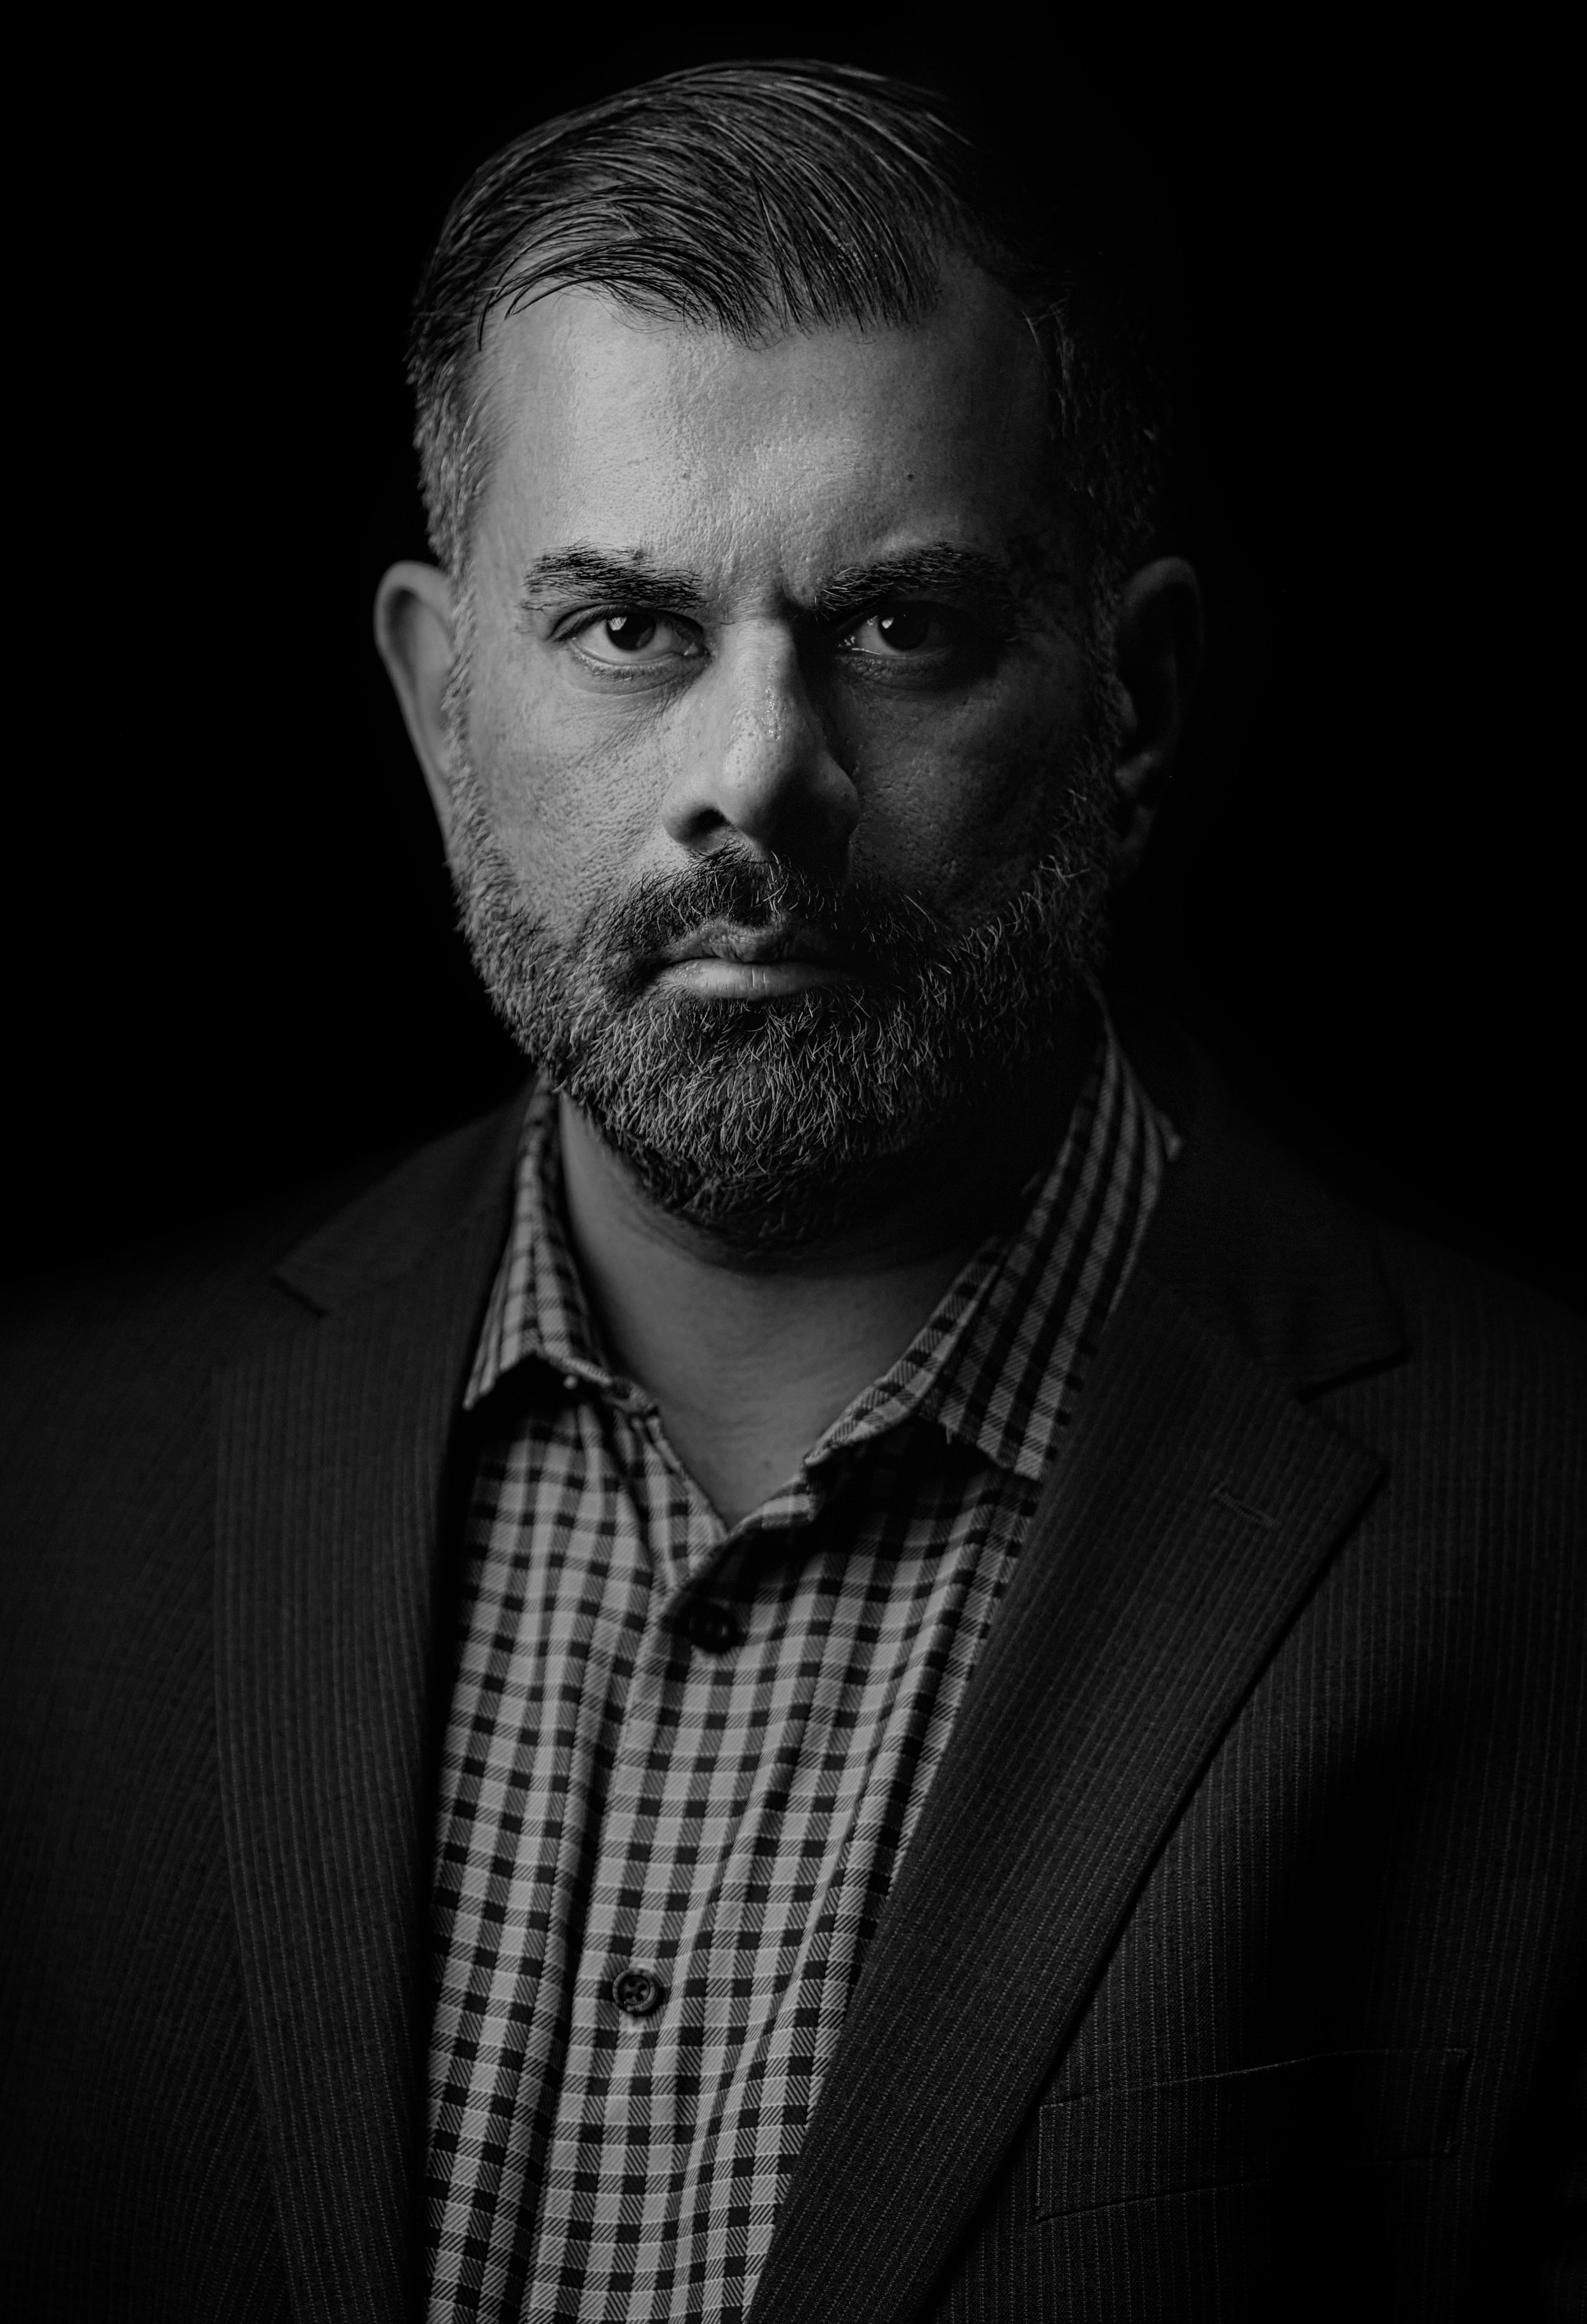
Notice how tiny the white catch light appears in the model’s eye. Without seeing the shadows and highlights in the rest of the photo, we can expect to see defined harsh shadows.
From the placement of the light (in the upper left hand side, but not on the extreme left) we can also predict that the lighting will be “Rembrandt” lighting, resulting in the characteristic “triangle shadow” on the opposite side of the nose.

Hard Lighting Example - Full Photo. Model: Sasha Emiri
Here’s the triangle shaped shadow that invariably results from using a Rembrandt lighting setup where the key light is positioned/angled 45 degrees toward the subject, both from above and on either side.

Rembrandt Lighting Shadow, abrupt transition from highlight to shadow
I’ll leave you with a slightly more advanced single light setup. Can you tell where the light is positioned relative to the subject, just by looking at the reflection of the eyes and the pattern of highlights and shadows?

What type of light source was used? Where was it positioned?
Model: Emma Sweeney
The Gear
The question I’m most often asked is what gear do I use? Although I love cameras, lenses, and lighting equipment as much as the next photographer, it’s important to remember that the gear is not nearly as important as how you make use of it and what you put in front of the lens.
All the photos above were taken with the Fujifilm X-T4 using the Fujinon 90mm f/2 shot wide open, and the light modifier used was a 7 foot Westcott Parabolic Umbrella (with diffusion for the soft light shots) and the Godox AD600 Pro Flash Strobe.

Studio Lighting and Mood
Simple but powerful, small changes in studio lighting can dramatically change the mood of a portrait.

Small changes in studio lighting can dramatically change the mood of a portrait.
I recently had the pleasure of working with author Dr. Tahir Rahman, Associate Professor of Psychiatry at Washington University in St. Louis.
Clamshell Lighting for Commercial Portraiture
Oxford University Press needed an approachable, commercial looking headshot to promote Dr. Rahman’s newest book.
We used a clamshell setup with a soft key light source above the subject’s face (the top part of the “clamshell”), and a broadly curved reflector for the lower part of the shell.
The key light above provides flattering wrap-around light, while the bottom fills in the shadows and smooths out the skin. I often find that adding a hair light opposite the key light adds depth and provides subtle background separation:

Commercial Portrait with Clamshell Lighting (Angler 48 inch BoomBox + Westcott Eyelighter + Gridded Hair Light)
Single Light Dramatic Portrait
By removing the reflector and hair light, we are left with just the key light. Moving the key light to one side of the subject’s face creates a classic Rembrandt lighting setup with deep shadows cast on the other side of the face. Removing a few light modifiers and changing the placement of our key light creates a profoundly different mood:

Single Light Dramatic Portrait (Angler 48 Octobox, feathered)
Post-Production
Lighting is paramount to controlling the mood of a portrait, but we can go one step further with editing and retouching in Photoshop. Black and White conversion, exposure reduction, contrast rebalancing, and detail enhancing all work together to add a sense of mystery and deepen the drama of the portrait:
Black and White Edit, Adobe Photoshop